the areas of impulse response, diaphragm settling time and polar technolo-
gies. Those who have heard Earthworks High Definition Microphones™, say
that they hear more of attack, more subtle details and a more pristine quality
in the sound than with any other microphones, regardless of price.
Miking Drums
There are many ways to mic drums and it seems that most every recording or
live sound engineer has their own way of doing so. Our objective is not to in-
dicate which drum miking approach is better, but to make suggestions and look
at advantages and disadvantages of each. Every engineer or producer uses their
own methods to obtain the results they desire, and that’s what matters.
Multi-microphone Method
The objective in multi-microphone drum miking is to place a separate mi-
crophone on either most or all the elements of a drum set. Typically, sepa-
rate mics are used on snare, toms, high-hat and kick drum with one or two
overhead microphones. The overhead mics pick up the overall sound of the
drums including cymbals, which are typically not miked separately. With
this method, the mixing engineer can control the level, and signal process-
ing (limiting, EQ, etc.) for each element of the drum set (toms, snare, hi-hat,
etc.). This provides a great deal of control over the sound of the entire drum
set and allows bringing out certain patterns on sock cymbal, snare, etc. Multi-
miked drums may be desirable when you are recording in a large room with
high ambient sound as it will reduce the amount of unwanted room sound.
Multi-miking is also a popular practice for miking drums in “live sound” ap-
plications such as concerts, as it will provide more gain before feedback in
addition to greater control of the drum mix.
No Phase Cancellation Issues
with Earthworks
™
Microphones
One of the typical disadvantages in the multi-microphone approach, when
using conventional microphones, is the interactive microphone phasing prob-
lems that result in the cancellation of certain frequencies. These phasing
problems are a result of the poor polar response of conventional microphones.
Conventional microphones have a drastically different frequency response
between the front and sides of the microphone. It is common for conventional
microphones to have a loss of 10 to 20 dB at high frequencies on the sides of
the microphone. This is why you cannot place three singers on a conventional
microphone, the one in front of the mic sounds great, but the two on the sides
have a dramatic loss of quality. These drastic changes in high frequency
response on the sides of the microphone cause phase differences, and these
6
9
The various types of metal drum rims may have the bottom flange of the
rim either closer to the shell or further from the shell. Depending upon the
type of metal drum rim, one of the previously described three positions will
allow the RimMount bracket to be mounted parallel to the drum shell. The
soft protective Polyolefin® coating on the RimMount bracket will prevent
the possibility of scratching the drum shell finish. Position the rim-guide so
the bottom edge “flange” of the drum rim fits comfortably into one of the
rim-guide grooves. This will insure that the cushioned rim-guide remains se-
curely in place as you tighten the thumbscrew to firmly secure the RimMount
to the drum rim.
Adjusting the Microphone Height
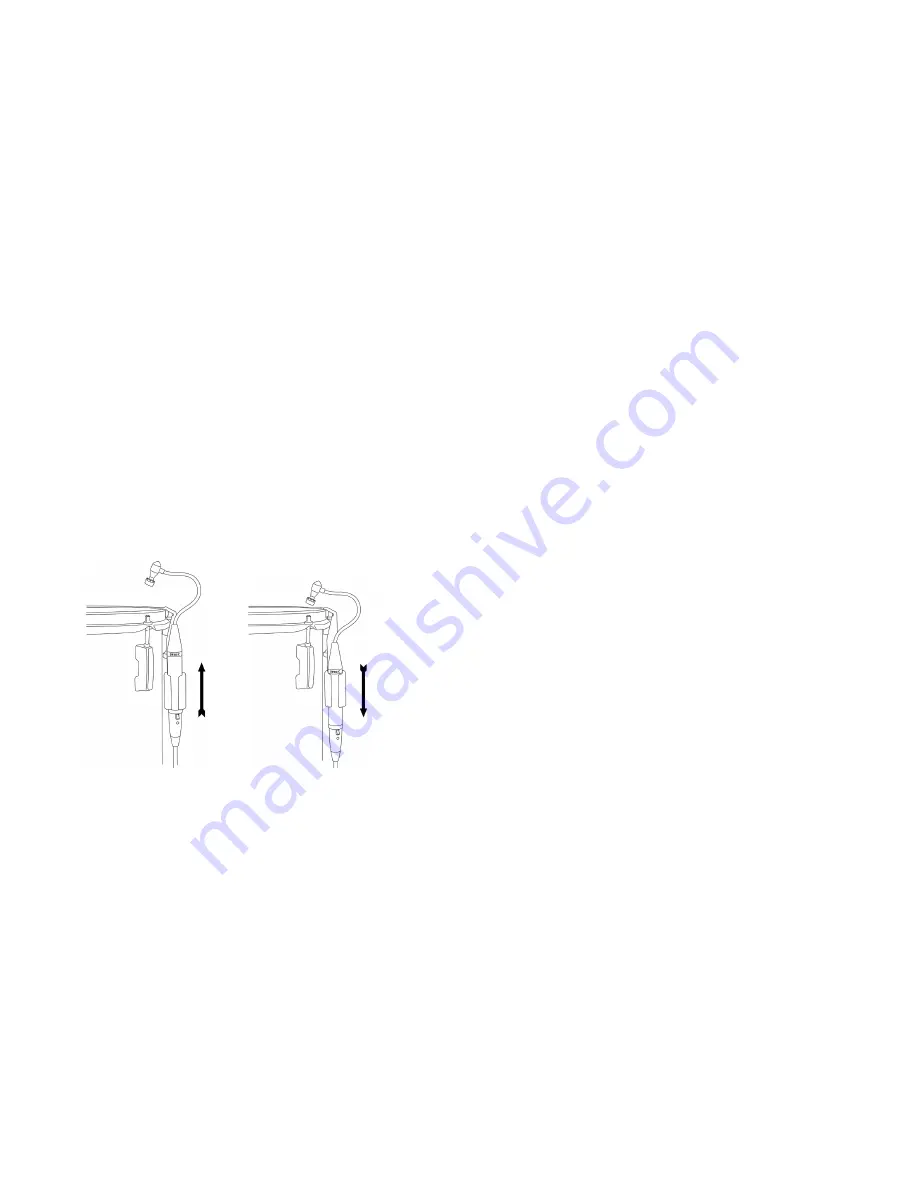
Once the RimMount is mounted securely on the drum rim with the DP30/C
microphone housed in the rubber holder, the microphone body can be moved
either up or down in the rubber holder to adjust the desired height. Then the
mini-gooseneck will provide a good amount of latitude in positioning the
microphone head from any pre-set microphone body height. Adjusting the
height of the DP30/C microphone body is shown in Figure 5-A and 5-B.
Figure 5-A and 5-B Adjusting DP30/C Microphone Height
Positioning the Microphone Head
Once the DP30/C microphone height has been set, then the microphone head
can be positioned where you desire. However, you should never place the
microphone head “parallel” to the drumhead. The microphone head should
always be at “an angle” to the drumhead. This will prevent any possibility of
the diaphragm being forced to the microphone backplate which could cause
an unwanted pop or thump in the sound or recording system.
A.
B.
Summary of Contents for CMK1 MicKit
Page 2: ......


