Page 6
WARNING: BEFORE OPERATING YOUR LOG SPLITTER, PLEASE FULLY READ AND
UNDERSTAND ALL SAFETY, MAINTENANCE, AND ASSEMBLY INSTRUCTIONS OUTLINED IN
THIS MANUAL. BECOME FAMILIAR WITH IT FOR YOUR OWN SAFETY. FAILURE TO DO SO MAY
CAUSE SERIOUS INJURY AND/OR DEATH. DO NOT ALLOW ANYONE TO OPERATE YOUR LOG
SPLITTER WHO HAS NOT READ THIS MANUAL. READ EACH STEP COMPLETELY BEFORE
PROCEEDING.
Tools Needed: (2) 9/16” Wrenches, (2) 1/2” Wrenches, (2) 3/4” Wrenches, (1) Flat Screwdriver,
(1) pair of Pliers, (1) 10” Adjustable Wrench, (1) Pipe Wrench and (1) Rubber Mallet
ASSEMBLY INSTRUCTIONS
NOTE: The following instructions pertain to both log splitter models, the 22-ton (W2265) and the
27-ton (W2808). Parts listings are included for both.
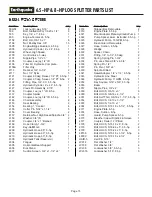
NOTE: Each log splitter was partially assembled at the factory. Refer to the drawing and parts list
should it become necessary to disassemble the unit for repair or replacement of parts.
NOTE: All threaded hose connections need to be taped with Teflon tape supplied in the parts bag
before connecting hoses.
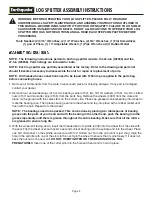
1. Remove all components from the crate. Inspect each piece for shipping damage. If any part is damaged,
contact your dealer.
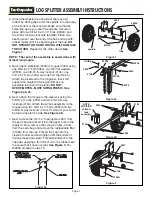
2. Remove four conical bearings (4154), two bearing seals (4153), two 3/4” ID washers (4159), two 3/4” slotted
nuts (4157) and two cotter pins (4155) from the parts bag. Remove the wheels (4099) from the crate and
place on the ground with the valve stem on the bottom side. Place one greased conical bearing into wheel to
mate the bearing race. Then place bearing seal onto the wheel and tap into place with a rubber mallet until
flush with the hub. Repeat for other wheel.
NOTE: The bearings need to be packed. This can be done by placing two tablespoons of bearing
grease into the palm of your hand and with the bearing in the other hand, push the bearing into the
grease repeatedly until there is grease throughout the entire bearing. Make sure that all the rollers
are greased to ensure long life.
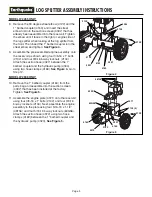
3. With the wheel still facing down, insert the threaded end of spindle (4339) into the wheel from the side with
the seal. Flip the wheel over and insert a second conical bearing onto the spindle and into the wheel. Place
one 3/4” ID washer on the spindle and secure with 3/4” slotted nut. Turn the nut until it is just snug. Align the
hole in the spindle with one of the slots in the nut. Spin the wheel to ensure that it spins freely. If it does not,
back the nut out to the next slot.
DO NOT OVERTIGHTEN OR THE BEARINGS WILL FAIL
PREMATURELY.
Insert one of the cotter pins into the hole and bend end to hold in place.
LOG SPLITTER ASSEMBLY INSTRUCTIONS


