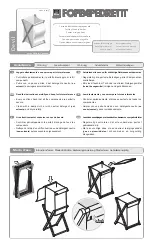
Instruction Leaflet for the Carpet Shampooer
Making The Carpet Shampooer Ready for Use
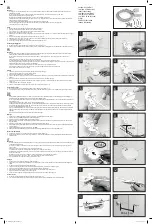
•
Make sure the collar at the bottom of the handle section is loose,
see fig 1A.
•
Fully extend the handle (to engage the trigger). Securely tighten the
collar to lock the handle in position and operate the trigger,
see fig 1B
.
You should feel a spring loaded action. This spring operates the
release valve. Your shampooer is now ready for use.
•
NOTE
: If the collar is not securely tightened the handle may move
causing the trigger to disengage.
Preparing the carpet
•
Vacuum the carpet to remove surface debris before applying the foam
shampoo.
•
It is advisable to test the carpet for color fastness prior to use. To do
this, mix a little of the foam shampoo liquid to the specified dilution,
apply to a clean cloth and then clean a small area of carpet, ideally one
which is normally hidden from view.
Shampooing
•
Mix the foam shampoo liquid to the specified dilution. We recommend
the use of Ewbank Carpet Shampoo pt no 021000 for best results.
Remove the filler plug, pour in the solution and then replace the filler
plug,
see fig 2
.
•
Pulling the trigger will release the solution onto the foam roller. Use the
trigger sparingly and
DO NOT OVER WET
the carpet,
see fig 3
.
•
Clean the carpet using short overlapping strokes.
•
After use, allow the carpet to dry thoroughly then vacuum to remove the
deposits lifted by the foam shampoo.
Cleaning the Carpet Shampooer
•
After use, pour out any unused solution and clean by rinsing out the
tank with a small amount clean water. Pull the trigger a number of times
to run the clean water through the system. Clean the head by rinsing
the roller and brushes under running water. The shampooer must be
thoroughly clean and dry before storing.
•
If necessary you can remove the roller and brush head assembly for
cleaning. Do this by inserting a screw driver between the main
moulding and brush rocker arm and gently lifting out,
see fig 4
•
For directions to reassemble the roller and brush head assembly,
see fig 5
.