


If there is no operations in one minute, the display will
exit the setting page.
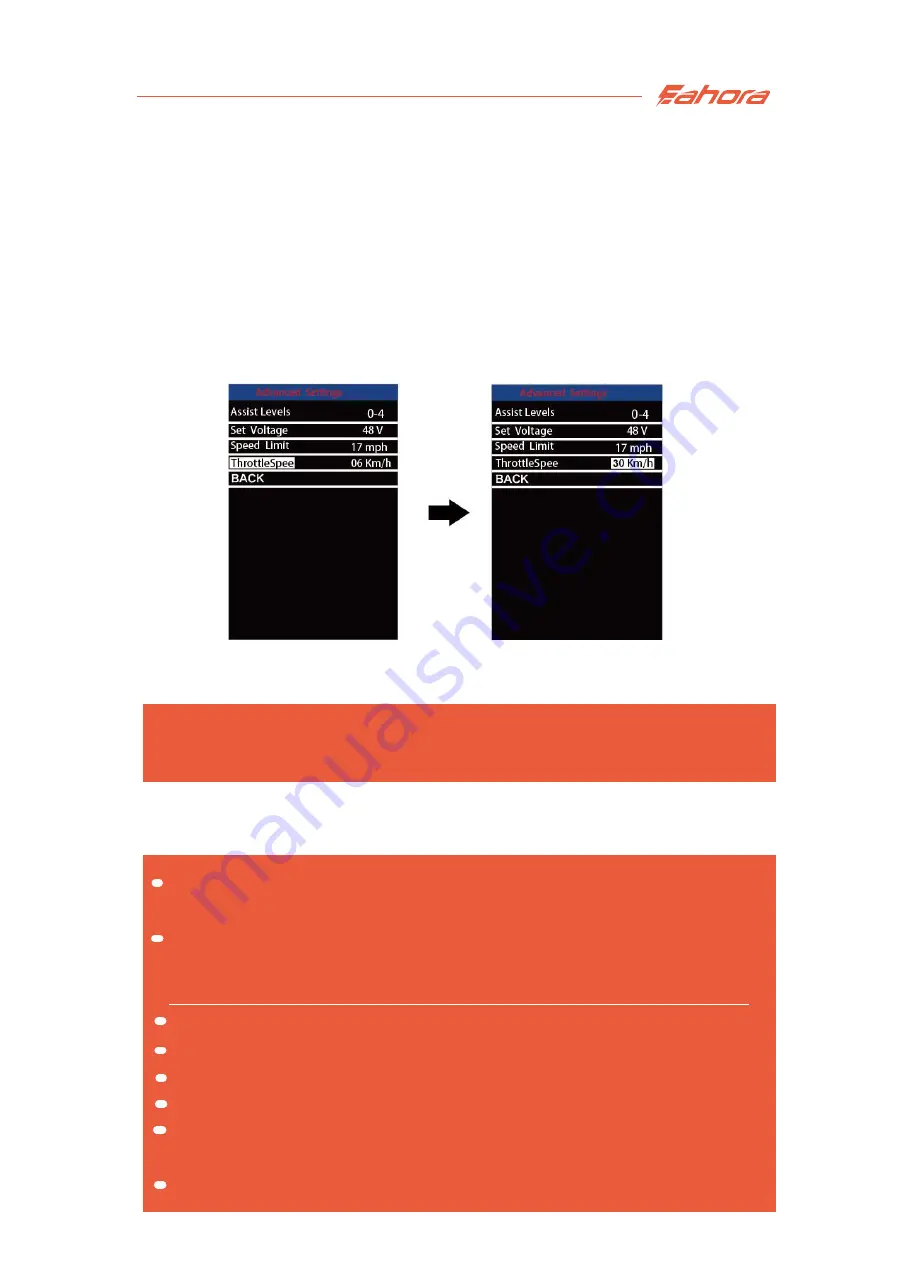
Throttle Speed Limitation Setting
Throttle Speed Limitation Setting
Quality Assurance and Warranty Scope
Throttle speed refers to the max speed limit setting of the throttle.
There are four options: 6/25/30/99.9 (km/h). The default speed limit
of the throttle is 6km/h which means the speed isn't able to surpass
6km/h when using the throttle.
Press the +/- button to switch the value.
Press the "i" button to save the
modified setting.
A limited warranty is valid for product quality faults under
normal use.
The warranty of the display is valid for 24 months since it is
shipped
.
The following conditions are not covered by the warranty
:
The housing of the display is opened
The connectors are destroyed
The housing is scratched or damaged after it is shipped.
The external wire of the display is scratched or damaged
.
Fault or damage caused by force majeure or natural disaster
.
(such as fire, earthquake,lightning strike, etc.)
The product is beyond warranty period.
Summary of Contents for KD986
Page 1: ...KD986 manual for owner ...