background image


FHD Oceans 


English USER MANUAL                            


- 35 -


———————————   

System Setting   


————————— 

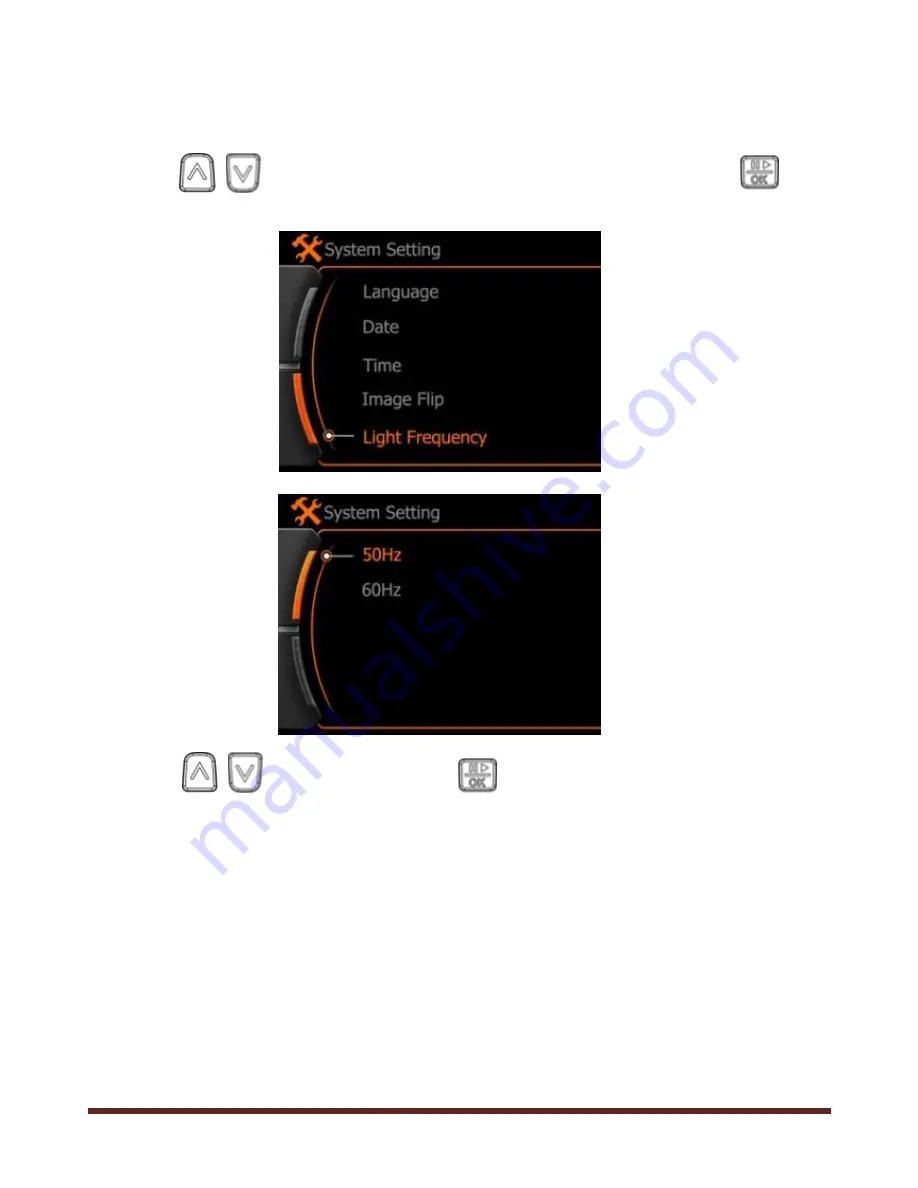
5. Light Frequency setting 

Press                  to select sub-menu <Light Frequency> and press         to  
enter.


Press                 to select and press        to confirm your selection.  


50Hz: For rating 50Hz area 

60Hz: For rating 60Hz area 


The  anti-flicker  frequency  can  be  changed  when  taking  photos  or  videos  in 
fluorescent light to correspond with the frequency of the mains supply. 60Hz is 
used in USA. 50Hz is used in Europe. 


Summary of Contents for Sport Ocean HD

Page 1: ...nglish USER MANUAL 0 FULL HD 1080P SPORT VIDEO CAMERA USER MANUAL Please read this user manual carefully and thoroughly before any attempt Install and operate this product and retain it for your futur...

Page 2: ...AYBACK VIDEO CLIPS 14 9 PLAYBACK PHOTOS 15 10 HDMI TV PLAYBACK 16 11 CONNECT WITH PC VIA USB 17 POWER CHARGER 18 1 INSTALL OF BATTERY 18 2 CHARGING THE BATTERY 18 3 BATTERY CHARGING TIME OPERATING TIM...

Page 3: ...TING 33 4 IMAGE FLIP SETTING 34 5 LIGHT FREQUENCY SETTING 35 6 AUTO POWER OFF SETTING 36 7 AUTO SCREEN OFF SETTING 37 8 VOLUME SETTING 38 9 FORMATTING SETTING 39 10 CHECK SD INFORMATION 40 11 RESET 41...

Page 4: ...e limits for a Class B digital device pursuant to Part 15 of the FCC rules These limits are designed to provide reasonable protection against harmful interference in a residential installation CE This...

Page 5: ...not repair disassemble or remodel the DV Incorrect repairing may cause electric shock and data loss saved in the product and void your warranty Do not use the product in a place where use of electron...

Page 6: ...peration for recording and taking a picture Optional recording resolution Full HD 1920 x 1080p 30FPS 1440 x 1080p 30 FPS HD 1280 x 720p 30 FPS WVGA 848 x 480 60 FPS Optional picture resolution 4000 x...

Page 7: ...FHD Oceans English USER MANUAL 6 Installation and use 1 Main Unit...

Page 8: ...2 Remote control Start recording Stop recording 1 When DV is power off push Record button to REC location and then Press on remote control DV will be power on and start to record video 2 Press to sto...

Page 9: ...and use 3 Install battery Please install battery according to below diagram thoroughly Incorrect installation the tag face is above Correct installation the tag face is below Push locking tab as shown...

Page 10: ...9 Installation and use 4 Install SD SDHC Card 1 Installation of SD SDHC card Please install SD SDHC card according to below diagram thoroughly Incorrect installation the tag face is above Correct inst...

Page 11: ...y B The DV built in Micro SD card reader supports Micro SD and SDHC cards up to 32GB Note Some SD or SDHC cards may not work properly SD SDHC cards made by Sandisk are strongly recommended 3 Checking...

Page 12: ...s English USER MANUAL 11 Installation and use 5 Install bracket Fixing the common gear wheel to the DV house Mounting the gear wheel with Handlebar grip Helmet grip or Goggle Mount Some illustration f...

Page 13: ...nstallation and use 6 Adjust lens azimuth Rotate the lens 90 90 degree by different mounting desired Rotate the lens 90 degree anticlockwise NOTICE The rotated range is from 90 to 90 rotate fiercely o...

Page 14: ...record location to prepare for recording press REC button of the remote controller to record and then press STOP button to stop and save the video clip GPS icon indication Received GPS signal The GPS...

Page 15: ...ter main menu select video playback icon and then press button to enter and the photo thumbnails will display on the screen as 2x3 matrix Press to select and then press button twice to play the clip s...

Page 16: ...button to enter main menu select photo playback icon And then press button to enter and the photo thumbnails will display on the screen as 2x3 matrix Press button to select and then press button to p...

Page 17: ...ess to enter And the file thumbnails will display on the screen as 2x3 matrix Press to select and press to playback the selection press to toggle backward forward selection X2 X4 X8 X1 default On paus...

Page 18: ...provided USB cable for downloading or uploading files and updating firmware Connect the DV with Computer by the USB cable Power on the DV The screen of the DV will display USB connected Attention Use...

Page 19: ...en the battery door by sliding the latch up Latch is tight You may need to use a coin Insert battery and rotate locking tab as shown Close and latch battery door fully before use 2 Charging the batter...

Page 20: ...he maker strongly recommends using a supplied AC DC adaptor but if it is necessary that another AC DC adaptor is purchased separately at a shop please check its electric specification is in accordance...

Page 21: ...possible Do not leave unit plugged in for extended periods Excessive power charging will reduce the battery working life and possibly damage the unit The battery will gradually loose charge when not...

Page 22: ...FHD Oceans English USER MANUAL 21 Main menu icon introduce 1 LOGO 2 Instruction...

Page 23: ...3 Main Menu Video playback ICON Photo playback ICON When move the cursor to the video folder icon If here has video clips in the folder On the top left corner of the icon will display the quantity of...

Page 24: ...rd to capture a clip video and again to stop and save Motion Detect The DV automatically take the motion videos as a monitor Time REC User can take most 5 clip videos according to the setting time Aut...

Page 25: ...ill start detecting motion and will take a clip if the living video of preview is changing The first default clip is 60 seconds another 30 seconds will be increased with another trigger after the vide...

Page 26: ...election the digits press to change the digits for each of the data or time options you desire to update and then press to add a new case 2011 Year 03 Month 28 Date 18 Hour 08 Minutes 25 Reconding tim...

Page 27: ...to enter Press to select sub menu and then press to confirm Off Disable 10 Seconds to start capturing after auto startup 10 seconds 20 Seconds to start capturing after auto startup 20 seconds 1 Second...

Page 28: ...select Loop Setting and press to enter Off None separateness DV will take one whole clip video if no other operation until the memory card is full Minutes The DV will take one clip video per minutes i...

Page 29: ...s to select Video Size and Press to enter Press to select and then press to confirm your selection Sub menu Solution Frame Per Second Length breadth ratio 1920x1080 Full HD 1080p 30fps 16 9 1440x1080...

Page 30: ...tion AV The content of videos will be taken include Audio Video Video The content of videos will be taken include Video only 8 Time Stamp setting Press to select Time Stamp and press to enter Press to...

Page 31: ...FHD Oceans English USER MANUAL 30 Video Setting 8 Photo Size setting Press to select Photo Size and press to enter Press to select and then press to confirm your selection...

Page 32: ...31 System Setting Lone press to enter main menu and press to select System Setting and then press to enter 1 Language setting Press to select sub menu Language and press to enter Press to select and p...

Page 33: ...to select sub menu Date and press to enter Press to toggle selection the digits press to change the digits for each of the year month or data options you desire to update and then press to confirm and...

Page 34: ...ress to select sub menu Time and press to enter Press to toggle selection the digits press to change the digits for each of the year month or data options you desire to update and then press to confir...

Page 35: ...ish USER MANUAL 34 System Setting 4 Image Flip setting Press to select sub menu Image Flip and press to enter Press to select and press to confirm your selection Regular Normal status Flip For special...

Page 36: ...cy and press to enter Press to select and press to confirm your selection 50Hz For rating 50Hz area 60Hz For rating 60Hz area The anti flicker frequency can be changed when taking photos or videos in...

Page 37: ...ff and press to enter Press to select and press to confirm your selection Off Disable 5Minutes Power off automatically after 5 minutes if without any operation 10Minutes Power off automatically after...

Page 38: ...setting Press to select sub menu Auto Screen Off and press to enter Press to select and press to confirm your selection Off Disable 1Minutes LCD off automatically after 1 minute if without operation 5...

Page 39: ...glish USER MANUAL 38 System Setting 8 Volume setting Press to select sub menu Volume setting and press to enter Press to select and press to confirm your selection 0 Disable 1 6 Volume level from lowe...

Page 40: ...to select sub menu Formatting setting and press to enter Press to select and press to confirm your selection No No operation and return Yes Format the memory card The data won t restore once you form...

Page 41: ...FHD Oceans English USER MANUAL 40 System Setting 10 Check SD Information Press to select sub menu SD Info and press to enter Free The free size of the memory card Used The used size of the memory card...

Page 42: ...nglish USER MANUAL 41 System Setting 11 Reset Press to select sub menu Reset and press to enter Press to select and press to confirm your selection No No operation and return Yes Reset the setting aft...

Page 43: ...e From official or agent website Download and release the firmware first if the received file is compression as picture below Released Copy the released firmware under the root director of a memory ca...

Page 44: ...ystem Setting Press to select sub menu Update and press to enter Press to select Start and then press to start updating The LCD screen will display Firmware Update and LCD screen off when finish updat...

Page 45: ...FHD Oceans English USER MANUAL 44 System Setting 13 Check Version Press to select sub menu Version and press to enter The screen will display the version number DV DV mode V2011022502 Firmware version...

Page 46: ...V LCD Selectable Audio MIC Built in Output Ch 1Ch Speaker Mono PC Interface Mini USB USB 2 0 High Speed Power Video Battery 3 7 V 1300 mAH Li ion Polymer AC DC Adaptor DC 5V 500mA Size Dimensions 116x...

Page 47: ...ps FHD 1440x1080 30fps HD 1280x720 30fps 848x480 60fps Photo Capturing Resolution 4000x3000 12M 3200 x 2400 8M 2592 x 1944 5M Audio Rec Video Audio Rec YES Playback Slide Show NO Image Thumbnail View...

Page 48: ...FHD Oceans English USER MANUAL 47 Charger specification 1 Charger 2 Option of plug BS EU SAA USA...

Page 49: ...FHD Oceans English USER MANUAL 48 Accessories introduce Fittings Manual Manual CD Universal Clip Handlebar Grip Helmet Grip Goggle Mount Battery USB Cable HDMI Head Strap Power Charger Velcro Set...

Page 50: ...FHD Oceans English USER MANUAL 49 We will not inform you if there is any modification for user maual in future...

Reviews: