


Transmission Gear Selector
The vehicle is equiped with a transmission
gear selector switch mounted on the dash-
board. The switch has three positions ("R",
"N","F").
"R" = Reverse
"N" = Neutral
"F" = Forward
The selector
must be placed on "N" to
start the engine. Once the engine is started,
engine the brake lever and move the slector
switch to the desired direction of travel.
Always be sure the vehicle has come to
a complete stop and the brake lever is fully
engaged before turning the selector switch.
Always pause in the "N" neutral positon
for a few seconds when shifting from forward
to revers or from revers to forward, this
allows the transmission time to disengage
and resycronize.
CONTROL FEATURE
CONTROL FEATURE
Always check your engine oil level with the
engine off and cold. Removing the dip stick
with the engine running could cause hot
oil to splash from the crankcase causing
severe burns.
Checking your engine oil while the engine
is hot can give you a false reading; always
check the oil level with a cold engine.
Your engine requires SAE 15W/40 engine
oil and the crankcase capacity is 0.9 Liters
/ 0.9 quart.
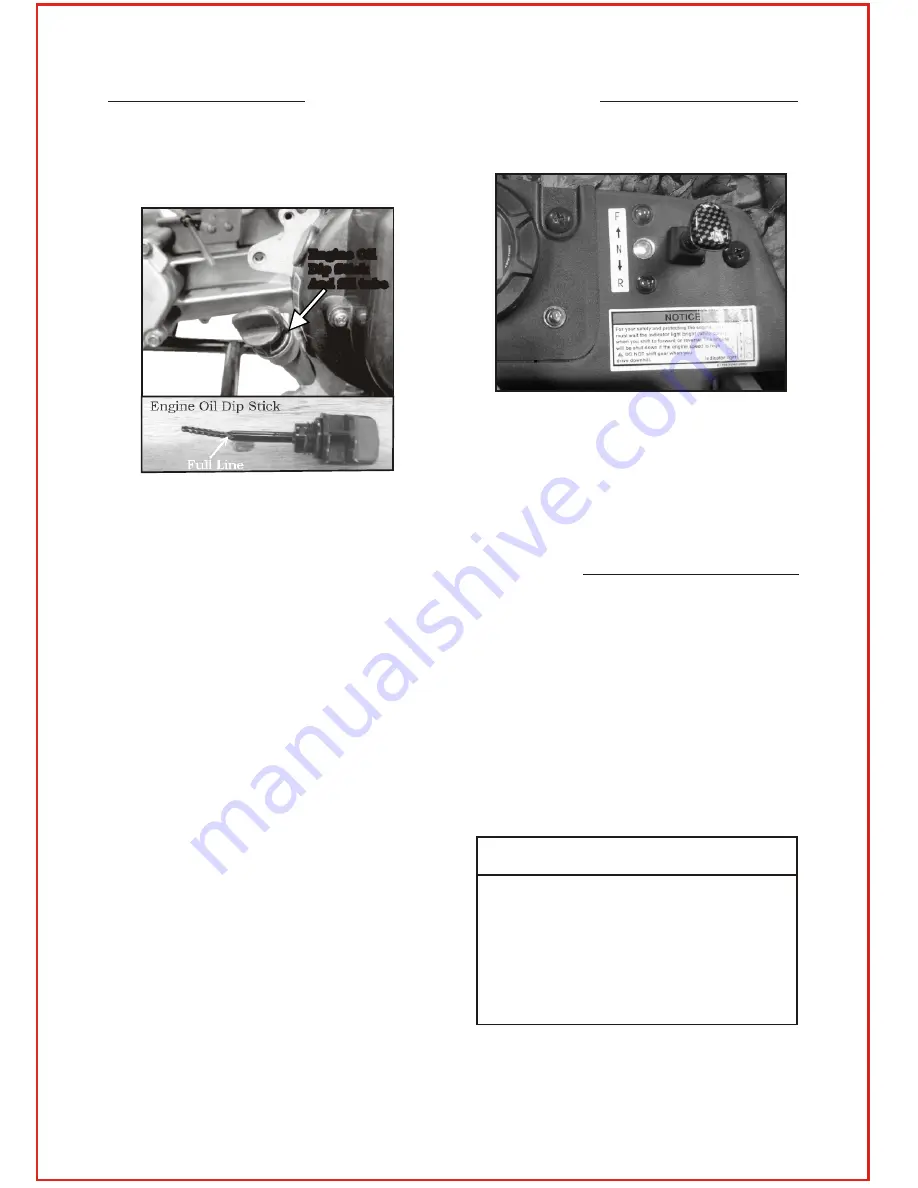
Engine Oil
Checking Engine Oil Level
This vehicle uses automotive type engine
oil to lubricate the engine. The engine oil
dip stick is located on the right-hand side
of your engine.
To check your oil level, remove the dip stick
by turning the thumb hold counter clockwise
until the stick has been completely disengaged
from the threads. Pull the dip stick out of
the crank case and check the level of the
oil as Indicated on the dip stick. The engine
oil is full when the oil reaches the level on
the stick as Indicated in the photo above.
The engine oil should be changed before
the start of each riding season or every 300
hours of operation. When riding where
conditions are dusty or humidity is high the
engine oil should be change more frequently.
Page 13
Engine Oil
Dip Stick
And fill tube
For your safety and protecting the engine,
you must wait the indicator light bright
(white color) when you shift to forward or
reverse. The engine will be shut down if
the engine speed is high.
DO NOT SHIFT GEAR when you drive
downhill.
NOTE!
Copyright ©2008-2009 ETON America, all rights reserved.


