background image

Version 1.0

with a safety limit of subscriptions. Failure to follow these instructions may lead to serious personal injury.
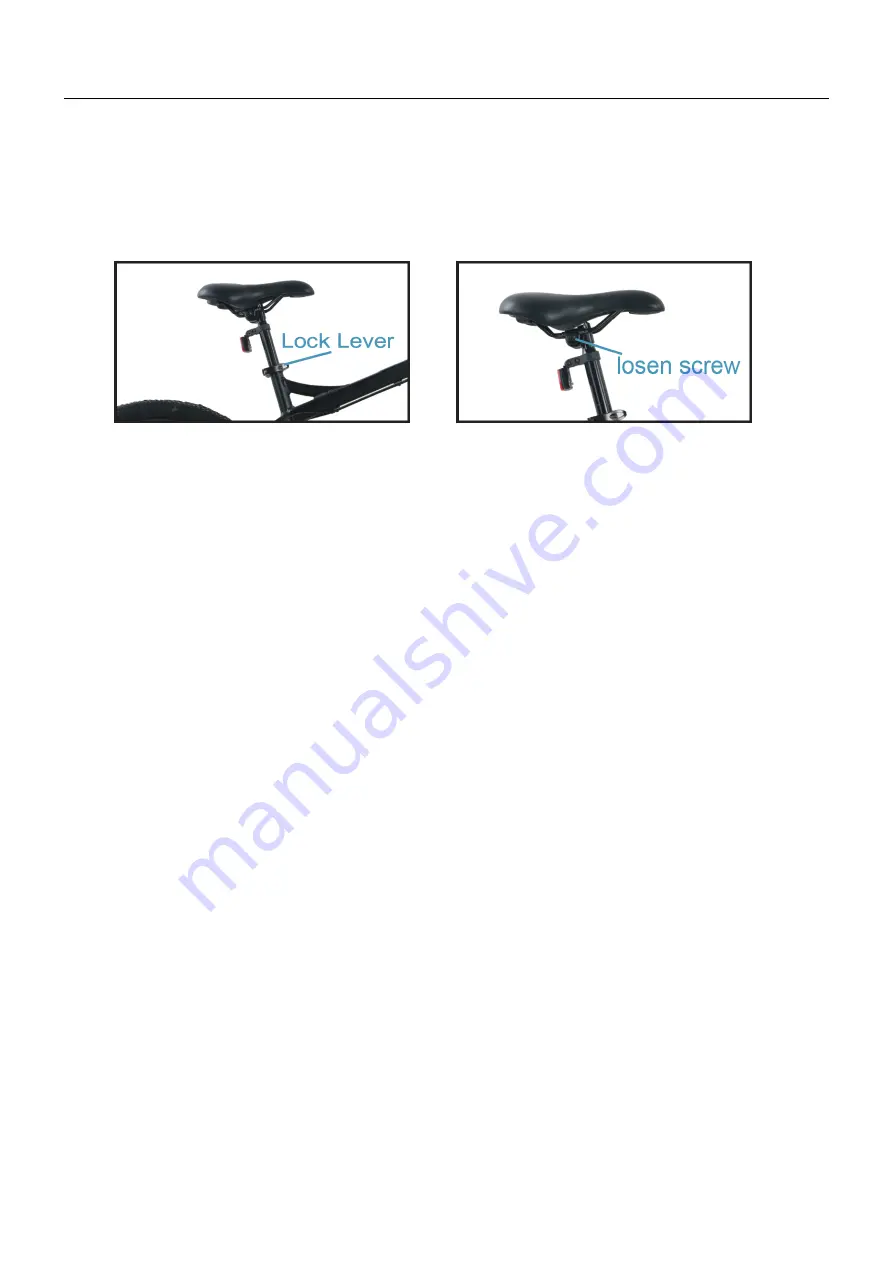
1. Open the stem I saddle lock lever.
2. Adjust the stem /saddle to the desired height. Do not exceed the safety limit indication.
3. Attach the lock lever and make sure that it remains firmly in place.
When you sit on top of the saddle, your heels should just touch the pedal when itis in its lowest position.
When cycling correctly, your knee should be slightly hooked and pedal will in the lowest position. You can also
adjust the angle of the saddle, loosen the screw below the saddle, then placing the position, and tighten the
screw back in place at the end.

5. General Terms of Use

5.1 IMPORTANT! AIways before riding a bicycle:

Check that the stem and handlebars are tightened securely.

Check that all bolts, nuts and fasteners are properly tightened. Pay special attention to the engine
mounts, the foot, the front fork and handlebar mounts.

Check that the brakes and brake levers are working properly.

You check that all reflectors and lights are in place and operate properly.

Make sure that the battery is fully charged. Check the battery charge level of the control unit LED display.

5.2 Throttle

If the throttle lever is mounted on the handlebar, avoid dangerous, unplanned acceleration by keeping your
hand away from the throttle you specify whenever you are not using it. To ensure safe use, turn off the bike
battery ignition key and the control unit of the On/Off button after each use.

5.3 During the riding

When ready to ride, and use the throttle grip, the bike shot up from ahead! Do not switch on the bike
before you are prepared to ride.

When you release the throttle or brake, power supply to the motor immediately.

When you start moving, or you ascend the hill, pedaling as much as possible to save the battery.
Pedaling as much as possible yourself, you can also extend the life of the battery and engine life.

When going downhill do not turn off the power wheel. This can lead to the engine control unit and
damage. If the battery runs out while you are riding, you can pedal it as anormal bike and please go
charge the battery as quickly as possible.

Tum off the ignition and remove the key whenever you stop moving.

Please make sure that you turn off the power first for preventing unintended acceleration.

Taking care of the wheel to extend the working life of wheeling.

5.4 Battery and Charger

Do not touch the battery terminals when the battery is charging. And do not let the battery terminals come
with metal or other conductive objects.

6

Summary of Contents for PERFORMANCE-NOVABIKE HPNB2201

Page 1: ...Version 1 0 User Manual PERFORMANCE NOVABIKE HPNB2201 Contents 1 Warranty conditions 3 2 Safety Instructions 4 2 1 Electrical Safety 4 3 Features 6 3 1 Electrical System 6 4 Parts of the E bike 7 1 ...

Page 2: ...ed warranty Warranty Period In accordance with the terms of the guarantee electrical bike For consumers 12 months warranty For companies and institutions 6 months warranty Starting from the date of delivery from the manufacturer Electrical bike warranty service on a centralized basis through its own service centers News for more information and instructions for easy warranty service connection can...

Page 3: ...wheel can result in fire electrical shock or personal injury Do not expose the wheel electrical equipment to moisture water or other liquids However if electrical appliances are exposed to water disconnect the charger from the wall outlet immediately and deliver damaged parts service center for resellers for review Do not expose the battery to fire and keep it away from it away Risk of explosion U...

Page 4: ...ou can compile and check the wheel itself Make sure in particular that the pedals saddle brakes handlebars and any part of a self installing is properly installed NOTE Never ride your bicycle while under the influence of alcohol Drinking alcohol impair the ability to react significantly limits your ability to use the wheel safely Even a small amount of alcohol limit your ability to operate safely ...

Page 5: ... to 38 47km 4 Parts of the E bike 4 1 Parts 1 Frame 2 Changeable battery 3 Seat lock lever 4 Brake lever 5 Tyres 6 Control unit 7 48V 500W motor 8 Pedal 9 Headlight 4 2 The saddle and handlebar stem You may want to adjust the stem and saddle height to the desired height Please note that the handlebar stem and saddle however must not be raised more than the tubes marked 5 ...

Page 6: ...ol unit LED display 5 2 Throttle If the throttle lever is mounted on the handlebar avoid dangerous unplanned acceleration by keeping your hand away from the throttle you specify whenever you are not using it To ensure safe use turn off the bike battery ignition key and the control unit of the On Off button after each use 5 3 During the riding When ready to ride and use the throttle grip the bike s...

Page 7: ... This is completely normal Avoid water or other liquids when charging the battery Do not leave the charger connected to the battery and power source for more than 10 hours Use the battery and AC charger at all times in accordance with the instructions 5 5 Charging the battery You can charge the battery disconnected or when the battery is fixed to the bike First pull out the charging connector cove...

Page 8: ...ction Headlight Button Bell Brake lever Display long press M button open Throttle rotating it and the e bike will forward 6 Maintenance and repairs IMPORTANT Do not attempt to open the battery casing motor or control unit Failure to do so may result in personal injury and void the warranty In case of difficulty please contact us Make sure that the tire surface is tightened Your bike is equipped wi...

Page 9: ...ive View battery charge level and recharge fully if necessary The control unit or the motor must be replaced The cycle goes away by itself Check that the throttle is not jammed lubricate or replace the throttle grip The cycle does not start after stop Check that the brake lever is released completely The charger is connected the signal light does not burn Ensure that the charger is receiving power...

Page 10: ... scissors to cut the cable tie for assembling use In addition there are pedals charger charger cable and tools in the cardboard box 8 2 The front wheel Tear off the front fork packaging and install the front wheel on the front fork Pay attention to the orientation of the front wheel the front wheel disc is on the same side as the front fork disc brake seat and the axles on both sides are installed...

Page 11: ...he quick release and insert the saddle into the seat tube Straighten the angle of the saddle so that it is in line with the main tube of the frame and adjust the height to a suitable height be careful not to exceed the handlebar safety line and lock the quick release handle 8 5 The pedals Take out the pedals pay attention to the left and right pedals and the specifics are displayed according to th...

Page 12: ...ked Check whether the battery is locked Do not move the key push the battery to the right to see if it can be moved 8 7 The front light Take the screw out and pass the screw through the center hole of the front light corresponding to the front fork gantry paying attention to the gasket on the screw head Take 4 hex key fix the front screw and lock the screw pay attention to the position of the fron...

Reviews: