background image

-26-

-27-

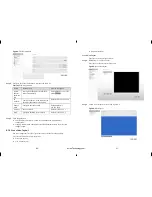
Items 

Name 

Content 

display the 

layout list, alarm list and alarm information

Play live video button. 

Close live video button. 

Mark tag button, you can mark the tag during the live 

video, it will helps to track the video fragment in recording 

playback.   

Click this button will call

, we 

can select which one want to display according to the 

requirement. 

PTZ menu button, click will call the PTZ control 

menu. 

Live 

video 

Display the live video, and configure the sensor settings. 
If you need to change the streams manually, we can right 

click the menu, it will list out all the streams which is 

available for current device. After we selected one of them, 

it will also display the stream information at the bottom 

side. 


Full screen automatically 

Click 

  button, it will be available to choose whether enable the full screen 

function, also the time delay for full screen showing. When this function is enabled, if 

we didn’t do any actions during the delay time period, then it will go t

o the full screen 

mode immediately. When it is in full screen mode, after you moved the mice to the 

bottom line it will give out the tool bar, click the icon 

  in tool bar we can exit the 

full screen mode. Then you click 

  can go to the full screen mode manually again. 

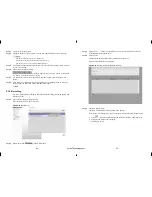
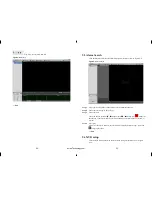
PTZ control 

Click 

  button, call the PTZ control menu, as Figure 5-2 showing. In this interface 

you can adjust pan, zoom, preset, trajectory, scanning, infrared light, north, timer 

settings etc. 

Figure 5-2


PTZ Control menu 


PTZ Control menu only can be cooperate with IPS Dome and Ext PTZ platform. 

Click 

  button to close the PTZ configuration menu. 

Click 

  button to exit the PTZ control menu. 

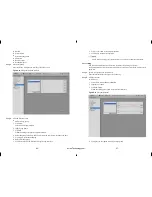
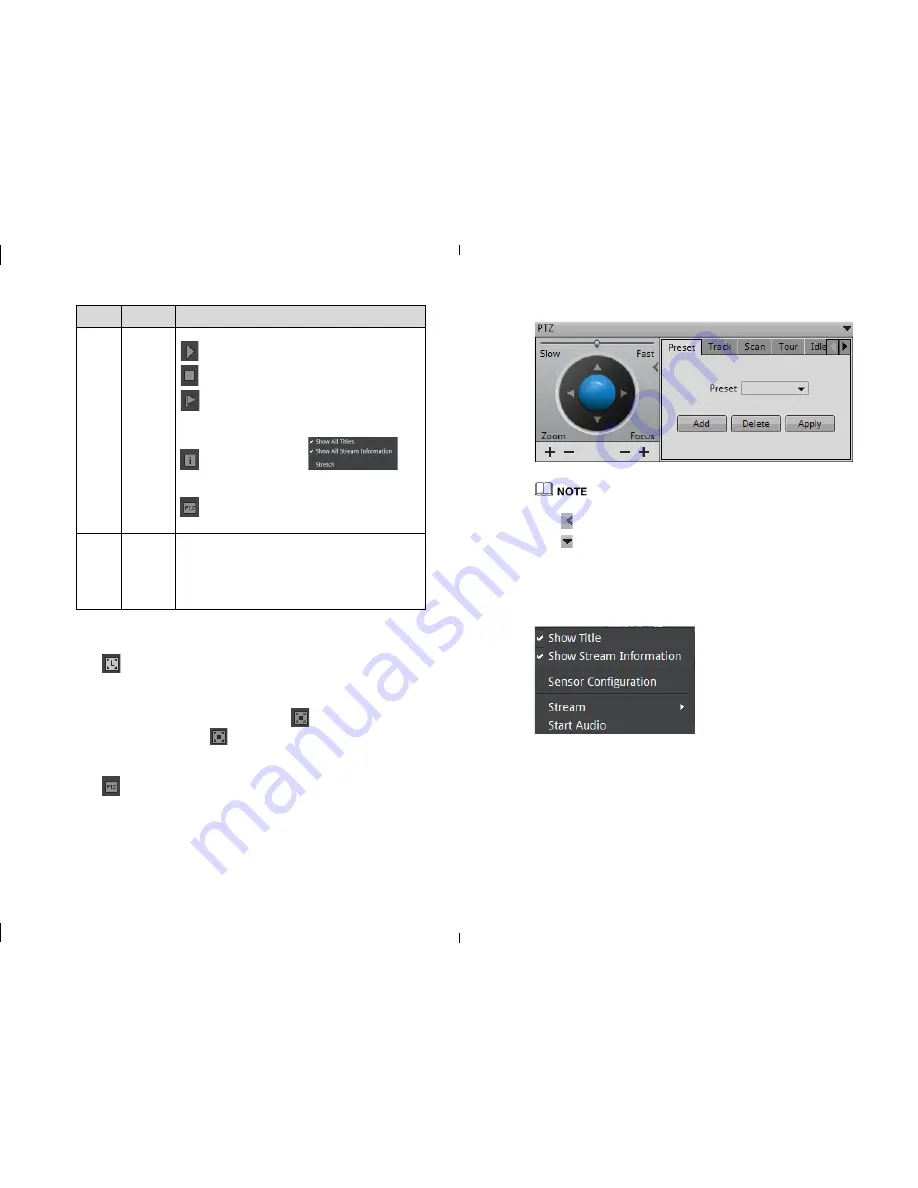
Live video fast operation 

Right lick mice to call Figure 5-3 

interface, call the menu “Showing title, Showing 

stream info, Enable audio, Stream switch, Sensor configuration etc.” 


Figure 5-3


Live video monitor menu 


eLineTechnology.com

Summary of Contents for Network Video Recorders

Page 1: ...NVR Software Guide for setup and configuration Product Made in China under ISO9001 ISO1400 standards Manual Printed in China v1 0 NETWORK VIDEO RECORDER Plug In Auto Detect Rercord 01 BSM 15 0009501...

Page 2: ...main text Special Notices When using video surveillance products comply with applicable statutory and regulatory requirement to enable and maintain legal surveillance device It is illegal for company...

Page 3: ...current market we recommend using SEAGATE and WESTERN Digital with high stability and high performance price ratio Never open the device cover and dissemble the device by nonprofessional person otherw...

Page 4: ...sunlight and keep away from heat and high temperature environment Make sure connects NVR with other equipment s normally Install the Hard Disk when use NVR first time NVR can automatically identify th...

Page 5: ...ustrial grade microprocessor intelligent heating and cooling Humidity 20 to 80 Power consumption With two 2T hard drive to increase 18W low power design the motherboard s maximum power consumption of...

Page 6: ...icator lamp does not flash please plug in the power cable Enable the power switch NVR start running If the front panel power indicator lamp flashing Red light please put the switch at front panel to s...

Page 7: ...ording your displayer For display using VGA set to 1024 768 or VGA 1280 1024 When using HDMI input we advise to use HDMI 1080P Adjustment Steps Step 1 Click Change on login interface and find the adju...

Page 8: ...ated camera network must be connected with the NVR LAN2 and ensure that the LAN2 camera network functions are enabled factory default enabled detailed configuration see Network Video Recorder User Man...

Page 9: ...port 1 enter http 192 168 0 120 Web access please confirm that the network is properly connected and the network is unobstructed and you use the correct IP address The system must have the flash playe...

Page 10: ...Area 2 NVR network configuration NVR default factory IP address network 1 192 168 0 120 network 2 192 168 1 120 The basic network configuration can configure the IP address subnet mask default gatewa...

Page 11: ...era When enabled private network cameras NVR will automatically search for the network cameras When the number of network cameras is not more than 12 units NVR automatically add the management list Wh...

Page 12: ...f network cameras status online not online account errors Online equipment you can click Real time video preview Modify the name of the network camera Enter the desired name of the device corresponds...

Page 13: ...hed the streams by the bottom line of the live video window we will see the stream information Live video interface introduction as Figure 5 1 Table 5 1 Live video interface introduction Items Name Co...

Page 14: ...ion also the time delay for full screen showing When this function is enabled if we didn t do any actions during the delay time period then it will go to the full screen mode immediately When it is in...

Page 15: ...video time The playback video will be displayed above the time axis blue marked means retain video red marked means alarm video yellow means label video green means normal video You can input the time...

Page 16: ...ackup file options Backup file large size we can define the maximum size of individual file Create the subdirectories can be specified create the directories based on the network cameras IP or ID Whet...

Page 17: ...m information from left list Means this camera have alarm information Step 3 We can select the alarm type at the Type drop down menu Figure 7 1 Alarm searching interface Step 4 Date selections You can...

Page 18: ...kup button to make backup files 8 Setup Setup includes NVR setup and camera setup NVR setup for NVR configure and camera setup for cameras configure 8 1 NVR setup Click NVR setup in upper right to int...

Page 19: ...like below Step 1 Click the add button to call the camera searching interface like Figure 8 2 Step 2 Add the cameras according to the IP segment or something specific Add IP address 1 Click Add butto...

Page 20: ...information Warning information searching steps Step 1 Select the warning type Disk Alarm Record Alarm All Step 2 Input searching Begin Time and End Time Step 3 Click searching button then the searchi...

Page 21: ...nfigure the DNS server address Default is 192 168 0 1 Step 3 Click to application Call the Apply successfully click OK to finish the network parameters configuration If pop up other windows then pleas...

Page 22: ...can t be none then please input the layout name End 8 1 6 Recording You can configure the Recording by Schedule Alarm recording recording quality and Recording Policy Step 1 Choose Setup Record Record...

Page 23: ...bit rates Step 11 Click Apply to save the configurations and exit the record policy interface End 8 1 7 Storage policy In storage policy interface you can do the following operates Check the current H...

Page 24: ...te Privileges Group interface 2 Click yes to return to the original interface 3 Click Apply to finish the operation System default privilege group is Administrators which cannot be deleted and modifie...

Page 25: ...R They way how to configure the device from NVR and from WEB is same Please reference the network cameras IE Web browser interface Guide 9 Web Browser Access NVR NVR Web Server built in Flash technolo...

Page 26: ...will be show as Figure 9 3 Figure 9 3 Number of users exceed NVR Web only support 6 channel Live video and 1 channel playback for one user login maximum ability other users only support 1 channel Liv...

Page 27: ...he camera that need to playback Click the camera of list means device was chosen means device was not chosen Step 3 Select date Check the date on calendar change month change year Means the date chose...

Page 28: ...Choose the alarm type by the bar Type Step 3 Choose the date Check the date on calendar change month change year Means the date chosen If the date with Red color means this day exist Alarm video reco...

Page 29: ...tting and operation please refer to Web operationmanu 10 NVMS Access NVR Operation condition You have installed NVMS already The NVMS client installation method please see video network management sys...

Page 30: ...n Camera Count and Disk Count Only Device Name can be edit other parameters can t be edit When device update the device info will auto update as well and will keep same step with the software version...

Page 31: ...VR time Set manually to change time Click button to call the date ActiveX Set the date Input the time after the date End 10 4 4 Device Management Add Delete the IP cameras to NVR through the Device ma...

Page 32: ...device manager NVR management Record Record Policy enter the record policy interface show in Figure 10 8 Figure 10 8 record policy Step 2 Select the device and click Configure After promote the Recor...

Page 33: ...the file system Step 8 Click DiskFormat to format the disk It will ask you all the information which has been saved in Disk will be cleared if yes then it will start to format End 10 4 6 NVR Monitor...

Page 34: ...rol the time simplification and narrow The maximum playback channel is 16 Query the start stop time not more than 7 days split screen display will be selected in accordance with the device for automat...

Reviews: