background image

RLanglois 10.26.16 


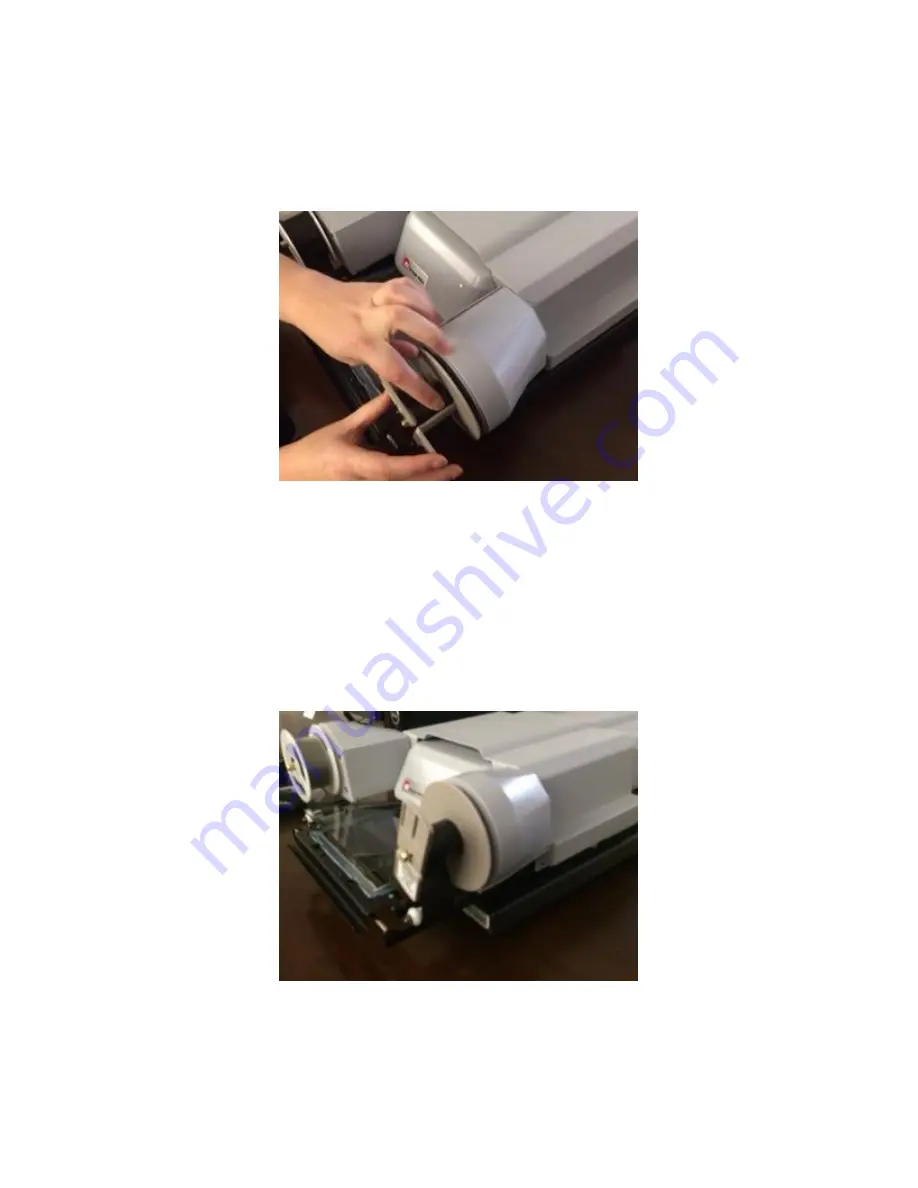
Turn the take-up reel to the right, making sure to turn the reel several 
times so that the end of the film is secured—remember that you 
have several feet of blank film to wind if necessary. 


Step 8 

To finish, slowly push the glass plane back in so that it automatically 
lowers. Center the now sandwiched film over the square of light 
beneath the pane. If you have done this correctly, you should now 
see the silhouette of your film (which will be blank at this point) on 
the screen in front of you.


Summary of Contents for ScanPro 3000

Page 1: ...RLanglois 10 26 16 1 ScanPro 3000 High Definition Microfilm Scanner Help Guide...

Page 2: ...r Loading the Film Now you are ready to load your film If you look down at the bottom right hand corner you should see a diagram like the one below that shows you how to load the film onto the machine...

Page 3: ...open area before you lift to avoid bumping the glass Step 2 If you look at your spool of film you will see a notch in the center that matches the shape of the metal peg on the left hand side of the m...

Page 4: ...wrap it under the left most roller and then over the next roller before pulling the film even with the glass pane Step 4 Next pull the end of the film to the right dragging it over top of the lower g...

Page 5: ...ft most roller and then under the next Step 6 Pull the film up and to the left of the take up reel the empty spool and insert the end into the gap in the spool The best way to do this is from the side...

Page 6: ...have several feet of blank film to wind if necessary Step 8 To finish slowly push the glass plane back in so that it automatically lowers Center the now sandwiched film over the square of light benea...

Page 7: ...e the Motorized Roll Film Control Motorized Roll Film Control The film controls can be found in the bottom right hand corner These are the controls that allow you to rewind and fast forward the film a...

Page 8: ...enter and film movement stops Note OFF is the recommended setting ON When the mouse button is released the slider will not return to the center and film movement will not stop 8 Auto Frame Checkbox Wh...

Page 9: ...or printed There are drag points at the midpoints of all sides and at all four corners of the Crop Box The Crop Box can be resized by left clicking and dragging at these points If you right click whil...

Page 10: ...ois 10 26 16 10 A left or right click and drag operation pulling these corners back to the outside will restore the rectangular shape Corners that have been moved inward by a right click and drag oper...

Page 11: ...Box Unfreeze the image to allow movement Zoom Click and hold to make the image larger Zoom has three controls Down Arrow Reduces the size of the displayed image Up Arrow Increases the size of the disp...

Page 12: ...Magnifier Window 2 Click the Down Arrow to display a list of magnification values you can use in the Magnifier Window When the Magnifier Window is open the Magnifier Box defined by a blue dashed recta...

Page 13: ...RLanglois 10 26 16 13 The upper right corner of the magnifier window has three standard controls 1 Minimize 2 Maximize restore 3 Close 1 2 3...

Page 14: ...anglois 10 26 16 14 Help Crop Box Control Zoom Magnifier Film Type Spot EDIT Film Orientation Mirror Scan Mode Brightness Contrast Printer 1 Scan to Drive 1 Scan to Drive 2 Manual Straighten Auto Adju...

Reviews: