PROGRAMMING
4-9
November 1998
Part No. 001-7600-001
Parameter
Description
Light
Enables or disables the display and key backlight. This programming can be overridden by the power-on menu
(see Section 3.3.4) or LITE key (see Section 3.3.9). The “Auto” configuration allows it to be controlled by pin 1
of the DB9 connector on the optional accessory cable. The on condition is selected by 0 volts (low) and off by 12
volts (high).
RF Power
Selection
This can be programmed for one of the following configurations:
MR CH Individual - The power output selected by the HIGH, LOW1, LOW2 keys (see preceding description)
is only temporary. Power returns to the level programmed for the channel when the channel is changed or
transceiver power is cycled.
Override - The power output selected by above power keys overrides the channel programming. The selected
level is permanent on the channel (changing the channel or cycling power does not change the selected power
level). Pressing the key again on the channel reselects the preprogrammed level.
MR-CH
Bank/Free
Free - Select if banks are not used. One block of up to 32 channels is programmed.
Bank - Select if channels are to be programmed as two banks with up to 16 channels each. The BANK option
switch must be programmed to select the banks (see Section 3.3.7).
Opening
Text
If text is entered, it is displayed and a tone sounds for 2 seconds when power is turned on. If no text is pro-
grammed, no tone sounds and no message is displayed. The characters and other information described for
“TEXT” in Table 4-1 also applies to this text.
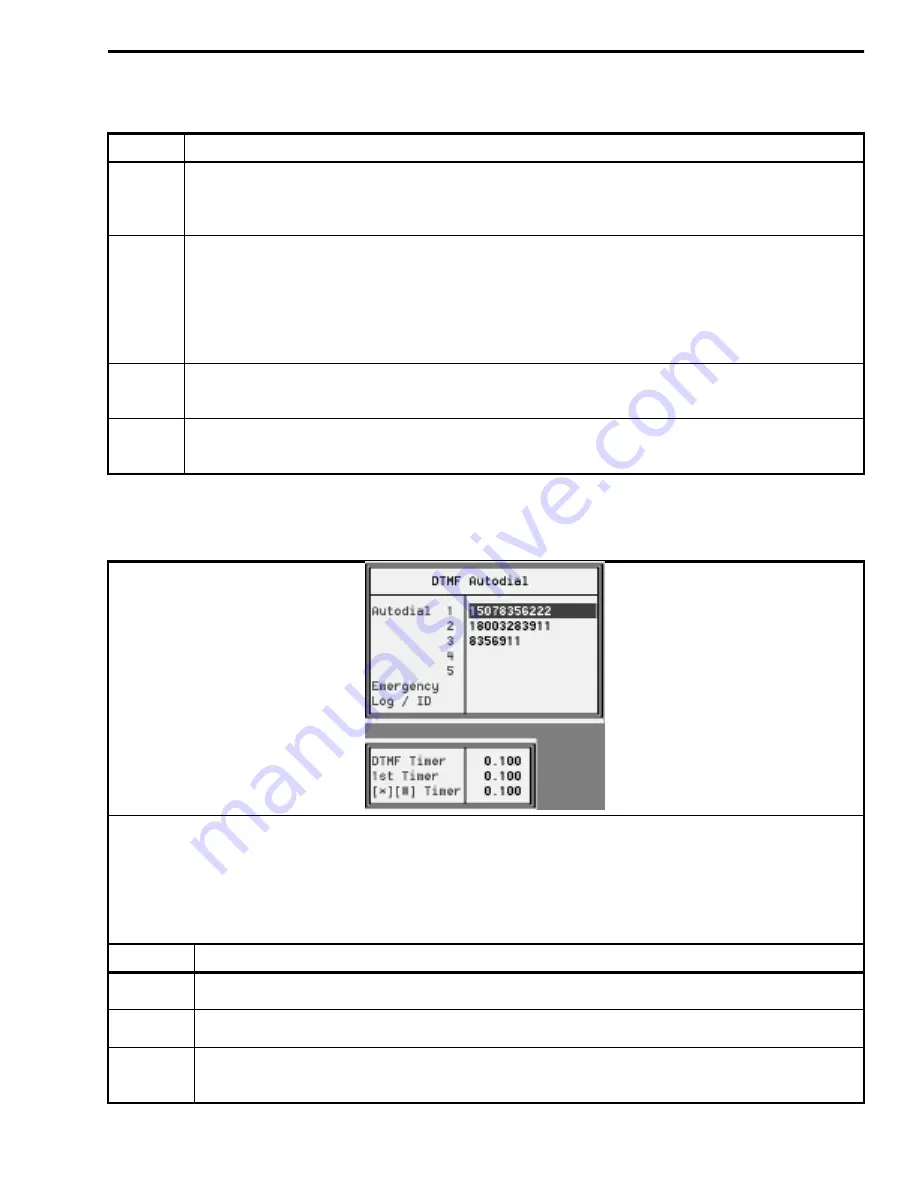
Table 4-3 DTMF Autodial Screen Description
This screen is used to program the DTMF autodial codes that can be transmitted by pressing the DTMF key (see Table
4-2). Each location can contain up to 16 characters. Allowable characters are 0-9, A-D, *, and #. Press the INS key to toggle
between the insert and overwrite modes. To clear a location, press the spacebar and then (Enter). Press ALT or ESC to cancel
the entered codes before input. The code on the “Emergency” line is transmitted when the Emergency key is pressed (see
Table 4-2). Likewise, the code on the “Log/ID” line is transmitted when the Log/ID channel parameter is enabled (see Table
4-1) and when the time-out timer expires (see Table 4-7). With PMR models, “4” and “5” are displayed in place of “Emer-
gency” and “Log/ID”.
Parameter
Description
DTMF
Timer
Sets the time interval in seconds for each code emission and interval.
1st Timer
Sets the tone period in seconds for the first DTMF code. This period is affected by the scanning period and
power saver function delays of receiving transceivers.
[*] [#] Timer Sets the tone period in seconds for the * character (same as “E”) and # (same as “F”). These codes can be used
for control codes on some systems. NOTE: When these special codes are used for the first code, the “1st
Timer” has priority over this setting.
Table 4-2 Key and Display Assign Screen Description (Continued)
Summary of Contents for 761X
Page 9: ...GENERAL INFORMATION 1 4 November 1998 Part No 001 7600 001 This page intentionally left blank ...
Page 11: ...GENERAL INFORMATION 1 6 November 1998 Part No 001 7600 001 NOTES ...
Page 43: ...PROGRAMMING 4 18 November 1998 Part No 001 7600 001 This page intentionally left blank ...
Page 87: ...UHF 7640 EXPLODED VIEW 7 22 November 1998 Part No 001 7600 001 FOLDOUT VHF Exploded View ...
Page 90: ...8 3 November 1998 Part No 001 7600 001 VHF 7610 MAIN BOARD BOTTOM VIEW FOLDOUT ...
Page 91: ...8 4 November 1998 Part No 001 7600 001 VHF 7610 MAIN BOARD TOP VIEW ...
Page 94: ...8 7 November 1998 Part No 001 7600 001 UHF 7640 MAIN BOARD BOTTOM VIEW FOLDOUT ...


