


DS491LT5-1 User Manual
25
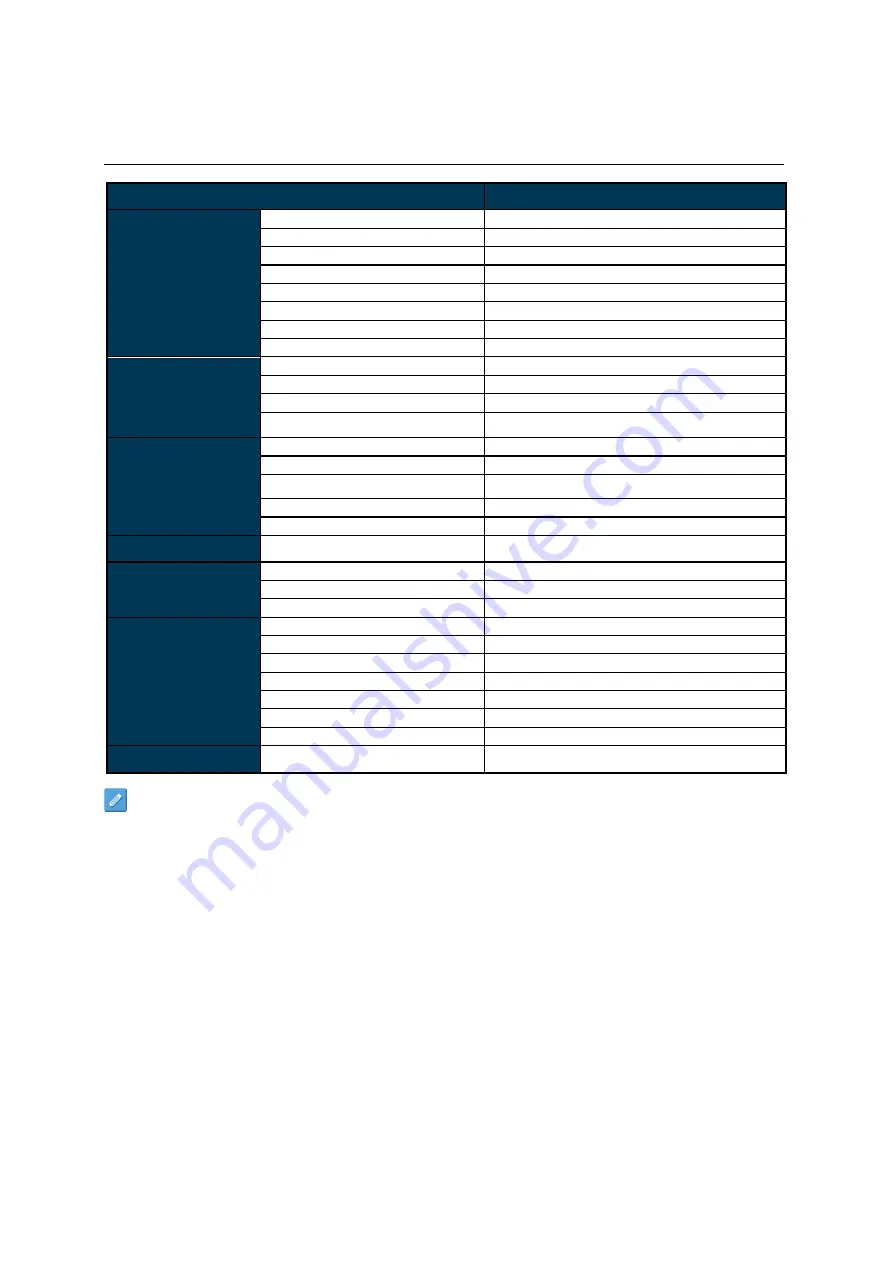
Specifications
MODEL
DS491LT5-1
PANEL
LCD Panel Size
48.5 inches
Native Resolution
1920 x 1080
Brightness
4,000 cd/m² (Typ.)
Contrast Ratio
3,000:1
Response Time
8 ms (Typ.)
Viewing Angle
178°/ 178°
Life Time
100,000 hrs (Typ.)
Panel Surface
AR, 2H
POWER
Power Supply
Internal
Rated Voltage
100 - 240V, 50 / 60Hz
Power On Mode
160W (Typ.) / 240W (Max.)
Standby Mode
< 0.5W
MECHANICAL
SPECS
Bezel Width
(T/B/L/R)
8.7/8.7/8.5/8.5 mm
Cabinet Color
Black
Monitor Dimension
(LxHxD)
1096.7 x 627.2 x 82.3 mm
Monitor Weight
(set / package)
20 kg / 26.5 kg
VESA Mounting
(Dimension)
4 Holes (400x400 mm)
USER INTERFACE
OSD Language
English
ENVIRONMENT
Operation Temperature
0°C ~ 45°C
Storage Temperature
-20°C ~ 60°C
Humidity
10%~80% RH Non-Condensing
I/O Ports
HDMI
IN *2
RS-232
IN *1
Audio
OUT *1
USB port
IN *2
RJ-45
IN *1
Micro SD Slot
IN *1
Extension Connector
(Mini USB)
IN *1 (ESK only)
Fuse
5A
Design and specifications are subject to change without notice.


