7
Calibration
The digital types of Block Heaters can easily be calibrated to show any blocks/vials and
tubes’ temperature in the displayed LED. Due to the differences in the mass of the various
aluminum blocks, environmental air temperature, thermal radiation, and many other factors,
the Block Heater may need to be re-calibrated when switching different blocks and when the
environmental changed. The DB-3-200-01 has been calibrated based on 16 mm Blocks.
DB-3-200-01 can be calibrated using one to five points. The calibration steps are described
in the followings:
1. Prepare the thermistor, or thermometer temperature measurement devices. You can
calibrate the block or even the temperature of the solution in the vials/tubes. Make sure
the thermistor or sensor well contacted with the blocks or vials/tubes solution.
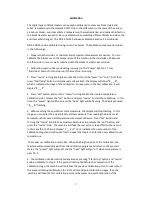
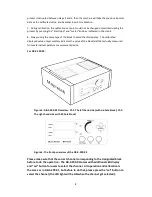
2. Calibration could not be made during running (i.e. the “Power” light on). Press
“Start/stop” button first to stop run if the machine is running.
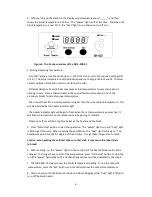
3. Press “mains” turning knob (please note that it should be “press” not “turn”) first, then
press “Start/stop” button, simultaneously release both, the display will show “
C _ _ X
”,
which X indicates the stage of the calibration. For example, in the first calibration, it will
display “
C _ _ 1
”.
4. Press “set” button, and turn the “mains” turning knob to the desired temperature
calibration point, release the “set” button, and press “mains” to start the calibration. In this
time, the “power” light will be on, and the “heat” light will be flashing. The display showed
“
C _ _ X
” flashing.
5. When reaching the equilibrium set temperature, the display will stop flashing. In this
stage, you can enter the actual block or vial temperature from reading the block or vial
temperature from external temperature measurement device: Press “set” button and
turning the “mains” knob to the actual temperature value, release the “set” button, and
press the “mains” knob. The machine will take the real value to take effect in the next run.
In this case the CL-201 will display “C _ _ X+1” (X + 1 indicates the next number of the
calibration stage) and continue to flash: Repeat the step 4 to enter the next calibration set
temperature.
The maximum calibration point is five. When finishing five point of the calibration, the
machine will automatically exit from the calibration program and return to the pre-start
status: the “power” light will go off and the “heat” light will go “on” when temperature is
over 50 ˚C.
6. The calibration can be interrupted anytime by pressing “Start/stop” button and “mains”
knob as indicated in step 3: If the process interrupted before the completion of the
calibration stage, the machine will only take the previous calibration point. For example, if
the process interrupted between the first and second point calibration stages, then the
machine will take the first calibration point and becomes one-point calibration; If the


