6
To save the changes made to the camera's settings, input
ID and PW of the camera for authentication.
7
If the camera needs to be rebooted after the settings were
changed, press the 'Reboot' button. The camera will power
cycle and will appear back in the search results once the
reboot is complete.
8
Click 'Save' to save changed values.
9
To update the camera's firmware from the DW IP Finder
TM
,
click on the firmware tab, upload the firmware file and
select the camera to update. You can update multiple
cameras at the same time.
Go to : http://www.digital-watchdog.com and search for
‘IP Finder’ on the quick search bar at the top of the page.
2
The latest IP Finder software will appear in the search
results. Click on the link to download the file to your
computer.
3
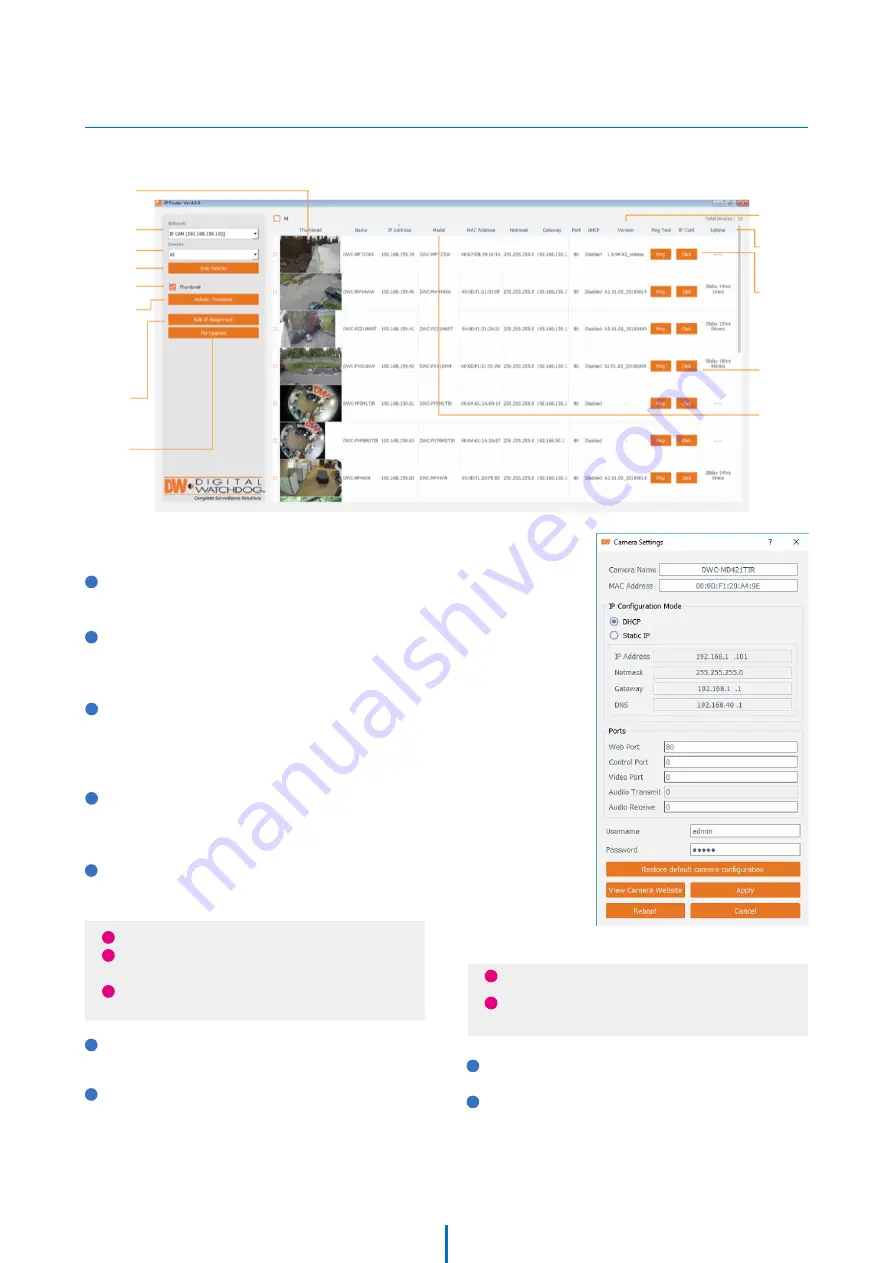
The software will scan your network for all supported
cameras and display the results in the tabel. Allow up to
5 seconds for the IP Installer to find the camera on the
network.
4
You can press the ‘Refresh List’ to search the network
again, or filter the search results by entering a value in
the filter box.
5
Check the box next to ‘Display Camera Thumbnail’ to view
a JPEG image of the camera’s view next to the camera
name on supported models.
Network setup -
DW IP Finder
TM
i
The default network type of camera is DHCP mode.
i
If you have a DHCP server, it will automatically set the
Camera IP.
i
Contact your network administrator for more
information.
Thumbnail view
Select network to scan
Filter device type to scan
Scan devices
Show/hide
thumbnail view
Refresh thumbnail view
Bulk IP assignment
Firmware upgrade
Firmware version
Camera's uptime
Open device
configuration
settings
Device's
information
i
Default ID / PW : admin / admin
i
For security purposes, it is highly recommended to
change your password after initial
setup
.
16
1


