6
STEP 3:
Configure network
Please have the following information ready before starting the network configuration.
* The camera network and local network cannot be on the same network.
Windows®
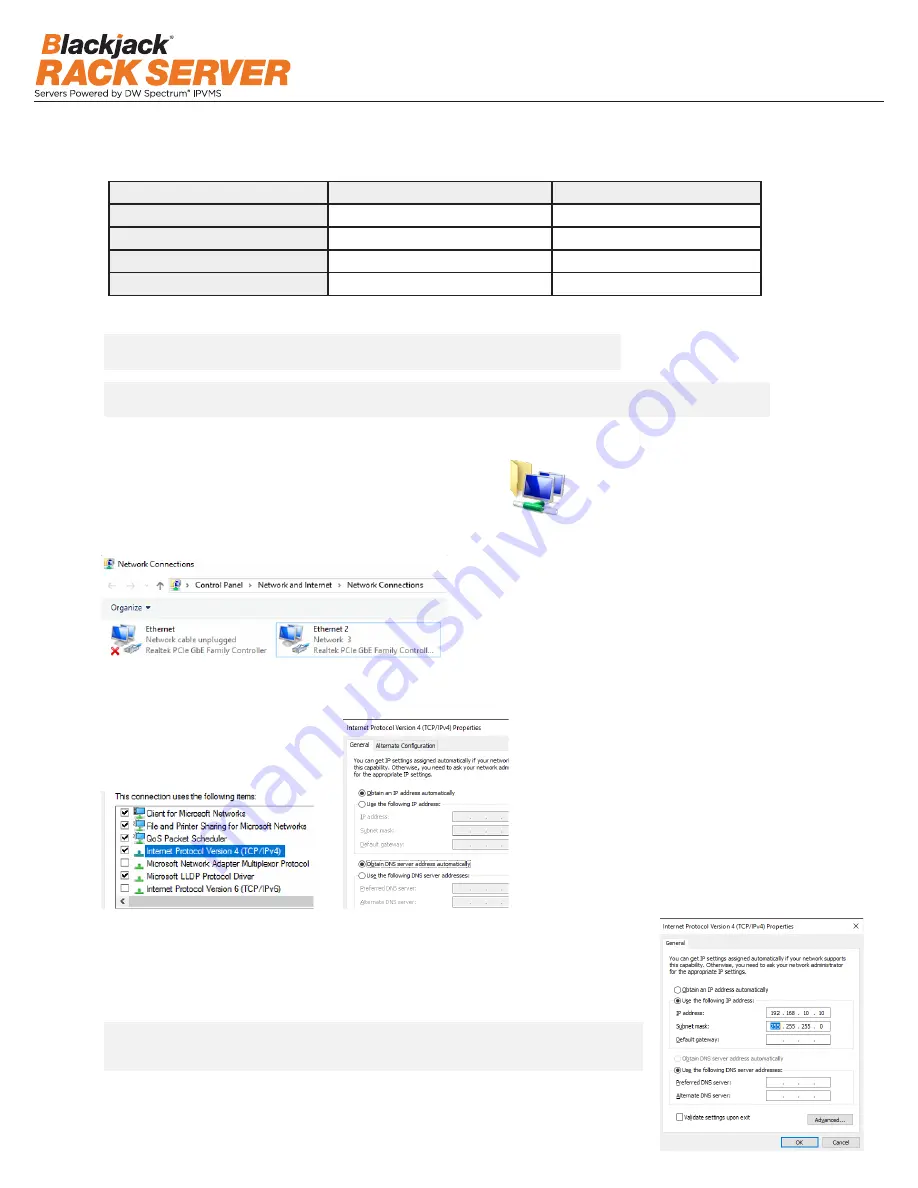
1. Double click on the “Network Connections” on the desktop.
2. Right-click on “Ethernet with cable connected” and click “Properties”.
3. Click Internet Protocol Version 4 (TCP/IPv4) and click Properties
4. Select Use the following IP address (Use the following DNS server addresses will be selected automatically)
5. Enter IP address and Subnet mask of the camera network. (do not enter anything for the Default gateway, Preferred DNS server and Alternate
DNS server.
NOTE
It must be the same network as the cameras and must not be the same network as the local network.
Contact your network administrator for more information.
3. Select “Internet Protocol Version 4 (TCP/IPv4)” and click “Properties”.
3. Click Internet Protocol Version 4 (TCP/IPv4) and click Properties
4. Select Use the following IP address (Use the following DNS server addresses will be selected automatically)
5. Enter IP address and Subnet mask of the camera network. (do not enter anything for the Default gateway, Preferred DNS server and Alternate
DNS server.
NOTE
It must be the same network as the cameras and must not be the same network as the local network.
Contact your network administrator for more information.
Camera network
Local network (LAN)
IP address
Subnet mask / Netmask
Default gateway / Gateway
Not applicable
DNS servers
Not applicable
NOTE
The Blackjack® server’s network settings are set to DHCP as default.
NOTE
If you are not sure what information to enter, contact your Network Administrator or Internet
Service Provider for the information.
4. Select “Use the following IP address” (Use the following DNS server
addresses will be selected automatically).
5. Enter the IP address and Subnet mask of the camera network. (Do not
enter anything for the default gateway, preferred DNS server and alternate
DNS server.
NOTE
It must be the same network as the cameras and must not be the same
network as the local network. Contact your network administrator for
more information.
6. Click OK to close then click Close to go back to Network Connections.
Local Network
7. Right click on the other Ethernet, the one with network cable unplugged, and click Properties.
8. Click Internet Protocol Version 4 (TCP/IPv4) and click Properties
9. Select Use the following IP address (Use the following DNS server addresses will be selected automatically)
10. Enter IP address and Subnet mask of the camera network.


