background image


3

Usage Precautions 

 
Please read the following usage precautions before using your TViX. 


  Connect the A/V cable 

 
Make sure the power is off when you connect the A/V cable between the TViX and the TV. 


  Cleaning the TViX 

 
When cleaning the TViX product, pull out the power cord and then wipe it with a soft piece of dry cloth. 


  TV out, ZOOM, and default volume depend on the TViX’s setting. 


  Checking Digital signal Reception 

 
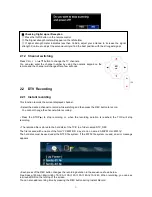
• Press the INFO button on the remote control. The Signal strength meter will appear on the left-bottom. 
• If signal strength meter indicates less than 14.9db, adjust your antenna to increase the signal strength.   

Continue to adjust the antenna until you find the best position with the strongest signal. 


 Record Notice 

 
• The first partition of the internal hard disk must use the NTFS format. FAT32 format can cause an error 
message. 
• When the signal is weak or unstable, recording cannot work properly. 
• When the hard disk is unstable, recording cannot work properly. So you must run Check Disk 
sometimes. 

• Hard disk requires the Check Disk, you must run the Check Disk sometimes 


 DTV EPG 

 
• HDTV EPG(Electronic Program Guide) shows the stream guide of real time. 
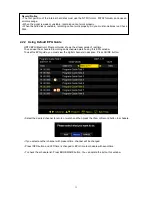
• You can use the scheduled recording and scheduled watch using this EPG window. 
• To use this EPG guide, you must view the digital channels in advance. 


  IceTV EPG ( Internet EPG for Australia only ) 

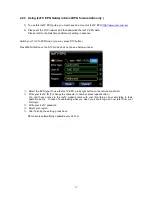
If you have an account of IceTV EPG, you can use IceTV EPG with TViX PVR. 
Set the TViX network (Netshare or SAMBA) in first. 
 

 Analog channel 

TViX PVR does not support analog (PAL) broadcasting ,cable channel or satellite. 


  Connect USB cable 

 
When connected to the computer through the USB cable the TViX acts as an external USB storage device 
(In this state, there is no video/audio output and the VFD will show as USB ON). For normal TViX play mode, 
disconnect the USB cable connected to the computer and turn on the TViX. 


  Detaching the HDD 

 
When detaching the HDD, please let the heat out sufficiently. 


Summary of Contents for TViX T-431

Page 1: ...User Manual TViX HD Tuner T430 T431 All specifications and information are subject to changes without further notices...

Page 2: ...easily accessible Do not expose TViX to oil smoke water humidity and dust Do not touch power plug with wet hands or do not use defective power cable loose outlet It may cause electric shock or fire B...

Page 3: ...stable recording cannot work properly When the hard disk is unstable recording cannot work properly So you must run Check Disk sometimes Hard disk requires the Check Disk you must run the Check Disk s...

Page 4: ...n If you choose FAT32 file format on Windows 2000 XP the drives maximum size will be limited to 32GBs If you want to use a single drive letter of 32GBs or more you have to format on Windows 98SE ME We...

Page 5: ...ade and expand the capacity of HDD by themselves like PC upgrading And you can backup the recorded file to from the PC TViX PVR implements all the DVB T features like EPG scheduled recording PC connec...

Page 6: ...level video contents Using the latest SMP8635 processor TViX HD supports the latest multimedia formats MKV MPEG 4 AVC H 264 VC 1 MP HL AP L3 WMV9 WMV HD as well as MPEG4 3 11 4 0 5 0 H 264 is a brand...

Page 7: ...r input This model is supports free to air DVB T digital only Location Select your location Time Zone If you want to use exact EPG guide you have to configure your time zone using Up Down button Day L...

Page 8: ...after finishing the recording TVIX TUNER does not support analog PAL broadcasting cable channel or satellite 2 1 Using DTV Channel 2 1 1 Channel Scanning Before you can use any of the special channel...

Page 9: ...he file is saved with a name of the form YY MM DD day station named AM PM HH MM tp The hard disk must be used under the NTFS file system If the FAT32 file system is used an error message appears Each...

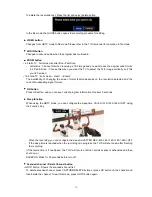
Page 10: ...cancel a current recording Press the CAPTURE DELETE button on the remote control and recording is canceled and the file is not stored If you press the power button while recording you will see the fol...

Page 11: ...tton to schedule If you select another channel with present time channel will be changed Press INFO button and VFD time is changed to EPG time to schedule with exact time To check the schedule list Pr...

Page 12: ...button on the DTV mode and you can see below window Select the EPG type To use the IceTV EPG press right button on the remote controller Write your IceTV ID To change the character to number press rep...

Page 13: ...he cycle option is depending the day of the week To Edit delete the scheduled list press the BOOKMARK button on the DTV mode Press the up down button to select a specific listing and then you can edit...

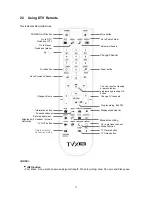
Page 14: ...Change TV channels Stop recording Exit DTV TV Record button Select multi audio Go to Photo Folder Go to Player Quick boot player Go to DTV Quick boot DTV Picture adjustment Brightness Contrast Hue Sa...

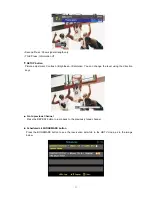
Page 15: ...Contrast Brightness Saturation You can change the level using the direction keys Go to previous Channel Press the REPEAT button to jump back to the previously tuned channel Scheduled List BOOKMARK but...

Page 16: ...depends on the resolution selected and the current broadcasting signal format OK button Press OK button and you can see current program information for about 3 seconds Sleep function When using the HD...

Page 17: ...heck the hard disk Connect the TViX to the PC s USB port Select the TViX hard disk properties Tools Check now You must select the hard disk without showing its contents in Windows Explorer or Check Di...

Reviews: