background image

8

9

Operation

Setting up the heater

Connecting the Power

The main power ON/OFF (0/I) switch is located on the back of the heater.  

To connect the power supply to the heater, push this switch to the ON (I) position. 

There is a “D” sound and the screen will display in full for 3 seconds,  

then heater enters into standby mode. 

If you wish to disconnect the power supply,    

push ON/OFF (0/I) button again and switch to OFF (0). 

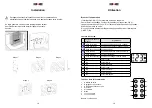
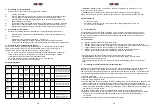
Reading the Digital Display

Remote Control Buttons

Control Panel Buttons

Referred to in manual

Meaning

Full Sun Icon

Working at full power = 2000W

Half sun Icon

Working at 

low

 power = 1000W

Snowflake Icon

Anti-Frost Function

Window Icon

Window open detection function

Timer Icon

Reverse timer function

[ ]

Child Lock Icon

Child lock function

d1

D1

Day 1/ Monday

d2

D2

Day 2/ Tuesday

d3

D3

Day 3/ Wednesday

d4

D4

Day 4/ Thursday

d5

D5

Day 5/ Friday

d6

D6

Day 6/ Saturday

d7

D7

Day 7/ Sunday

Buttons

Referred to in manual as

On/ standby button

Power setting button

Up-arrow button

Down-arrow button

1.

Turning the Heater On and Off

2.

Set the current day and time

To switch on the fan heater, press the 

on/standby button

 once. 

t will immediately power on and you will hear it running,  and it  will start  to blow out warm  air.  
OFF: To switch the heater off again, press the same 

on/standby button

 to put it into standby mode.

Set the day of the week

a)

Switch the heater on.

b)

Long-press the 

timer button

 for 3 seconds.

c)

The screen will first display 

d1

 and start to flash.

d)

Press the 

up-arrow

 or 

down-arrow

 to set the day of the week

it currently is from d1, d2, d3, d4, d5, d6, d7.

e)

After selecting the day, press the 

timer button

 once to confirm.

Set the clock

f)

Next, the heater enters into the time/clock setting.

A numbered digit flashes on the screen.

g)

Set the hour: Press the 

up-arrow button 

or

 down-arrow

 button to set the

current correct hour among 00-23 in the cycle.

h)

When you have chosen the hour, press the 

timer button

 once to confirm.

i)

Set the minutes: Press the 

up-arrow button 

or

 down-arrow

 button to set the

current correct minutes from 0-59.

j)

Press the 

timer button

 once to confirm.

k)

Finally, when both the hour and minutes have been set,

press the 

timer button

 once to confirm and save the settings.

After setting the time, allow the digital screen to return back to the standard screen. 

To check if the current day and time is set currently, press the timer button once; the screen will 

automatically show the information in this order: Day, Hour, Minutes in turns within 1 second of each 

other, then, the screen will switch back to the ambient temperature display. 

mode

prog

1

5

2

6

3

7

4

8

1.

On/Standby

2.

Power Setting

3.

Window open detection button

4.

Timer button

5.

Program

6.

Mode button

7.

Up-arrow button

8.

Down-arrow button

Battery: 1 x CR2025 3V

Summary of Contents for BFH21

Page 1: ...DUR NIC Creative Consumer Products OUR HIC CD e o o duronic com duronic duronicmedia Duronic duronicmedia BFH21 Bathroom Fan Heater ...

Page 2: ...2 3 English Manual Manuel d utilisation en français Gebrauchsanleitung auf Deutsch Manual de Instrucciones en Español Manuale D istruzioni In Italiano Instrukcja obsługi Polski 4 15 26 37 48 59 Contents ...

Page 3: ...out by Duronic using original spare parts and accessories Always operate the appliance on a dry smooth even and stable surface Do not place the unit on a damaged wall or a wall covered in damp mould Do not operate the machine or handle the plug with wet hands Do not immerse in water or other liquids Cleaning should be done as per instructions in this manual Do not insert or allow any foreign objec...

Page 4: ... in cool dry location when not in use This product is only suitable for well insulated spaces or occasional use Some parts of this product can become very hot and cause burns Particular attention has to be given where children and vulnerable people are present If the machine is operated with a defective or damaged mains cable there is a potential danger of fatal electric shock Never use a machine ...

Page 5: ...standby button to put it into standby mode Set the day of the week a Switch the heater on b Long press the timer button for 3 seconds c The screen will first display d1 and start to flash d Press the up arrow or down arrow to set the day of the week it currently is from d1 d2 d3 d4 d5 d6 d7 e After selecting the day press the timer button once to confirm Set the clock f Next the heater enters into...

Page 6: ...r setting 7 Setting the customised Program UP Pre Set Modes Anti frost default mode to keep the room at a temperature of at least 5 to prevent frost Comfort this setting is customised by the user when they set up their heater This is an option to set a countdown timer to switch off the heater after a certain amount of time For instance if you set it for 2 hours it will stay on for this time and th...

Page 7: ...to remind the user to close the window door After closing the window door 10 Reverting to the Default Setting To reset the heater settings to their factory default settings Disconnect power Press and hold the down arrow button Reconnect to power The heater will then recover to the default settings To Check the UP Settings Press the program button to check each day s setting Press the timer button ...

Page 8: ...omestic purposes 4 It does not cover wear and tear malicious damage misuse neglect inexpert repairs or consumable parts 5 Shine Mart Ltd has no responsibilities for accidental or consequential loss or damage 6 Shine Mart Ltd are not liable to carry out any type of servicing work under the guarantee 7 Valid in the UK only Imported by Shine Mart Ltd RM3 8SB Information on waste Disposal for Consumer...

Page 9: ... prise de courant pour éviter tout accident Afin d éviter toute surchauffe de l appareil ne recouvrez pas l appareil N utilisez pas l appareil juste à côté d une baignoire d une douche ou d une piscine Assurez vous que l appareil soit éteint avant de le brancher Eteignez l appareil et débranchez le lorsqu il n est pas utilisé avant de procéder au nettoyage ou toute opération de maintenance Pour dé...

Page 10: ...s souhaitez débrancher l appareil appuyez d abord sur l interrupteur ON OFF 0 I Lecture Touches de l écran de la télécommande Désignation dans le Signification Icône soleil plein Fonctionne à pleine puissance 2000W Icône Fonctionne à puissance réduite 1000W flocon de neige Icône anti gel Fonction Icône Fonction de détection de fenêtre ouverte Icône Fo retardateur nction sécurité enfant Icône Fonct...

Page 11: ...e 2 l appareil fonctionne à puissance réduite 1000W C Pour changer la puissance appuyez simplement sur la touche de réglage de la puissance l appareil changera alors la puissance D La puissance sélectionnée sera automatiquement sauvegardée et l écran retournera sur l écran d accueil Après avoir modifié la puissance vous avez la possibilité de modifier la température ambiante Appuyez à nouveau sur ...

Page 12: ...paramétrer l heure à laquelle l appareil devrait s arrêter G H 8 Sécurité pour enfants Pour des raisons de sécurité cet appareil est doté d une sécurité pour enfants afin d éviter qu ils ne puissent pas modifier le fonctionnement de l appareil Pour activer cette sécurité appuyez longuement sur la touche du haut et la touche du bas en même temps pendant 3 secondes L écran affichera l élément suivan...

Page 13: ... durabilité et performance Cet appareil vous offrira de longues années de service tant que vous l utilisez correctement et suivez les instructions de maintenance présentées dans ce manuel Ce produit est garanti pour 1 an à partir de la date originelle d achat Si ce produit était endommagée en raison d un problème électrique ou d une fabrication imparfaite le produit défectueux peut être remplacé a...

Page 14: ...e Stellen Sie das Gerät nicht auf eine beschädigte oder mit Feuchtigkeit oder Schimmel bedeckte Wand Tauchen Sie das Gerät nicht ins Wasser oder andere Flüssigkeiten Die Reinigung sollte gemäß den Anweisungen in diesem Handbuch erfolgen Lassen Sie nicht zu dass Fremdkörper in die Einlass oder Auslassöffnung gelangen da dies zu einem elektrischen Schlag führen oder das Gerät beschädigen kann Halten...

Page 15: ...se Ablagerungen regelmäßig entfernt werden indem Sie das Gerät vom Stromnetz trennen und anschließend die Lüftungsschlitze und das Gitter saugen Stellen Sie das Heizgerät nicht auf einen Teppich und legen Sie das Kabel nicht unter einen Teppich Platzieren Sie das Kabel so dass niemand darüber stolpern oder darauf stehen kann Stellen Sie das Heizgerät erst dann weg wenn es vollständig abgekühlt ist...

Page 16: ...irm zur Anzeige der Umgebungstemperatur zurück Bedienung Herstellen der Stromversorgung Der Hauptschalter EIN AUS 0 I ist auf der Rückseite des Geräts Um das Gerät einzuschalten drücken Sie den EIN AUS Schalter um es einzuschalten Es ertönt ein D Geräusch und das Display schaltet sich für 3 Sekunden ein Danach ist die Heizung im Standby Modus Wenn Sie das Gerät wieder ausschalten möchten drücken S...

Page 17: ...llung anzupassen b Sie können zwischen 6 verschiedenen Modi auswählen um die Wärme in Ihrem Zuhause besser zu kontrollieren Jedes hat ein voreingestelltes Muster um die Heizung so zu programmieren dass sie sich den ganzen Tag ein und ausschaltet P1 P2 P3 P4 P5 sind die werkseitig eingestellten Standardprogramme Jedes folgt einem anderen Muster um eine Reihe von Vorlieben zu berücksichtigen Weitere...

Page 18: ...t wieder an die Stromversorgung an Die Heizung wird auf die Standardeinstellungen zurückgesetzt Verwenden der Fensteröffnungserkennung Wenn die Heizung eingeschaltet ist drücken Sie die Fensteröffnungserkennungstaste einmal um diese zu aktivieren Das Fenstersymbol blinkt auf dem Bildschirm Um diese Funktion abzubrechen drücken Sie die Fensteröffnungserkennungstaste erneut um die Einstellung abzubr...

Page 19: ...r Verschleiß böswillige Beschädigung Missbrauch Vernachlässigung und unsachgemäße Reparaturen sind von der Gewährleistung ausgeschlossen 5 Shine Mart Ltd übernimmt keine Verantwortung für zufällige oder Folgeschäden 6 Shine Mart Ltd ist nicht für Wartungsarbeiten zuständig Diese fallen nicht unter die Gewährleistung 7 Gültig in der EU Dieses Produkt ist mit fitted CE geprüfte Typ F Euro Stecker BS...

Page 20: ...e colocarse justo debajo de una toma de corriente Para evitar que se sobrecaliente no lo cubra con nada No use este calefactor cerca de una bañera una ducha o una piscina Asegúrese de que el aparato está apagado antes de conectarlo a la toma de corriente principal Tras su uso cuando se vaya a limpiar o cambiar de sitio desconecte siempre el aparato de la toma de corriente Para desconectarlo pulse ...

Page 21: ...e pulse el interruptor y colóquelo en la posición OFF Funcionamiento Encendiendo el calefactor Lectura de la pantalla Botones del Control Remoto Ventana Icono d1 D1 d2 D2 d3 D3 d4 D4 d5 D5 d6 D6 d7 D7 Nombre en el manual Significado Icono Sol Entero Funcionamiento a máx potencia 2000W Icono Medio Sol Funcionamiento a media potencia 1000W Icono Copo de Nieve Función anticongelado Función detectora ...

Page 22: ...el de potencia configure la temperatura Presione el Botón Flecha Arriba y el Botón Flecha Abajo para configurar la temperatura a su gusto Seleccione una temperatura entre 5º y 35º Una vez llegue al número que desee espere 5 segundos y se guardará automáticamente b Para ayudarle a controlar la calefacción hay 6 modos diferentes predeterminados con los cuales el calefactor se enciende y apaga a lo l...

Page 23: ...os para prevenir que los niños cambien los modos mientras el calefactor está encendido Activar el bloqueo para niños 8 Función bloqueo de seguridad para niños Mantenga pulsado de forma simultánea el botón flecha arriba y el botón fecha abajo al mismo tiempo durante 3 segundos para activar el bloqueo para niños Aparecerá x en la pantalla para confirmar que se ha activado Mientras este bloqueo esté ...

Page 24: ...no de obra entonces el producto debe ser devuelto al lugar original de compra Reembolso o reemplazo es a discreción de la compañía Productos Duronic se ofrecen con una garantía de 1 año bajo las siguientes condiciones 1 El producto debe ser devuelto al vendedor con comprobante de compra original 2 El producto debe instalarse y usarlo según las instrucciones contenidas en este manual 3 Este aparato...

Page 25: ... accessori originali Utilizzare sempre su una superficie asciutta liscia uniforme e stabile Non collocare l unità su una parete danneggiata o coperta da umidità muffa Non utilizzare l apparecchio o toccare la spina con le mani bagnate Non immergere in acqua o altri liquidi La pulizia deve essere eseguita secondo le istruzioni in questo manuale Non inserire o consentire l ingresso di oggetti estran...

Page 26: ...pecifiche tecniche 1 passo 2 passo 3 passo 4 passo 5 passp Se l apparecchio viene utilizzata con un cavo d alimentazione difettoso o danneggiato persiste un potenziale pericolo di scossa elettrica mortale Per evitare rischi per bambini molto piccoli questo termoventilatore deve essere installata in modo che la parte più bassa di esso sia a 120 cm dal pavimento Modello BFH21 220 240V 50 60Hz 2000W ...

Page 27: ...del termoventilatore Per accendere il termoventilatore posizionare l interruttore in posizione ON I Verrà emesso un suono acustico e il display si accenderà per alcuni secondi per poi entrare in modalità standby Se si desidera spegnere il termoventilatore premere nuovamente il pulsante ON OFF 0 I e posizionare su OFF 0 Pulsanti sul termoventilatore Funzionamento Collegare alla presa elettrica Disp...

Page 28: ...0 W all icona del mezzo sole 1000 W d e a La modifica verrà salvata automaticamente Per impostare il termoventilatore nuovamente a 2000 W ripetere i passaggi indicati precedentemente Premere il pulsante freccia su o freccia giù per selezionare la temperatura desiderata b P1 P2 P3 P4 P5 sono i programmi predefiniti che sono già stati impostati Ognuno segue un modello diverso per adattarsi a una ser...

Page 29: ...Per disabilitare il blocco per bambini tenere premuto contemporaneamente il pulsante freccia su e il pulsante freccia giù per 3 secondi Per verificare le impostazioni UP Premi il pulsante programma per verificare le impostazioni di ogni giorno Premere il Premendo prima il pulsante timer anziché il pulsante freccia su o freccia giù è possibile saltare i passaggi per mantenere il termoventilatore in...

Page 30: ... condizioni 1 Il prodotto deve essere restituito al rivenditore con la prova d acquisto originale 2 Il prodotto deve essere installato e usato seguendo le istruzioni contenute nel manuale 3 Il prodotto va utilizzato solo per scopi domestici Non è da utilizzarsi per uso commerciale 4 La garanzia non copre usura danni volontari abuso negligenza riparazioni inesperte o consumo dei materiali 5 Shine M...

Page 31: ... ciepła ostrych przedmiotów lub czegokolwiek co może spowodować jego uszkodzenie Grzejnik nie może znajdować się bezpośrednio pod gniazdem elektrycznym Aby uniknąć przegrzania nie zakrywaj urządzenia Nie stosuj urządzenia w bezpośrednim otoczeniu wanny prysznica lub basenu Upewnij się czy urządzenie jest wyłączone przed podłączeniem do gniazdka zasilającego Wyłącz urządzenie i odłącz od zasilania ...

Page 32: ...lacza Przyciski pilota d1 D1 d2 D2 d3 D3 d4 D4 d5 D5 d6 D6 d7 D7 Określony w instrukcji jako Znaczenie Ikona pełnego słońca Ikona połowy słońca Ikona śnieżynki Ikona otwartego okna Ikona programatora Ikona bl rodzicielskiej Praca na maksymalnej mocy 2000W Praca na połowie mocy 1000W Tryb zapobieganie zamrażaniu Detektor otwartego okna Zmiana czasu pracy Tryb blokady przeciw dzieciom Dzień 1 Ponied...

Page 33: ...ł aby ustawić temperaturę pomieszczenia b Wybierz pomiędzy 5 C and 35 C Gdy ustawiłeś właściwą temperaturę nie musisz zatwierdzać ustawień dodatkowych przyciskiem Po 5 sek bezczynności ustawienia te zostaną automatycznie zapisane Aby ułatwć zarządzanie temperaturą w twoim domu masz do wyboru 6 programów Każdy z programów ma wstępnie zapisane ustawienia które ułatwią kontrolę temperatury w ciągu dn...

Page 34: ...e co potwierdza aktywację blokady W tym momencie żadne z przycisków nie mogą zostać użyte 8 Blokada rodzicielska Usuwanie blokady rodzicielskiej Aby usunąć blokadę rodzicielską jednocześnie przyciśnij strzałkę w górę i strzałkę w dół Sprawdzenie ustawień programu UP Przyciśnij przycisk Prog aby sprawdzić ustawienia poszczególnych dni Przyciśnij przycisk programatora czasowego aby przełączyć pomięd...

Page 35: ...gotrwałość produkuy zostaje osiągnięta przez właściwe użytkowanie i konserwację Gwarancja obejmuje 1 rok od daty zamówienia Jeżeli jakikolwiek defekt powstanie ze względu na wadliwość materiału lub niewłaściwe wykonanie to uszkodzony produkt musi zostać dostarczony do miejsca z którego został zamówiony Zwrot pieniędzy lub wymiana produktu jest w gestii firmy Duronic Products oferuje jeden rok gwar...

Page 36: ......

Reviews: