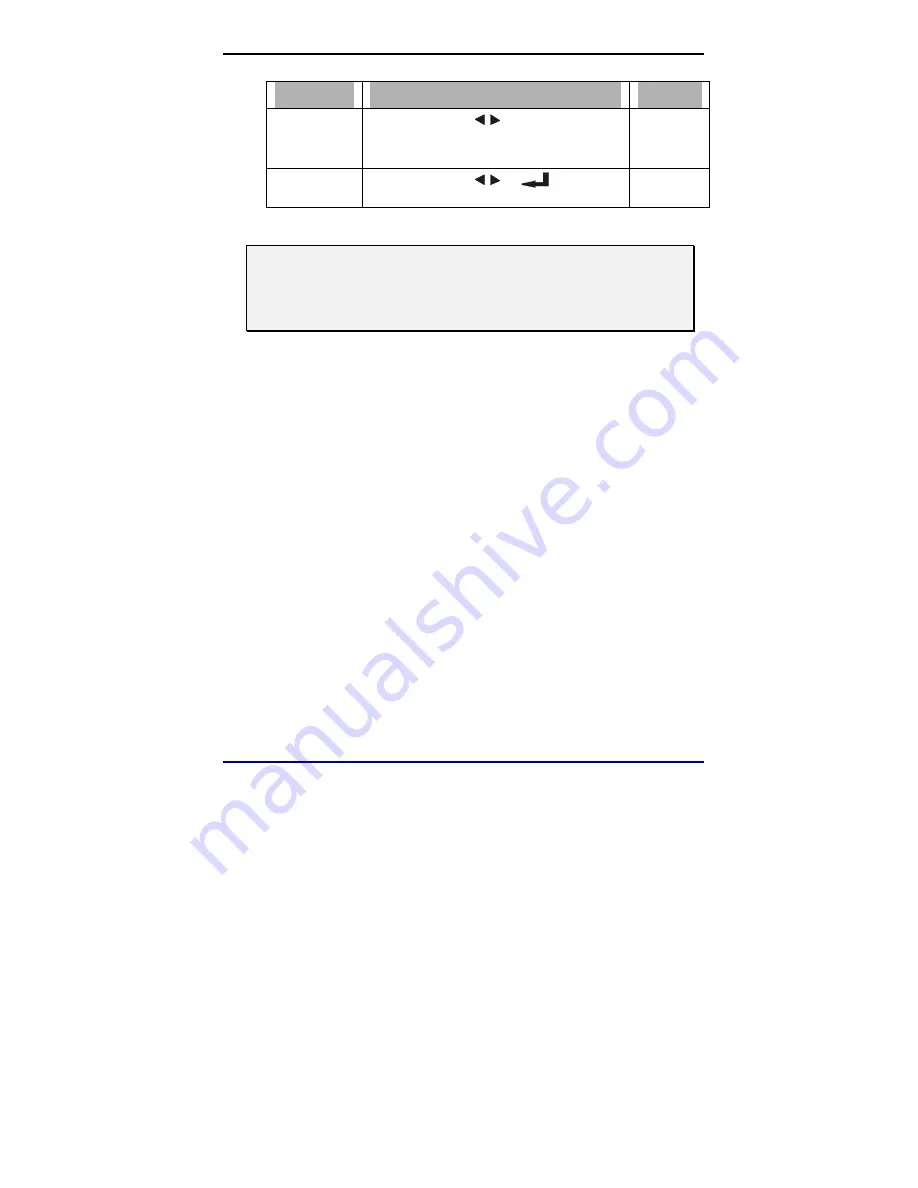
Dukane ImagePro 8039B User Manual Download Page 31


 25 


Item 

Description 

Default 

OSD Display 
Time 

Press the cursor 

 button to choose 

how long the OSD window appears. 
(Range: 10—30 seconds) 

15 

Reset 

Press the cursor 

 or 

 button to 

return settings to the factory defaults. 

— 


N

OTE

:


PIP 

MODE ALLOWS YOU TO VIEW A SMALL VIDEO WINDOW IN THE MIDDLE OF A 

FULL

-

SCREEN VIDEO DISPLAY

. F

OR EXAPMPLE

WHILE DISPLAYING OUTPUT 

FROM YOUR 

PC 

YOU COULD HAVE A SMALL WINDOW DISPLAYING YOUR VIDEO 

SOURCE

Summary of Contents for ImagePro 8039B

Page 1: ...e without notice The manufacturer makes no representations or warranties with respect to the contents hereof and specifically disclaims any implied warranties of merchantability or fitness for any par...

Page 2: ...s manual to alert you of hazardous situations The following boxes are used in this manual to alert you to important information NOTE PROVIDES ADDITIONAL INFORMATION ON THE TOPIC AT HAND IMPORTANT PROV...

Page 3: ...stand Avoid using the system near water in direct sunlight or near a heating device Do not place heavy objects such as books or bags on the unit Power Safety Only use the supplied power adapter Do no...

Page 4: ...stalling and using the projector read the regulatory notices in the Regulatory Compliance section on page 40 About this manual This manual is intended for end users and describes how to install and op...

Page 5: ...RANGE 10 CONNECTING INPUT DEVICES 11 STARTING AND SHUTTING DOWN THE PROJECTOR 12 ADJUSTING THE PROJECTOR LEVEL 14 ADJUST THE ZOOM FOCUS AND KEYSTONE 15 ON SCREEN DISPLAY MENU SETTINGS 16 ON SCREEN DI...

Page 6: ...R MESSAGES 33 IMAGE PROBLEMS 33 LAMP PROBLEMS 34 REMOTE CONTROL PROBLEMS 35 AUDIO PROBLEMS 36 HAVING THE PROJECTOR SERVICED 36 SPECIFICATIONS AND WARRANTY 37 SPECIFICATIONS 37 Input output connectors...

Page 7: ...ck that the following items are included LCD projector Remote control Two AAA batteries Power cord RGB cable USB cable CD ROM User s manual Quick start guide Carrying case Contact your dealer immediat...

Page 8: ...ECAM An 1200 ANSI lumens brightness rating allows for presentations daylight or in lit rooms Supports resolutions up to SXGA at 16 7 million colors to deliver crisp clear images Flexible setup allows...

Page 9: ...shing Operational error code refer to LED Error Messages on page 33 Image focus control Image zoom control Lamp ready LED OSD menu button Select input source left cursor Power LED Power AC socket Lens...

Page 10: ...l video camera Page 11 Stereo mini jack USB Mouse VGA RGB in Connect to PC Page 11 VGA RGB out Connect to 2 nd projector or display RS 232 Service port for firmware upgrades Kensington Lock Secure to...

Page 11: ...Y SIGNAL Projector Bottom Item Description Page ref Height adjusters Adjust level of the front of the projector Page 14 Projection lamp cover Remove when changing lamp Page 27 Ceiling support holes Co...

Page 12: ...ONTROL LASER INTO ANYONE S EYES Laser IR transmitter Power LED Power button Right mouse button Keystone button Laser button Mouse pad Volume button Left mouse button Left right cursor buttons Volume m...

Page 13: ...the On Screen Display OSD Status Use this button to check configuration settings Auto Use this button to optimize image size position and resolution Blank Press to blank the screen press again to sho...

Page 14: ...dentification on the projector Power Laser Keystone Volume L L L L R R R R Menu Status Mute Auto Blank Zoom Source Freeze Zoom READY READY READY READY POWER POWER POWER POWER SOURCE SOURCE SOURCE SOUR...

Page 15: ...rtment cover by sliding the cover in the direction of the arrow 2 Insert two AAA batteries supplied taking note of the battery polarity markings inside the compartment 3 Replace the cover NOTE DO NOT...

Page 16: ...ers 33 feet and 30 degrees above or below the projector level If the projector does not respond to the remote control move a little closer Refer to the illustrations below NOTES AVOIDUSINGTHEPROJECTOR...

Page 17: ...a cable not supplied to the projector s VGA RGB in connector and the PC s video out connector Tighten the securing screws on both connections Connect a video device VCR DVD or video camera to the A V...

Page 18: ...tor Connect the other end to a wall outlet The power LED and Lamp ready LED turn on 2 Turn on the connected devices 3 Ensure the Lamp ready LED is on a steady not flashing orange and then press the Po...

Page 19: ...and HDTV are supported through the RGB in connector and an optional RGB cable 5 To finish your presentation turn off the projector IMPORTANT IF YOU HAVE CONNECTED THE USB CABLE TO A PC THE PROJECTOR...

Page 20: ...raise the level of the projector lift the projector A and press both Level adjuster buttons B The Level adjusters drop down C 2 To make minor adjustments rotate the adjusters 3 To lower the level of t...

Page 21: ...on projector only to resize the projected image and screen size 2 Use the Image focus control on projector only to sharpen the projected image 3 Use the Keystone button on the remote control or projec...

Page 22: ...rojector while reading this section Set the OSD language to your preference before continuing The default language is English 1 Press Menu The Main menu appears Main Setup ColorMgr Language Utility St...

Page 23: ...implified Chinese Traditional English French German Portuguese Spanish Menu Select SubMenu Exit MENU 3 Press the cursor button until the language you want is highlighted 4 Press the cursor or button t...

Page 24: ...ARE NOT SHOWN WHEN CONNECTED TO A VIDEO SOURCE THESE ITEMS ARE SET AUTOMATICALLY BY THE PROJECTOR Item Description Default Contrast Press the cursor button to adjust the contrast Range 0 100 50 Brigh...

Page 25: ...ITEMS IN THE SETUP MENU ARE DIFFERENT FROM WHEN CONNECTED TO A VIDEO SOURCE Setup PC Menu Main Setup ColorMgr Language Utility Status Frequency Tracking Aspect Ratio Projection Volume Keystone Reset M...

Page 26: ...Aspect Ratio Press the cursor button to toggle between the 4 3 standard format and 16 9 High Definition TV HDTV format 4 3 Press the cursor button to choose from four projection methods Desktop mount...

Page 27: ...etup ColorMgr Language Utility Status Color Saturation Color Tint Color Temp OSD Translucent Gamma Reset Menu Select SubMenu Exit MENU 100 0 Cool Warm Off Normal On Video Type RGB YPbPr HDTV YCbCr DVD...

Page 28: ...eo Type YCbCr Some DVD component video output YPbPr HDTV Color Temp Press the cursor button to adjust the video tint hue Range Cool Normal Warm Normal OSD Translucent Press the cursor button to turn O...

Page 29: ...Utility Status Chinese Simplified Chinese Traditional English French German Portuguese Spanish Menu Select SubMenu Exit MENU Item Description Default Chinese Simplified Chinese Traditional English Fre...

Page 30: ...Red Green Blue 0 Seconds Item Description Default PIP Size Press the cursor button to select the picture in picture size Range Off Small Medium Large Off PIP Position Press the cursor button to choos...

Page 31: ...rs Range 10 30 seconds 15 Reset Press the cursor or button to return settings to the factory defaults NOTE PIP MODE ALLOWS YOU TO VIEW A SMALL VIDEO WINDOW IN THE MIDDLE OF A FULL SCREEN VIDEO DISPLAY...

Page 32: ...l Zoom Digital zoom operation Auto Source When enabled the system will automatically check all ports for connected devices Press the cursor button to toggle between On Off On Auto Power Off When enabl...

Page 33: ...r from your local dealer IMPORTANT THE LAMP CONTAINS A CERTAIN AMOUNT OF MERCURY AND SHOULD BE DISPOSED OF ACCORDING TO LOCAL ORDINANCE REGULATIONS AVOID TOUCHING THE GLASS SURFACE OF THE NEW LAMP DOI...

Page 34: ...crews on the lamp compartment cover Note These captive screws remain in the cover 2 Carefully lift the lamp housing straight up and remove it 3 Insert the new lamp Note After securing the screws the l...

Page 35: ...gr Language Auto Source Auto Power Off Video Information Software Rev Lamp Hours Menu Select SubMenu On Off 1024 x 768 60 Hz On Off VCDO 30A 2020 Lamp Hour Reset 4 Press the button A message screen ap...

Page 36: ...TO THE PROJECTOR INTERIOR WHILE CLEANING LEAVE UNPLUGGED IN A WELL VENTILATED ROOM FOR SEVERAL HOURS BEFORE USING IF A LOT OF WATER GETS INTO THE PROJECTOR INTERIOR WHEN CLEANING HAVE THE PROJECTOR SE...

Page 37: ...3 Rinse all detergent from the cloth and wipe the projector again CAUTION TO PREVENT DISCOLORATION OR FADING OF THE CASE DO NOT USE ABRASIVE ALCOHOL BASED CLEANERS Using the Kensington Lock If you are...

Page 38: ...attached Ensure the attached device is turned on Ensure a connected PC is not in suspend mode Ensure a connected notebook computer is configured for an external display this is usually done by pressi...

Page 39: ...error 6 Fan error refer to Lamp ready status to determine which fan 7 Lamp cover open Power 8 LCD driver error Image Problems Problem No image appears on the screen 1 If the Blank screen is shown pre...

Page 40: ...Set the Frequency and Tracking settings on the Setup menu of the OSD to the default settings 2 To ensure the problem is not caused by connected PC s video card connect to another computer Problem The...

Page 41: ...have the projector serviced Remote Control Problems Problem The projector does not respond to the remote control 1 Direct the remote control towards the front or rear remote sensors on the projector...

Page 42: ...with other speakers 5 Have the projector serviced Problem The sound is distorted 1 Check the audio cable connection 2 Test the source audio output with other speakers 3 Have the projector serviced Ha...

Page 43: ...s to 333 inches Brightness typical 1200 ANSI lumens Brightness uniformity lowest of 9 point 9 point 80 Projection lens Manual zoom and focus Zoom ratio 1 3 Horizontal keystone correction No Vertical k...

Page 44: ...ion 220 watts Stand By 20 watts Noise 34 dB Lamp 150W Audio speaker 1W mono speaker Remote keys Power Auto Menu Source Keystone Input output connectors D SUB 15 pin x 2 RGB in RGB out PC USB connector...

Page 45: ...39 Dimensions 28 9 cm 11 4 in 8 8 cm 3 5 in 26 1 cm 10 5 in...

Page 46: ...ay cause harmful interference to radio communications Operation of this equipment in a residential area is likely to cause harmful interference in which case the user will be required to correct the i...

Reviews: