background image

9

INSTALLATION

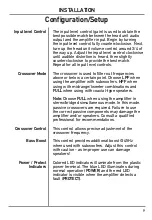
The input level control (gain) is used to obtain the 

best possible match between the head unit audio 

output and the amplifier input. Begin by turning 

the input level control fully counterclockwise. Next, 

turn up the head unit volume control around 3/4 of 

the way up. Adjust the input level control clockwise 

until audible distortion is heard, then slightly 

counterclockwise to provide the best match.

Repeat for all input level controls.


The crossover is used to filter out frequencies 

above or below a certain point. Choose 

LPF

 when 

using the amplifier with subwoofers, 

HPF

 when 

using with midrange/tweeter combinations and 

FULL

 when using with coaxial-type speakers. 

Note:

 Choose 

FULL

 when using the amplifier in 

stereo/bridged simultaneous mode. In this mode, 

passive crossovers are required. Failure to use 

the correct passive components may damage the 

amplifier and/or speakers. Consult a qualified 

professional for recommendations.  

This control allows precise adjustment of the 

crossover frequency. 

This control provides additional boost @ 45Hz 

when used with subwoofers. Adjust this control 

with caution - as improper use can damage 

speakers!

Colored LED indicators illuminate from the plastic 

power terminal. The blue LED illuminates during 

normal operation (

POWER

) and the red LED 

indicator is visible when the amplifier detects a 

fault (

PROTECT)

.

Input level Control

Crossover Mode

Crossover Control

Bass Boost

Power / Protect 

Indicators

Configuration/Setup

Summary of Contents for DA10004D

Page 1: ...INSTALLATION OWNER S MANUAL Mobile Power Amplifiers DA6002D DA10004D ...

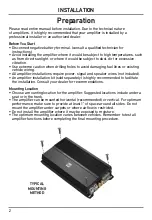
Page 2: ...ring All amplifier installations require power signal and speaker wires not included An amplifier installation kit sold separately is highly recommended to facilitate the installation Consult your dealer for recommendations Mounting Location Choose a mounting location for the amplifier Suggested locations include under a seat or in the trunk The amplifier can be mounted horizontal recommended or v...

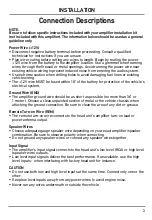
Page 3: ... wire should be as short as possible no more than 36 or 1 meter Choose a clean unpainted section of metal or the vehicle chassis when attaching the ground connection Be sure to clean the area of any dirt or grease Remote Turn on Wire REM The remote turn on wire connects to the head unit s amplifier turn on lead or power antenna output Speaker Wires Choose adequate gauge speaker wire depending on y...

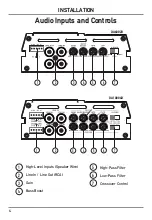
Page 4: ...re Line In Line Out RCA Gain Bass Boost 1 2 3 High Pass Filter Low Pass Filter Crossover Control 4 5 6 7 INSTALLATION Audio Inputs and Controls 4 H IG H IN P U T H IG H IN P U T L L R R DA6002D DA10004D 2 1 3 4 5 6 7 3 1 2 4 5 6 7 ...

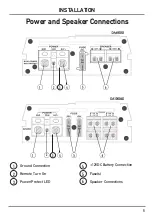
Page 5: ...INSTALLATION 5 Power and Speaker Connections Ground Connection Remote Turn On Power Protect LED 1 2 3 12VDC Battery Connection Fuse s Speaker Connections 4 5 6 3 3 1 1 2 2 ...

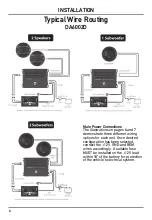
Page 6: ...n pages 6 and 7 demonstrate three different wiring options for each unit Once desired configuration has been selected connect the 12V GND and REM wires accordingly A suitable fuse MUST be installed on the 12V lead within 18 of the battery for protection of the vehicle s electrical system ...

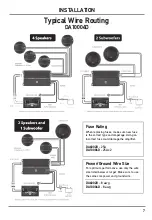
Page 7: ...w fuse is the correct type and amperage Using an incorrect fuse could damage the amplifier DA6002D 25A DA10004D 25Ax2 Power Ground Wire Size For optimum performance use only the wire size listed below or larger Make sure to use the same size power and ground wire DA6002D 8 awg DA10004D 8 awg ...

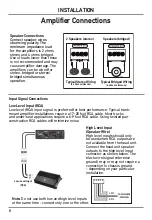
Page 8: ... below The black wire signal reference ground may or may not require a connection to chassis ground depending on your particular installation Low Level Input RCA Speaker Connections Connect speaker wires observing polarity The minimum impedance load for the amplifiers is 2 ohms stereo and 4 ohms bridged Use of loads lower than these is not recommended and may cause amplifier damage The amplifiers ...

Page 9: ... and FULL when using with coaxial type speakers Note Choose FULL when using the amplifier in stereo bridged simultaneous mode In this mode passive crossovers are required Failure to use the correct passive components may damage the amplifier and or speakers Consult a qualified professional for recommendations This control allows precise adjustment of the crossover frequency This control provides a...

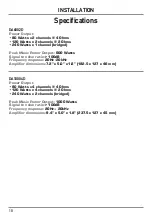
Page 10: ...o noise ratio 100dB Frequency response 20Hz 20kHz Amplifier dimensions 7 2 x 5 0 x 1 8 182 5 x 127 x 46 mm Power Output 80 Watts x 4 channels 4 Ohms 120 Watts x 4 channels 2 Ohms 240 Watts x 2 channels bridged Peak Music Power Output 1000 Watts Signal to noise ratio 100dB Frequency response 20Hz 20kHz Amplifier dimensions 9 4 x 5 0 x 1 8 237 5 x 127 x 45 mm DA6002D DA10004D ...

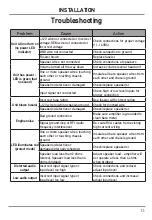
Page 11: ...ting 12V wire touching chassis ground Check for pinched wire Speaker s defective or damaged Check replace speaker s Engine noise Bad ground connection Make sure amplifier is grounded to clean bare metal Signal ground loop or RFI radio frequency interference Re route RCA cables from existing high current wiring LED illuminates red protect mode One or more speaker wires touching each other or touchi...

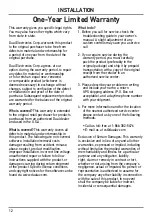
Page 12: ...hipment of the product Specific license conditions and copyright notices for the software can be found via www dualav com What to do 1 Before you call for service check the troubleshooting guide in your owner s manual A slight adjustment of any custom controls may save you a service call 2 If you require service during the warranty period you must carefully pack the product preferably in the origi...

Page 13: ...INSTALLATION Notes 13 ...

Page 14: ...cument may be updated and subject to change without notice To access the latest document please check the product website Dual Electronics Corp Toll Free 1 866 382 5476 Monday Friday 9AM 5PM EST www dualav com 2016 Dual Electronics Corp NSC1016 V01 ...

Reviews: