background image

3.

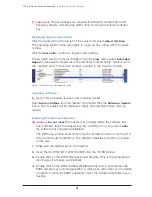
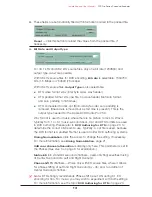
These fields are automatically filled with information carried in the packed file.

Reset

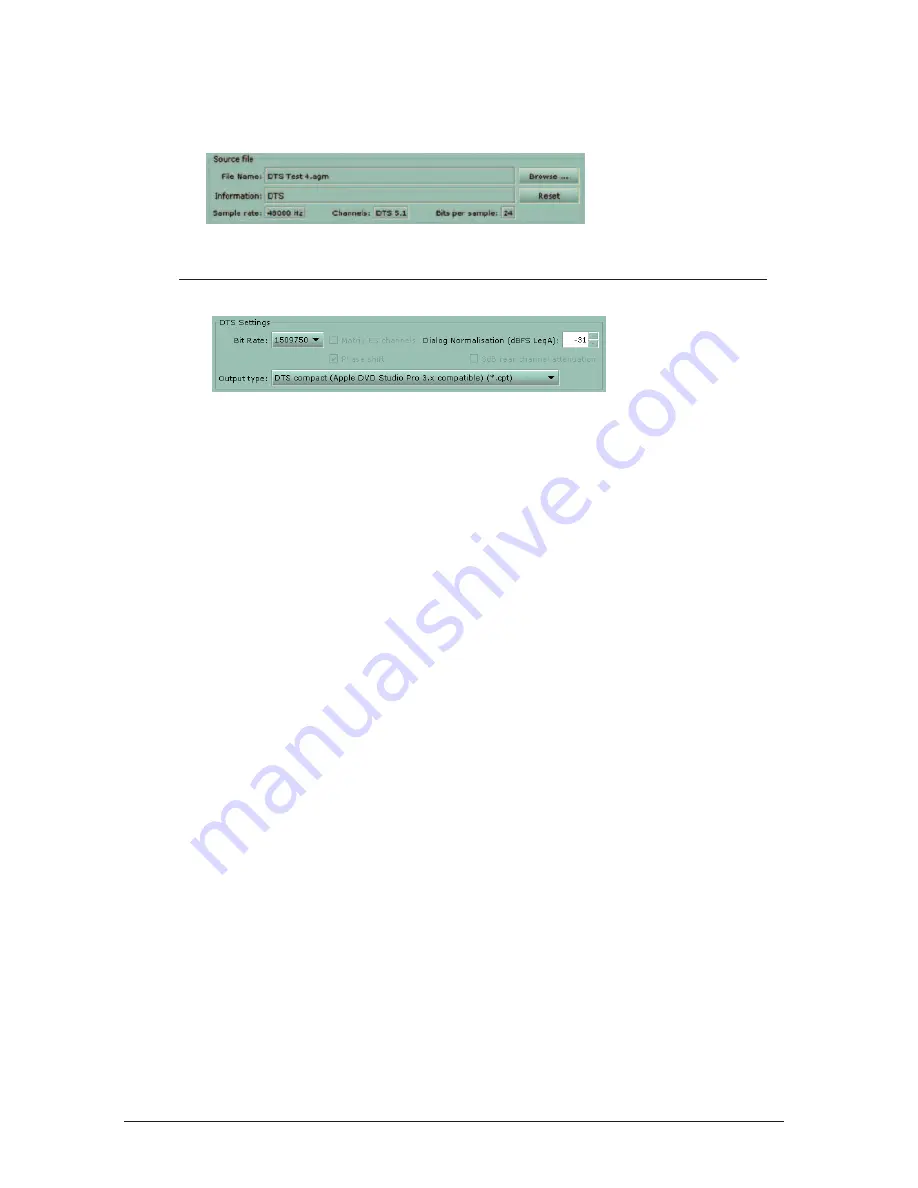
— click this button to reload the values from the packed file, if

necessary.

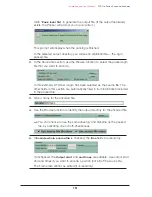
4. Bit Rate and Output type

For 44.1 kHz and 88.2 kHz source files, only one bit rate (1234800) and
output type (.wav) are possible.

With 48 kHz source files for DVD encoding, 

Bit rate 

is selectable: 1509750

bits (1.5 Mbps) or 754500 (754 kbps). 

With 48 kHz source files, 

Output Type

is also selectable:

DTS wave format .wav (Intel byte order, wav header) 

DTS padded format .dts (raw file, no wave header, Motorola format, 
and zero padding to fill frames)

DTS compacted format .cpt (Motorola byte order, zero padding is
removed, timecode is removed but a start time is present). This is the
output type needed for the Apple DVD Studio Pro V3.0.

Wav format is used for music where there is no picture to lock to. Wav is
typically for 5.1 or 6.1 music surround discs. Cpt and DTS formats are used
in DVD authoring. Please refer to 

DVD Authoring for DTS

on page 20, to

determine the correct bitstream to use. Typically, a .cpt file is used, because
the DTS format is a padded file that is used in older DVD authoring systems.

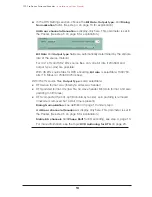
Dialog Normalization,

click the arrows to change the setting, if necessary.

For more information, see 

Dialog Normalization,

page 21.

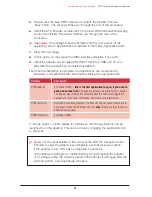
3dB rear channel attenuation

is display-only here. This parameter is set in

the Packer. (See step 5 on page 8 for explanation.)

Matrix ES

into standard surround channels - (read-only flag) specifies mixing

of Center Surround into Left and Right Surround.

Phase shift

ES channels — Works only with ES source files, where it allows

for phase shifting of Left and Right Surround by –45¡ prior to addition of
Center Surround channel.

Note: 

DTS strongly recommends Phase shift be set ON during 6.1 ES

encoding for film. For music, you may wish to experiment with both settings.
For more information, see the topic 

DVD Authoring for DTS

on page 20.

Installation and User Manual –

DTS Pro Series Surround Encoder

13

Summary of Contents for Surround Encoder

Page 1: ...e s s e e e DTS Pro Series Installation and User Manual surround encoder A Full Featured Suite for Today s Digital Audio Workstation...

Page 2: ...of all other warranties expressed or implied including warranties of merchantability and fitness for a particular purpose In no case shall DTS be liable for special incidental consequential or indire...

Page 3: ...6 3 USING THE PRO PACKER 7 4 ENCODING IMMEDIATELY AFTER PACKING 12 5 USING THE ENCODER IN STANDALONE MODE 14 6 ENCRYPTING A FILE 18 6 1 Decrypting a File 19 7 DVD AUTHORING FOR DTS 20 8 UNINSTALLING T...

Page 4: ...Encrypter utility and libraries Important Proper privileges are required to install and uninstall Surround Encoder software including the WIBU driver for the auto detected adapter key dongle Instruct...

Page 5: ...r dongle Surround Encoder requirements Mac OS X version 10 3 5 or higher Java Runtime 1 4 1 or higher There are patches available at http www apple com downloads macosx apple to install these two abov...

Page 6: ...he Software Update icon A list of updates will be displayed Check and download those that you require Installing DTS Surround Encoder Caution Do not insert the adapter key dongle before the software h...

Page 7: ...plication to open if you need to pack and encode files The packer prepares the audio for the encoder The Packer also informs the encoder about the channel configuration sample rate time code informati...

Page 8: ...ompatible source files See Using the Pro Packer section 3 Important Open the DTS Encoder first only if there are files that have already been packed If you choose Pack and Encode the Pro Packer will a...

Page 9: ...o Packer Initial screen Our example In this example 48 kHz files are being packed and then encoded to produce a DTS 5 1 DVD 1 Select channel mapping L C R for the front channels See Table 1 page 11 2...

Page 10: ...option is Local meaning the output file will be placed on your local computer Next determine the location for the output packed file The Browse button will open a Select Output Directory window that...

Page 11: ...ted automatically based on the length of the Input Files and the selected frame rate 11 The Input Files section of the screen is where you select the individual source file to be assigned to each enco...

Page 12: ...shown in this example Input file sample rate does not match the selected output sample rate In this case you must change the output sample rate to match step 4 or provide inputs of the proper sample...

Page 13: ...Channel Configuration Combinations Front Back LFE Input fields in Brief description Channels Channels On Off pull down selection of format steps 1 2 3 pg 4 Lt Rt Grayed out Grayed out Lt Rt L R matrix...

Page 14: ...s in this example so the Encoder will use the same filename and directory of the packed agm file Otherwise uncheck these options type a filename and navigate to a directory for the encoded file 2 If E...

Page 15: ...surround discs Cpt and DTS formats are used in DVD authoring Please refer to DVD Authoring for DTS on page 20 to determine the correct bitstream to use Typically a cpt file is used because the DTS fo...

Page 16: ...k OK In the Output directory you will see two additional files the log encoding report and the cpt encoded file 5 Using the Encoder in Standalone Mode The DTS Surround Encoder may be used separately f...

Page 17: ...ields in this section are automatically filled in from information included in the packed file 3 Type a name for the encoded file 4 Use the Browse function to identify the output directory for the enc...

Page 18: ...ts 1 5 Mbps or 754500 754 kbps With 48 kHz source files Output Type is also selectable DTS wave format wav Intel byte order wav header DTS padded format dts raw file no wave header Motorola format and...

Page 19: ...s bar at the bottom of the screen will indicate the progress of the encode task Next a prompt will inform you that the encoding task is finished Click OK In the output directory the output file cpt in...

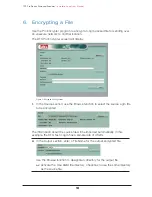
Page 20: ...ct the source agm file to be encrypted The information about the source file will be imported automatically In this example the DTS Test 4 agm has a sample rate of 48 kHz 2 In the Output section enter...

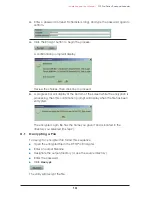
Page 21: ...this confirmation prompt will display when the file has been encrypted The encrypted agm file has the name you gave it and is located in the directory you selected in step 2 6 1 Decrypting a File To...

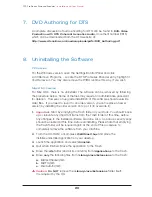
Page 22: ...by installing the older version on top of it to overwrite it 1 Important Start by emptying the Trash folder in your Dock You should back up or relocate any important items from the Trash folder at th...

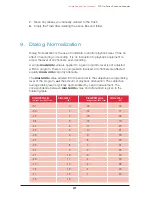
Page 23: ...ed equally DIALNORM can only attenuate The DIALNORM value entered into the encoder is the subjective average dialog level of the program not the amount of playback attenuation The subjective average d...

Page 24: ...ialog levels then match on playback and no user adjustment should be necessary For music which contains no dialog DIALNORM may be used to set playback loudness at a level appropriate in the context of...

Page 25: ...Installation and User Manual DTS Pro Series Surround Encoder 23...

Page 26: ...DTS Pro Series Surround Encoder Installation and User Manual 24...

Page 27: ...Installation and User Manual DTS Pro Series Surround Encoder 25...

Page 28: ...st quality audio available on the market today With more than 280 million DTS licensed consumer electronics products available worldwide there s a compelling reason for content owners and producers to...

Reviews: