


12
Note: After turning on the power of the module it always starts
in the KIT-mode.
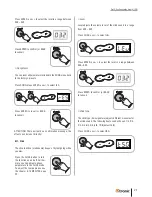
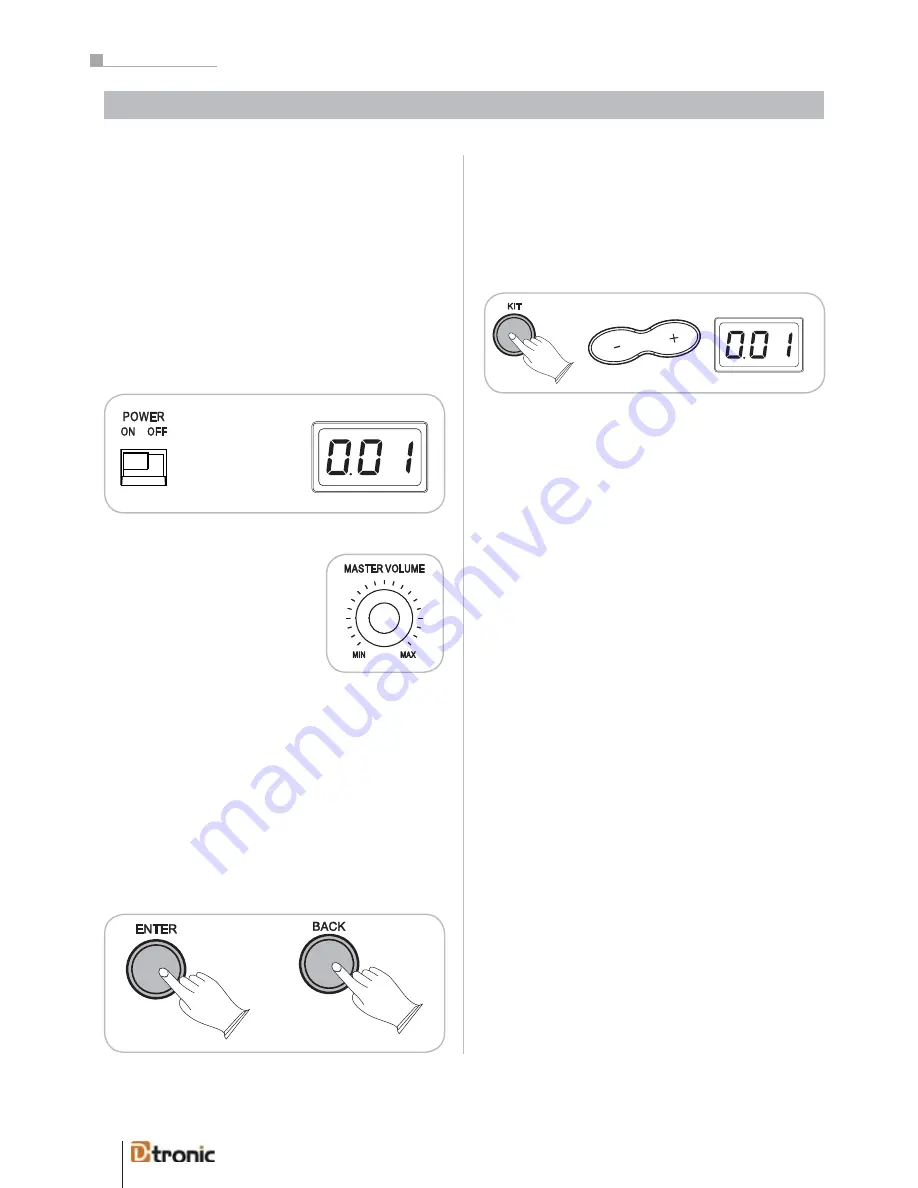
ENTER+BACK Buttons
With the ENTER- and BACK-buttons you are able to navigate
between the different levels of the menu. Pressing ENTER
confirms and saves currently edited parameters. It also leads
to the subordinated menu level or saves the parameter and
jumps back to the superordinated menu.
The BACK button cancels and discards the changed parame-
ter. After pressing the button you will jump back to the super-
ordinated menu level.
Selecting a Drumkit
The unit has 25 (001-0025) preset drumkits and 5 (026-030)
user kits. Press the KIT button and the current kit number
appears; it is directly ready to play. To select another kit just
press +/--buttons to go to the next or previous drumkit.
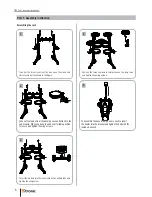
Switch the Power On
To turn the drumkit on and off use the POWER switch located
on the left side of the drum module. When the drum kit is tur-
ned on, the number of the selected drumkit will appear in
the LED-display. Connect the module to a power socket car-
rying the correct voltage (indicated on the rear panel). Use the
enclosed power cord. Never connect the module to a power
socket that is also supplying power to electric engines or big
domestic appliances. Always avoid connecting too many elec-
tric devices to the same power socket.
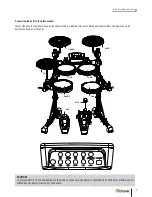
Set the Main Volume
Use the MASTER VOLUME controller
to adjust the overall volume. It con-
trols the volume of the output signal
(Master Out), the input signal (Aux
In) and headphones (Phones).
Part 4: Main functions
Part 4: Main functions
.
Connect the module to a power socket carrying the cor-
rect voltage (indicated on the rear panel). Use the enclosed
power adaptor. Never connect the module to a power socket
that is also supplying power to electric engines or big
domestic appliances. Always avoid connecting too many
electric devices to the same power socket. To turn the
drum kit on and off use the POWER switch located on the
left side of the drum module. When the drum kit is turned
on, the number of the selected drum kit will appear in the
LED-display.
The unit has 25 (001-0025) preset drum kits and 5 (026-
030) user kits. Press the KIT button and the current kit
number appears; it is ready to play. To select another kit
just press +/--buttons to go to the next or previous drum
kit.
Note: After turning on the power to the module it always
star ts in the KIT-mode.
Selecting a Drum Kit


