


PRECAUTIONS
•
Always exercise care when operating and handling the 139CS.
•
Never disassemble any portion of the enclosure. It will void any product warranty on the
139CS.
•
Do not use any AC/DC adapter other than the one provided with the device or acquired from
the manufacturer or its partners.
•
In the unlikely event that smoke, abnormal noise, or strange odor is present, immediately
power down the 139CS and disconnect all power sources.
•
Please report the problem to your device provider immediately.
Powering ON and OFF
The Power Button is located on the front of the 139CS. The Power Button may be configured to
function differently depending on the power options of the operating system. In general, to turn
the 139CS on, push and release the Power Button on the front bezel. The power LED will be lit
(blue) and the corresponding interface will be displayed on the display monitor.
To turn off the device, again depending on software operating system, push and release the
Power Button or use a software shutdown interface. In the event of system lockup, the Power
Button may be used to perform a reset on the device. To do that, push and hold the Power
Button for at least 4 seconds. The system will shut down and all unsaved work may be lost.
Pushing on the Power Button again will restart the device.
Device Ports
The 139CS features an optimal set of I/O ports while preserving the compact size of the system.
The video-out connectors, network (10/100/1000 BaseT Ethernet), COM ports, and power ports
are supplemented by USB and audio ports. Through its USB ports, the 139CS supports a wide
range of USB-based peripherals. These peripherals are applicable in providing the means for
software installation, application storage, data storage, and system software recovery and updates.
Wireless Networking
Wireless LAN
The Medical-Cart Computer is often delivered with an embedded (user-inaccessible) 802.11ax
WLAN adapter equipped with a hidden custom antenna.
•
Through the support of typical WLAN adapters, the Medical-Grade Integrated LCD System
should be able to detect all 802.11 access points in the vicinity for you to select the access
point of your choice for connection.
•
The SSID and WEP/WPA/WPA2 (if enabled) parameters on the Medical-Grade Integrated
LCD System and the access points have to match. The SSID is case-sensitive and it is
recommended that you enable WEP/WPA/WPA2 encryption (or advanced alternatives) for
secure access.
•
When WEP/WPA/WPA2 is enabled, you may need to consult your network administrator
or your networking equipment literature to properly con
fi
gure associated settings such as
Authentication mode, etc.
•
Refer to the access point operating manuals for setting up the 802.11 access points.
Bluetooth
The Medical-Cart Computer features a built-in Bluetooth adapter that operates on the Microsoft
Windows Bluetooth protocol. The Bluetooth con
fi
guration application is invoked from the System
Tray or from the Control Panel. Follow the instructions and options provided within the applica-
tion to con
fi
gure and invoke Bluetooth connectivity with the corresponding peripherals.
NOTE:
Bluetooth devices or accessories that are not compatible with the Microsoft Windows
Bluetooth protocol may not work with the devices.
2
3
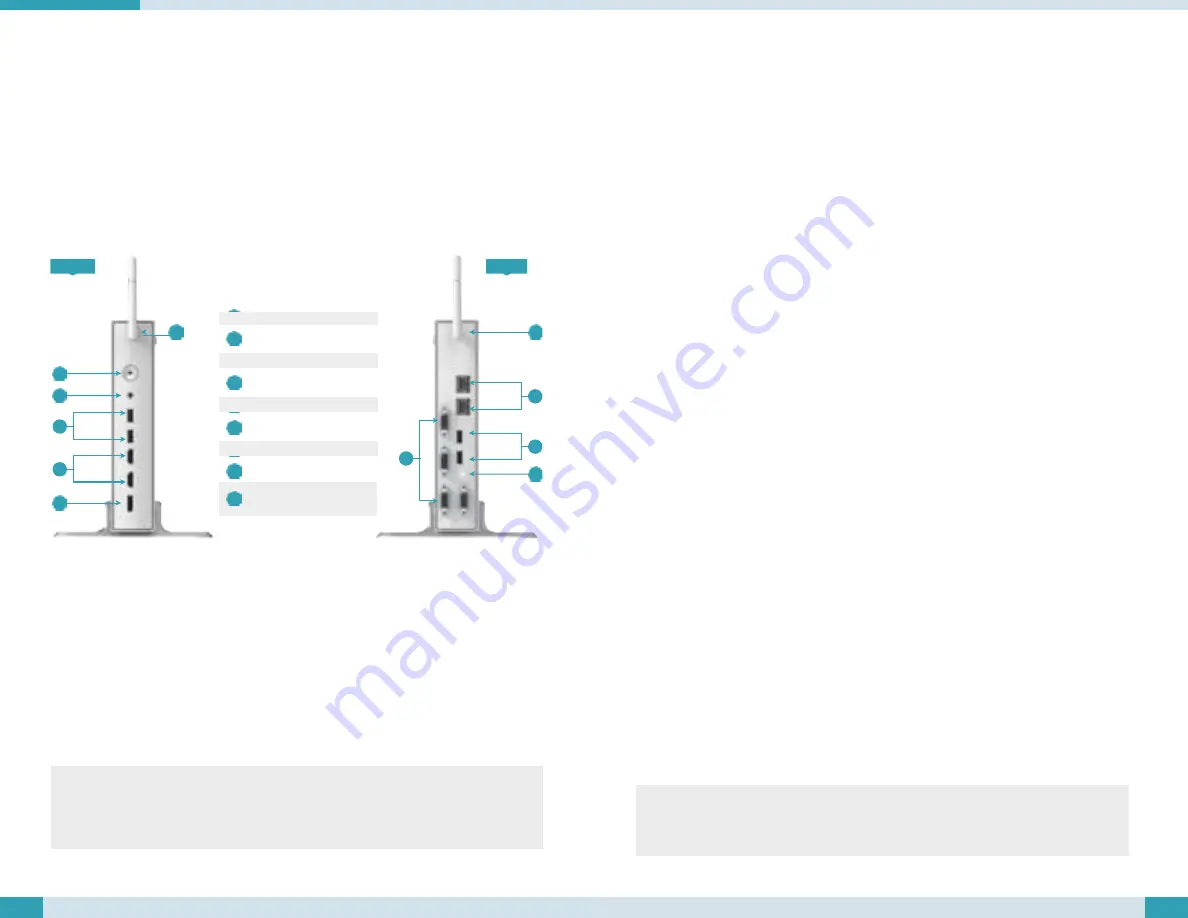
Front
Back
I
I
A
B
G
C
C
F
D
H
E
A
Power Button
B
Audio Jack
C
USB 3.0 Port
D
HDMI
E
DisplayPort
F
COM Port (RS232)
G
Ethernet
H
DC-in
I
Wi-Fi dipole antenna
(optional)
NOTE:
Avoid using the Power Button (“hold 4+ seconds” feature) to turn off the device—this form
of hardware shutdown is intended to be a means of recovery from device lockups, and not as
normal operation.


