background image

7mm

16

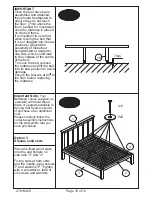
IMPORTANT

Once the feet have been 
assembled and attached, 
they should be adjusted to 
ensure they do not touch 
the floor, (7mm above the 
floor) to allow for movement 
once the mattress is placed 
on the bed frame.
It is important to note that 
when moving the bed that 
it is not dragged into its new 
position to prevent the 
possibility of these feet 
being twisted or angled to 
one side, which could lead 
to the collapse of the centre 
of the bed.
To move the bed, remove 
the mattress and lift the bed
into its new position to avoid 
damage.
Ensure the feet are at 90  to
the floor before replacing 
the mattress.

Place the fixed wood slats
onto the slat holders on
side rails "3" and "4".

Fix the slats at both ends
and the middle using screws
"I" and washers "P", tighten
with a screwdriver. total of
six screws and washers. 

Option 1:
Dreams solid slats

Important Note:

Your

Bedstead comes supplied as
 standard with Solid Wood 
Slats, or upgrade available to 
Sprung Slat System at point 
of purchase at an additional 
cost.
Please carefully follow the 
correct assembly instructions 
for the slat system that you 
have purchased.

Page 10 of 12

27814400

1

2

3

4

Ix6

Px6

Summary of Contents for HAMPSTEAD BED

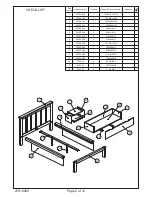
Page 1: ...card any of the packaging until you have checked that you 3 have all the parts and the pack of fittings To ensure an easier assembly we strongly advise that all fittings are 4 only finger tightened du...

Page 2: ...80 3 32434144 1 1920x395x104 4 32434244 1 1920x395x104 5 32432344 2 340x310x17 6 32432444 2 340x310x17 7 32432544 2 416x340x17 8 32432644 2 416x340x37 9 32434344 1 1354x310x19 10 32432844 1 500x260x17...

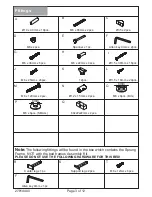
Page 3: ...814400 A 10 x 40mm x 10pcs B C D E M8 x 65mm x 2pcs 35 x 2pcs M8 x 2pcs Spanner x 1pc Center leg x 1pc R Support leg x 2pcs T M6 x 12mm x 8pcs Allen key 4mm x 1pc F G M6 x 38mm x 6pcs H S I 3 5 x 30mm...

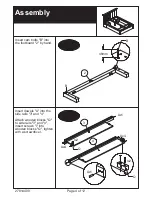
Page 4: ...to the footboard 2 by hand Insert dowels A into the side rails 3 and 4 Attach wooden blocks Q to side rails 3 and 4 insert screws I into wooden blocks Q tighten with a screwdriver Page 4 of 12 2781440...

Page 5: ...ner E Insert screws I into wooden blocks Q tighten with a screwdriver For the headboard use bolts M and washers O through the headboard and nuts N in the side rails Tighten using spanner E Dx2 Cx2 Ex1...

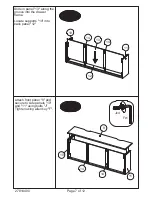
Page 6: ...Kx4 8 Install castors K to panel 8 tighten with screws L x2 Fx1 Jx4 Attach side panels 10 and 11 to back panel 12 using bolts J Tighten using allen key F Footboard Drawer Page 6 of 12 27814400 11 10...

Page 7: ...in panel 13 along the groove into the drawer frame Locate supports 14 into back panel 12 Attach front panel 9 and secure to side panels 10 and 11 using bolts J Tighten using allen key F Fx1 Jx4 13 10...

Page 8: ...Secure supports 14 to front panel 9 and back panel 12 using screws I Install castors K to body of drawer tighten with screws L Page 8 of 12 27814400 14 9 12 14 Lx8 Kx4 Ix4...

Page 9: ...ge 9 of 12 27814400 Attach central support 15 to support feet 16 Using bolts G tighten using allen key F Locate central support 15 in between the headboard 1 and footboard 2 1 2 3 4 15 15 16 16 Fx1 Gx...

Page 10: ...mattress and lift the bed into its new position to avoid damage Ensure the feet are at 90 to the floor before replacing the mattress Place the fixed wood slats onto the slat holders on side rails 3 a...

Page 11: ...ocated on the side rails 3 and 4 Position the slat frame so that the holes in the frame align with those in the side rails 3 and 4 Secure the frame to the side rails 3 and 4 by threading bolts G washe...

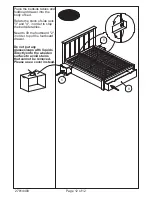
Page 12: ...ide rails 3 and 4 in order to stop the bedside tables Need to lift the footboard 2 in order to put the footboard drawer Do not put any glasses cups with liquids directly onto the wooden surface to avo...

Reviews: