11
2
2
.
.
I
I
n
n
s
s
t
t
a
a
l
l
l
l
i
i
n
n
g
g
Y
Y
o
o
u
u
r
r
V
V
i
i
g
g
o
o
r
r
R
R
o
o
u
u
t
t
e
e
r
r
This section will guide you to install the router through hardware connection and
configure the router’s settings through web browser.
2
2
.
.
1
1
H
H
a
a
r
r
d
d
w
w
a
a
r
r
e
e
I
I
n
n
s
s
t
t
a
a
l
l
l
l
a
a
t
t
i
i
o
o
n
n
Before starting to configure the router, you have to connect your devices correctly.
1.
Connect the DSL interface to the external ADSL splitter with an ADSL line cable.
2.
Connect one port of 4-port switch to your computer with a RJ-45 cable. This device
allows you to connect 4 PCs directly.
3.
Connect one end of the power cord to the power port of this device. Connect the
other end to the wall outlet of electricity.
4.
Connect the telephone sets with phone lines (for using VoIP function). For the user
of the model without VoIP ports, skip this step.
5.
Connect the ISDN NT1/1+ box with ISDN cable. This connection is available for
Europe only.
6.
Power on the router.
7.
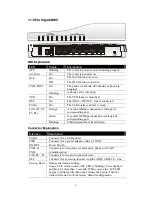
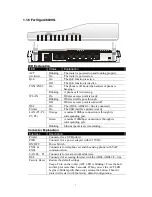
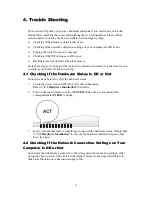
Check the
ACT
LED to assure network connections.
(For the detailed information of LED status, please refer to section 1.1.)
ACT
WLAN
ADSL2+
Link
Data
Factory
Reset
DSL
P1
P2
P3
P4
PWR
Printer
FXS2 FXS1
Internet
ADSL
Splitter
or
(Microfilter)
Land line jack
1
2
4
3
ACT
QoS
FX
Analog Phone
Analog Phone
Phone
Line
6
ISDN
7
NT1/1+
5
ISDN Network
Caution
: Each of the FXS ports can be connected to an analog phone only. Do not
connect the FXS ports to the telephone wall jack. This connection might damage your
router.

