background image


ii 


DR

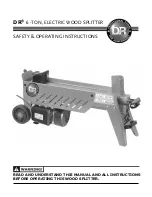
 4 -Ton WOOD SPLITTER Safety & Operating Instructions


And congratulations on your purchase of a new


DR 4 -Ton WOOD SPLITTER!


We have done our utmost to ensure that your


DR 4 -Ton WOOD SPLITTER will be 

one of the most trouble-free and satisfying pieces of equipment you have ever owned.  
Please let us know of any questions you may have.  We want to answer them as quickly 
as possible. When you do call, please have your order number handy.  For technical 
assistance, please call Toll-Free 1-800-DR-OWNER(376-9637) and one of our 
Technical Support Representatives will be happy to help you. We also hope to hear 
from you on how much you like your new helper. 


And, please tell your friends about your new DR 4 -Ton WOOD SPLITTER! Having 
DR Owners spread the word about our products and our way of doing business is the 
best advertising we can have, and the best way to help us provide even better service in 
the years to come. 


Thanks once again!  

for all of us at 
Country Home Products, Inc

.


S

ALES 

M

ANAGER


COPYRIGHT


2005 Country Home Products, Inc. All rights reserved.


Country Home Products, Inc. 
Meigs Road 
P.O. Box 25 
Vergennes, VT 05491 


Toll-free phone

: 1-800-DR-OWNER (376-9637) 

Fax

: 1-802-877-1213 

Web site: 

www.dr-owner.com


Summary of Contents for 4-TON ELECTRIC WOOD SPLITTER

Page 1: ...DR 4 TON ELECTRIC WOOD SPLITTER Safety Operating Instructions Please read instructions before operating machine...

Page 2: ...9637 and one of our Technical Support Representatives will be happy to help you We also hope to hear from you on how much you like your new helper And please tell your friends about your new DR 4 Ton...

Page 3: ...R Controls and Features 9 Unpacking the DR 4 Ton WOOD SPLITTER 10 Chapter 4 Operating Your DR 4 Ton WOOD SPLITTER 11 Before Starting the Electric Motor 11 Splitting Safety 13 Operating the DR 4 Ton WO...

Page 4: ...iv DR 4 Ton WOOD SPLITTER Safety Operating Instructions...

Page 5: ...happy to help you Conventions used in this manual Tip This is a helpful hint to guide you in getting the most out of your DR 4 Ton WOOD SPLITTER Tools Needed This indicates you will need a special to...

Page 6: ...2 DR 4 Ton WOOD SPLITTER Safety Operating Instructions...

Page 7: ...g guidelines for safely operating your new machine Preparing to Use the DR 4 Ton WOOD SPLITTER Read these Safety Operating Instructions before you use the DR 4 Ton WOOD SPLITTER Become familiar with t...

Page 8: ...4 DR 4 Ton WOOD SPLITTER Safety Operating Instructions...

Page 9: ...the Machine Safely To be safe do not operate the machine near children or pets and never allow children to operate the wood splitter Keep your hands and feet clear of the splitting area while the ram...

Page 10: ...in a stalled position for more than 5 seconds The hydraulic fluid may overheat and damage the machine If the wood being split is excessively hard stop the machine rotate the log 90 and try again If t...

Page 11: ...d Never operate the wood splitter unless the power cord is plugged into a properly grounded outlet which supplies 110 120V power and is protected by a 15 amp circuit breaker If an extension cord is to...

Page 12: ...oving cap Tip See page 21 for Troubleshooting Tips Additional Information and Potential Changes Country Home Products Inc reserves the right to discontinue change and improve its products at any time...

Page 13: ...ay be helpful to familiarize yourself with the controls and features on your wood splitter by reviewing the picture below before beginning the steps outlined in this chapter DR 4 Ton WOOD SPLITTER Con...

Page 14: ...support legs and the rear center rest 3 If you have banding around your motor and frame as shown in Figure 2 cut the banding Be careful when cutting the banding 4 Remove the wooden packing wedge betwe...

Page 15: ...d the wood splitter 2 Plan your work before you start Have the logs to be split positioned where they can be easily reached Remember the maximum log length is 20 and the maximum diameter is 10 for the...

Page 16: ...rea around the Hydraulic Fluid Fill Drain Port Figure 5 and then using the adjustable wrench unscrew the Dipstick located in the Hydraulic Fluid Fill Drain Port 7 Clean the Dipstick and check the leve...

Page 17: ...flat on the beam between the Log Guides Figure 6 with butt end toward hydraulic cylinder ram Never attempt to split a log at an angle and be sure the wedge and ram will contact the log squarely on th...

Page 18: ...wood with full power from your machine 1 With a log properly loaded and with the Air Bleed Screw open depress the Electric Motor Start Button with your right hand and wait a few seconds as the motor...

Page 19: ...e 8 and activate the ram to push the wood wedge under the jammed log 3 Repeat this process using progressively larger wedges until the jammed log is freed Figure 8 4 Lift the log off the wood splitter...

Page 20: ...16 DR 4 Ton WOOD SPLITTER Safety Operating Instructions...

Page 21: ...condition of the wood splitter e g nuts bolts welds etc Before each season Check the hydraulic fluid level page 19 Use an AW32 hydraulic fluid for operation over 40 F and Dextron automatic transmissio...

Page 22: ...ughly and reinstall being careful not to damage the threads of the aluminum Hydraulic Fluid Cylinder End Cover 5 Open the Air Bleed Screw using a small Phillips screwdriver 4 turns and cycle the ram b...

Page 23: ...PLITTER in a dry area to prevent moisture from damaging the electrical components of the machine Make sure that the Air Bleed Screw is tightened See Figure 4 on page 11 WARNING When performing any mai...

Page 24: ...20 DR 4 Ton WOOD SPLITTER Safety Operating Instructions...

Page 25: ...hydraulic system See page 8 and page 18 Step 5 Is the wood splitter on a level surface See page 11 Step 1 Make sure the voltage at the outlet or extension cord connection to the wood splitter is at l...

Page 26: ...ram operation symptom on page 21 Check the hydraulic fluid level See page 18 Bleed any accumulated air from the hydraulic system See page 8 and page 18 Step 5 If the problem persists call 1 800 DR OWN...

Page 27: ...M8 27 204801 O ring Oil Seal 28 202491 Washer Flat M8 29 204771 Washer Spring M8 30 204791 Bolt M8 x 30 31 204651 Foot Motor Rubber Right 32 203721 Foot Motor Rubber Left 33 204571 Screw Phillips Ref...

Page 28: ...Guiding 70 204811 Washer Flat M6 71 203371 Nut M6 72 204821 Bolt M6 x 14 73 202691 Leg Support 11 74 182201 Handle Carry 75 203381 Screw Cr head M6 x 20 Safety Labels Supplies 206661 Bleed Screw Labe...

Page 29: ...DR 4 Ton WOOD SPLITTER Safety Operating Instructions 25 DR 4 Ton Electric Wood Splitter Schematic...

Page 30: ...26 DR 4 Ton WOOD SPLITTER Safety Operating Instructions Notes...

Page 31: ...chine are not covered by this warranty During the warranty period the warranty holder is responsible for the machine transportation charges if required During the warranty period warranty parts will b...

Page 32: ...this checklist each time you use your machine HARDWARE Check all nuts and bolts to be sure that the components are secure FRAME Check all welds to be sure that the frame is in tact and secure CLEAN Ma...

Reviews: