a P P l i c at i o n
Gun-applied verSion:
1. Adjust flow control screw on
back of gun to an open position.
Immediately press trigger to fill
gun with foam while dispensing
into an appropriate waste
receptacle.
2. Keeping can inverted, insert
applicator nozzle into the
penetration to be filled and
begin dispensing foam slowly.
Fill gap less than 1/3 full to
allow for proper expansion.
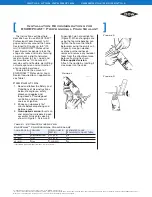
3. The foam dispensing gun is
recommended to control size
of the foam bead (from 1/8"
to 3" [3 mm to 75 mm]). This
is achieved by squeezing the
trigger on the foam dispensing
gun or by adjusting the flow
control knob on the back of the
gun to set how far the trigger
can be pulled (Figure 5).
CauTion:
do not inject the foam sealant
into blind six-sided cavities, such
as window mullions. The foam
must be exposed to atmospheric
moisture to thoroughly cure.
Tip: using grease or petroleum
jelly in the adapter of the gun
may reduce possibility of foam
gluing the can on the gun.
Tip: apply foam in a continuous
bead, with no voids or breaks, to
achieve an effective seal.
installation information . commercial/residential
®™Trademark of The Dow Chemical Company (“Dow”) or an affiliated company of Dow
*Foam should only be dispensed around the outside of the box, not inside.
Figure 5
Electrical wire penetration
t Y P i c a l a P P l i c at i o n S
Outdoor water faucet
Fireplace gas line
Pipe penetration
Sewer plumbing penetration
Wall-ceiling juncture
Electrical outlet*
Attic hatch
HVAC vent


