


BASIC CONFIGURATION GUIDE
PAGE 17
5 Connect to other systems
If you want to receive the pass data collected by the VTAP100 in other systems, you will need
to enable a virtual COM port, or serial RS232 interface if your hardware permits.
Note:
The serial RS232 interface is an option on the VTAP100-OEM hardware only. The
Wiegand interface is only available on the VTAP100-PACW model.
Send pass data over a virtual COM port
are included in this guide.
There are a number of other advanced features which may be needed by integrators, for more
complex applications. For information about other serial interfaces, and using the virtual
COM port in passive mode, you will need to refer to the Advanced Configuration Guide and
Commands Reference.
5.1 Send pass data over a virtual COM port
A virtual COM port setting for the USB interface will mean that the VTAP100 is treated by
the connected PC as a COM port, as well as a mass storage device. The COM port will be
active and will send any pass data received as soon as it is read. (Refer to the Advanced
Configuration and Commands Reference Guide if you want to collect pass data only in
response to queries over the COM port.)
To enable the serial virtual COM port requires several steps:
1. If you are using Windows, install the appropriate driver by right clicking the
VTAP100.inf
file, in the VTAP100 file system, and choosing 'Install'.
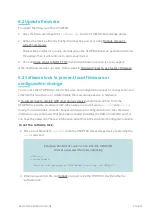
2. Make changes to the
config.txt
file.
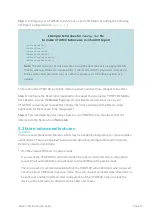
Example: Changes to
config.txt
to enable the virtual COM port
!VTAPconfig
ComPortEnable=1
ComPortMode=1
ComPortSource=81
Here
ComPortEnable=1
switches the virtual ComPort on (where
=0
is disabled).
ComPortMode=1
chooses to send data over the ComPort interface. This happens for all
passes cards/tags that can be read, by using
ComPortSource=81
.


