

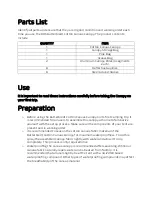


Assembly
Tarp Canopy setups may be a bit confusing the
fi
rst time, but will quickly become
second nature! We recommend siting the canopy’s ridge in a North-South orientation.
Step 1
o
Remove the aluminum canopy pole segments from the canopy storage bag.
Assemble each canopy pole by sliding the ends of each segment together. There
are four sections to each pole. Each pole will have a pointed base end and a
metal peg top end.
o
Remove the co on canvas canopy from the storage bag. Spread the canopy
flat
on the ground.
o
ch the guylines to the tarp with your favorite self-tightening knot through
the steel tabs. We recommend the Figure Eight knot popular in rock climbing.
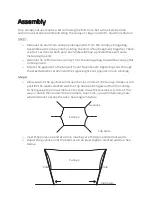
Step 2
o
Allow slack in the guylines and stake the six corners of the canopy. Make sure to
position the stakes slanted with the top hook pointing away from the canopy.
To help gauge the proper distance to stake, draw the tensioners ½ to ¾ of the
way in, stake, then loosen the tensioners. Over time, you will intuitively know
what distance to stake the lines. See diagram below.
Top View
Side View
Guylines
Pole
Pole
Canopy
Canopy
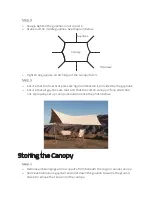
o
Insert the poles one end at a time, making sure the tip is pointed outwards.
o
Adjust the guylines until the poles are in an ideal slightly-slanted position. See
below.


