background image

7

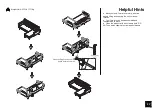
Step 2

Attach 

C

 to 

A

 with        ,       ,       ,

as shown.

4

Option 1

4

5

6

4

6

4

4

     There are 2 options for the chaise

position.From Step 2 to Step 6,we will show

you how to assemble Option 1.

      If you intend to assemble Option 2, 

please start from Step 7 instead.

5

6

5

4

8

Summary of Contents for 2275029NUK

Page 1: ... STORE If parts are missing or damaged we will gladly ship your replacement parts free of charge Call 01942 524100 Email cseurope dorel com Lot Number Thank you for purchasing from Dorel UK IMPORTANT READ CAREFULLY RETAIN FOR FUTURE REFERENCE Sectional Sofa Bed 2276629NUK Blue Linen 2277929NUK Green Linen 2275429NUK Light Grey Linen 2275029NUK Dark Grey Linen ...

Page 2: ...ice purchaser must present original bill of sale Components repaired or replaced are warranted through the remainder of the original warranty period only The defective components will be repaired or replaced without charge subject to the terms and conditions described above Read Before Beginning Assembly Caution Call our Customer Care phone number if you need assistance Work in a spacious area and...

Page 3: ...issing please contact your Retailer Before you throw the package please use the Check Box to identify the parts and ensure that you have all the parts needed for the assembly There are inner box es that include components required to complete this assembly Parts Replacement Parts visit call 01942 524100 ...

Page 4: ...issing please contact your Retailer Before you throw the package please use the Check Box to identify the parts and ensure that you have all the parts needed for the assembly There are inner box es that include components required to complete this assembly Parts Replacement Parts visit call 01942 524100 ...

Page 5: ... 8 7 2 3 4 2 3 8 3 8 16 Please do not completely tighten all the hardware until the entire assembly is complete unless otherwise indicated in the step by step instructions The screw s bolt s to be used at each step are shown in actual size in the lower right corner of the page ...

Page 6: ...6 Step 1 Hand tighten into C F 1 1 F ...

Page 7: ...with as shown 4 Option 1 4 5 6 4 6 4 4 There are 2 options for the chaise position From Step 2 to Step 6 we will show you how to assemble Option 1 If you intend to assemble Option 2 please start from Step 7 instead 5 6 5 4 8 ...

Page 8: ...8 Step 3 Attach D E to A with as shown 4 5 4 5 3 3 3 4 5 7 ...

Page 9: ...9 Step 4 4 5 6 Attach F to B with as shown 4 5 6 4 6 4 4 5 4 F 8 ...

Page 10: ...10 Step 5 Attach D E to B with 53 as shown F 3 4 5 7 4 5 3 4 5 3 ...

Page 11: ...11 Step 6 Attach A B with as shown 4 6 2 2 6 4 4 2 X 2 F 4 6 2 4 ...

Page 12: ...12 Step 7 Attach F to A with as shown 4 5 6 Option 2 4 5 6 F 4 6 4 4 5 4 8 F ...

Page 13: ...13 Step 8 Attach D E to A with as shown 3 4 5 7 F 3 4 5 4 5 3 ...

Page 14: ...14 Step 9 Attach C to B with as shown 4 5 6 4 5 6 4 6 4 4 5 4 8 ...

Page 15: ...15 Step 10 Attach D E to B with as shown 4 5 3 4 5 3 3 4 5 7 ...

Page 16: ...16 Step 11 Attach A B with as shown 4 6 2 2 6 4 4 X 2 2 F 2 4 6 4 ...

Page 17: ... with two people lifting and carrying the unit to its new location Your furniture can be disassembled and reassembled to move Clean the product with a soft damp cloth DO NOT use harsh chemicals or abrasive cleaners Open the Zipper and push this button before you fold it ...

Reviews: