OP000530
Inspection, Maintenance and Adjustment
4-18
Check for Leaks in Hydraulic System
1.
Perform a daily walk-around inspection to make sure that
the hoses, piping, fittings, cylinders and hydraulic motors
are not showing any signs of leakage. If any is noted,
determine the source of the leak and repair.
Check Fuel Level
1.
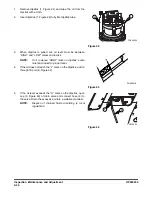
At end of each work day, fill fuel tank. Add fuel through fuel
fill tube (1, Figure 20). When working at a temperature of
0°C (32°F) or higher, use ASTM No. 2-D or its equivalent.
At temperatures below 0°C (32°F) use ASTM No. 1-D or its
equivalent.
2.
Make sure that the fuel fill hose is grounded to the
excavator before fueling begins.
3.
Check the amount of fuel in the tank by observing the fuel
tank sight gauge (2, Figure 20) and fuel gauge in monitor
panel. Fill the tank using the fill tube with the proper fuel for
the operating conditions.
NOTE:
See “Fluid Capacities” on page 4-8. for
capacity.
4.
The excavator may be equipped with the optional battery
operated fuel fill pump. The pump assembly is located in
the battery box. Put the suction hose of the pump into the
fuel resupply tank. Turn the switch in the battery box "ON,"
and the fuel will be pumped into the excavator fuel tank.
5.
Do not overfill the tank.
6.
Securely tighten cap after fueling.
NOTE:
If breather holes in cap are clogged, a vacuum
may form in the tank preventing proper fuel flow
to engine. Keep holes in fuel cap clean.
FG006597
2
1
Figure 20
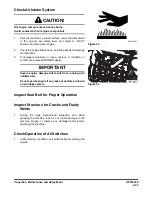
WARNING!
Use extreme safety precautions while refueling to prevent
explosions or fire.
Immediately clean up any split fuel.
Figure 21
FG000317
3
3
Summary of Contents for DX190W
Page 2: ......
Page 71: ...OP000528 2 3 Operating Controls ...
Page 128: ...OP000528 Operating Controls 2 60 CD Player Optional AST DIR FG000109 Figure 135 ...
Page 196: ......
Page 292: ...OP000530 Inspection Maintenance and Adjustment 4 96 ...
Page 304: ...OP000440 6 8 Troubleshooting ...

