15
Donaldson Company, Inc.
Filter Bag
1. Activate the pulse cleaning for 10 to 15 minutes to
remove excess dust from the filter bags.
2. Remove header cover, if equipped.
3. Remove jet tubes and set aside.
4. Remove the hex nuts securing the wire insert.
Remove the clamps and withdraw the insert and
filter bag. Inspect insert for excess corrosion, broken
mesh, or other damage and replace as necessary.
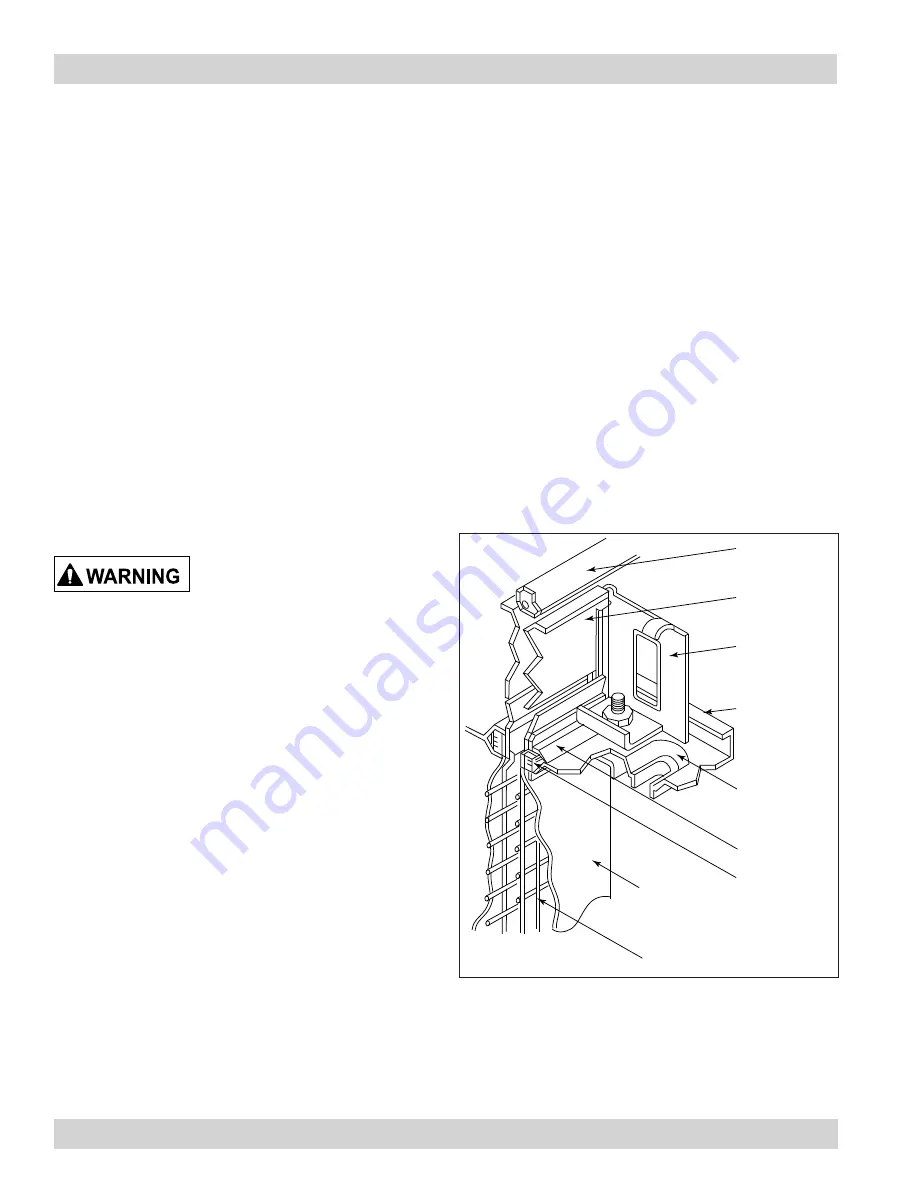
jet tube
insert header
insert clamp
seal frame
recess for
filter bag
filter bag
insert frame
sealing ring
sealing flange
Filter Bag Detail
5. Slide the filter bag over the wire support frame as
shown. Slide bag carefully until top of bag is tight
against the support frame flange.
6. Place filter bag and wire support assembly in seal
frame slots as shown.
7. Position clamps and tighten using a deep well
socket and extension. Do not overtighten. Maximum
recommended torque is 20 ft/lb.
Note: If filter bags are mounted horizontally, tighten
bottom clamp first.
8. Repeat to install all bags.
9. Replace jet tubes with the open end pressed firmly
into its locator and the orifices directed toward the
filter bag.
Filter Removal and Installation
Use proper safety and protective
equipment when removing
contaminants and filters.
Dirty filters may be heavier than they appear.
Use care when removing filters to avoid
personal injury.
Turn power off and lock out electrical
power sources before performing service or
maintenance work.
Turn compressed air supply OFF and bleed
lines before performing service or maintenance
work.
Diaphragm Replacement
1. Remove nylon tubing by pushing inward on the fitting
collar and withdraw the tubing.
2. Remove the hex-head set screws and washers
securing the valve bonnet.
3. Check that the bleed-hole pin is not blocked.
4. Place the diaphragm over the bleed hole pin with the
nylon sealing washer inside the valve throat.
5. Position spring, if equipped, inside the bonnet
recess.
6. Replace valve bonnet with the spring over the
diaphragm disk shoulder and bonnet over the bleed
hole pin. Secure using the hex-head set screws and
washers removed in Step 2.
7. Reconnect nylon tubing and secure.


