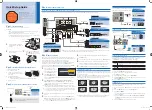
2. Installation Instructions
1. Before mounting the box, make a hole for cables. The hole should be at the top of the
left wall of the box.
2.
The following cables must be connected to the
Display
touch panel:
•
Mains cable 230V AC, 50Hz
- connect to the adapter using connectors.
•
CAT5 cable
- plug to the LAN connector of the touch screen.
The lenght of the cables should allow easy removal of the panel.
3.
Box should be mounted so that its front is flush with the surface of the wall.
3. The First Start
When you first start the panel, you have to configure touch screen. The configurator will
ask you to touch the screen in each corner. When the calibration is done, the
Display
panel will restart automatically. To call the callibration screen again please hit the
Calib
button (bottom left corner of the screen) during
Display
startup.
4. Configuration
In order to begin configuration press the
Setup
button during
DOMIQ/Display
startup.
Configuration window is divided into two parts:
the navigation bar
and
the main window
.
The buttons on the navigation bar, switch between configuration tabs. The currently
selected tab is highlighted in blue.
4.1. System
The
System
tab includes information about: current software version, network connection
and working time statistics.
4.2. WiFi
The
WiFi
tab is used to configure wireless network connection.
Configuration runs in the following order:
1.
Choosing a wireless network. WiFi signal strenght is displayed next to the wireless net-
work name.
2.
Choosing encryption type. Please choose the type of encryption corresponding to that
used in your wireless network. If you select
WPA
, the
Display
panel will automatically
recognize the type of WPA encryption.
3.
Entering the wireless network password.
Active WiFi connection is confirmed by the
Connected
inscription next to the wireless net-
work name.
4.3. Ethernet
If you press the
Ethernet
navigation button,
DOMIQ/Display
will attempt to establish the
network connection via Ethernet. If the attempt was succesfull, it will be confirmed with the
message:
Current IP Address (via Ethernet): <assigned IP address>
.
If your network doesn’t have DHCP, the screen with the following message will be dis-
played:
Current IP Address (via Ethernet): None
.
Installation Manual
www.domiq.pl
© DOMIQ 2011
Page 3 of 4
IM-DSP-EN-111020


