background image

23

Installation recess

The refrigerator must be installed draught-free in a recess (see point “

6.2

”).

The measurements of the recess are given in the table below.
Step (A) is only required for cabinets with a step. Push the appliance far enough into 
the recess until the front edge of the refrigerator casing is flush with the front of the 
recess. Allow a gap of 15-20 mm between the back wall of the recess and the 
refrigeration unit. The floor of the recess must be level, allowing the appliance to be 
pushed easily into its correct position. The floor must be substantial enough to bear 
the weight of the appliance.

Ensure that the refrigerator is installed level in the recess.

Recess measurements:

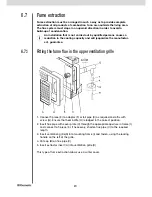
Securing the refrigerator

In the sidewalls of the refrigerator, there are four plastic
sleeves with screws for securing the refrigerator. The
sidewalls or rails attached for securing the refrigerator 
must be designed in such a way that the screws will
remain firmly in place even when under increased load
(while the vehicle is moving).

Always insert screws through the sleeves provided;
otherwise, structural parts embedded in the foam,
such as cables, etc., may be damaged.

Once the refrigerator is in its final position, secure the
screws into the wall of the recess.

The screws must penetrate through the sheet metal
casing of the refrigerator. 

6.5

6.6

RM 7271        825 mm

490 mm             515 mm

220 mm

235 mm

RM 7275        825 mm

490 mm             515 mm

220 mm

235 mm

RM 7291        825 mm

529 mm             515 mm

220 mm

235 mm

RM 7295        825 mm

529 mm             515 mm

220 mm

235 mm

RM 7361        825 mm

490 mm             515 mm

-

-

RM 7365        825 mm

490 mm             515 mm

-

-

RM 7371        825 mm

490 mm             580 mm

220 mm

235 mm

RM 7401        825 mm

529 mm             515 mm

-

-

RM 7405        825 mm

529 mm             515 mm

-

-

RM 7541        825 mm

529 mm             570 mm

-

-

RM 7545        825 mm

529 mm             570 mm

-

-

RM 7551        825 mm

529 mm             570 mm

-

-

RM 7555        825 mm

529 mm             570 mm

-

-

Model            Height H

Width W

Depth T

Height HSt

Depth TS

Width of recess = W

Width of recess = W

Summary of Contents for RM 7271 L

Page 1: ...1 L RM 7295 L RM 7361 L RM 7365 L RM 7371 L RM 7401 L RM 7405 L RM 7541 L RM 7545 L RM 7551 L RM 7555 L Type C40 110 822 6100 01 MBA 02 2010 English N 14 OPERATING INSTRUCTIONS INSTALLATION INSTRUCTIONS EN ABSORPTION REFRIGERATOR Model number Product number Serial number Record for future reference ...

Page 2: ...ith a stipulated use by date and a minimum storage temperature of 4 C or less especially for meat poultry fish sausage pre packed foods Instructions Pack raw and cooked foods separately e g in containers aluminium foil etc Only remove the outside packaging of single packs if all the necessary data such as the use by date for example can also be read on the single packs Do not leave cooled goods ou...

Page 3: ... Winter operation 12 5 10 Interior light 13 5 11 Changing the decor panel 13 5 12 Changing the door 14 5 13 Troubleshooting 15 5 14 Maintenance 16 5 15 Product liability 16 5 16 Environmental hints 16 5 17 Disposal 16 5 18 Energy saving tips 16 5 19 Technical data 17 5 20 Declaration of conformity 17 6 0 Istallation guide 18 6 1 Installation 18 6 2 Draught free installation 20 6 3 Ventilation and ...

Page 4: ...g tap of the gas supply and the valve on the cylinder Open the windows and leave the room Do not switch on anything electrical Extinguish naked flames Never open the cooling unit it is under high pressure Work on the gas flue system and electrical components must only be carried out by qualified service personnel It is imperative that the operating pressure should correspond to the data given on t...

Page 5: ... entertained Parts can be ordered throughout Europe from our Dometic Service department Your Service Centre contact numbers are found in the European Service Network booklet or www dometic com When contacting Dometic Service please state the model product number and serial number together with the MLC Code if applicable You will find this information on the data plate inside the fridge Description...

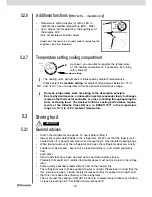
Page 6: ...e butane The desired power option is selected by means of energy selector switch 1 Energy selector switch 1 has four settings AC mains power DC 12V Gas liquid gas OFF Appliances with automatic energy selection have the additional setting AUTO 5 2 5 2 1 1 Manual energy selection MES e g RM 7xx1 L B Automatic and manual energy selection AES e g RM 7xx5 L 1 Energy Selection Switch 2 Gas electric Ther...

Page 7: ... If the operating display fails to light up it lights up red at AES models the device is not in operation For troubleshooting see 5 13 If the operating display fails to light up it lights up red at AES models the device is not in operation For troubleshooting see 5 13 1 2 3 1 3 2 CAUTION The refrigerator should only be used while the motor is running otherwise the on board battery would be dischar...

Page 8: ... using main switch A To remove air from the gas pipes repeat this procedure 3 4 times If these actions do not help please call an authorised Dometic Service Centre 5 2 3 5 2 4 1 Set energy selector switch 1 to gas 2 Set rotary switch 2 to MAX postion 1 3 3 1 The refrigerator must be operated using liquid gas propane butane no natu ral gas or town gas When using LPG gas please consider that the bur...

Page 9: ...detected from the D connection of the alternator to the electronics or from the respective sig nal on the solar charge regulator Gas operation Gas operation is selected in the following circumstances No supply voltage available The vehicle engine is not running Supply voltage less than 200V Gasfaults at AUTO mode see 5 2 4 Refuellung stop 9 Set energy selection switch A to position AUTO The LED AU...

Page 10: ...ood General advices Switch the refrigerator on approx 12 hours before filling it Always store pre cooled foods in the refrigerator Make sure that the food is well cooled when it is bought and also when transporting it Use insulated cooling bags When taking food out of the refrigerator only open the refrigerator door very briefly Foods must be packed best of all in closed containers and stored sepa...

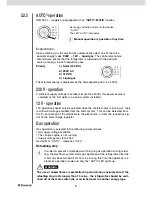
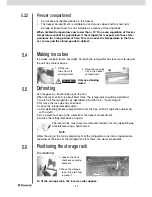
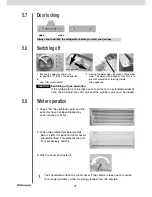
Page 11: ...tment of the refrigerator runs into an appropriate container at the back of the refrigerator From there the water evaporates Positioning the storage rack 5 5 5 6 1 Fill the ice cube tray with drinking water 2 Place the ice cube tray in the freezer compartment 5 4 1 Loosen the front and back securing brackets 2 Move the storage rack to the left and remove it Dismantling 2 1 To fit the storage rack ...

Page 12: ...n If the refrigerator is to be taken out of service for an extended period of time the on board shut off valve and the cylinder valve must be closed CAUTION 2 When the ambient temperature falls below 8 C the optional winter covers should be fitted This protects the unit from excessively cold air 1 Check that the ventilation grills and the extractor have not been blocked by snow leaves or similar W...

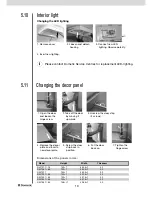
Page 13: ...730 1 453 5 1 3 2 RM 7361 65 730 1 453 5 1 3 2 RM 7371 730 1 453 5 1 3 2 RM 7291 95 730 1 491 5 1 3 2 RM 7401 05 730 1 491 5 1 3 2 RM 7541 45 730 1 491 5 1 3 2 RM 7551 55 738 1 498 5 1 3 0 Model Height Width Thickness Interior light Changing the LED lighting Changing the decor panel 1 Remove cover 4 Insert new lighting 2 Loosen and detach housing 3 Connect new LED lighting Observe polarity Please ...

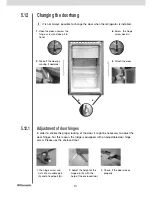
Page 14: ...enclosed tool 5 12 1 Open the door unscrew the hinge screw and keep it to hand 2 Take off the door by moving it upwards 5 Attach the door 6 Screw the hinge screw back in 3 4 It is not always possible to change the door when the refrigerator is installed 5 12 1 1 The hinge screw con sists of a movable part A and a fixed part B 2 Adjust the height of the hinge pin A with the help of the enclosed too...

Page 15: ... 230V Possible cause Action you can take a On board fuse defective b No connection to supply voltage c AES gas operation despite connection to the supply voltage a Fit new fuse b Establish power connection c Appliance switches to gas operation due to insufficient supply voltage automatically switches back to 230 V operation Failure The refrigerator does not cool sufficiently Possible cause Action ...

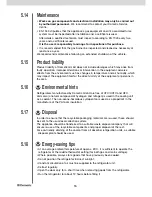
Page 16: ...ints Refrigerators manufactured by Dometic GmbH are free of CFC HCFC and HFC Ammonia a natural compound of hydrogen and nitrogen is used in the cooling unit as a coolant The non ozone hazardous cyclopentan is used as a propellant in the manufacture of the PU foam insulation Disposal In order to ensure that the recyclable packaging materials are re used these should be sent to the usual local colle...

Page 17: ...5x541 86 lit 10 5 lit 125 W 120 W ca 2 6 KWh 260 g 27 kg X X RM 7295 L 821x525x541 86 lit 10 5 lit 125 W 120 W ca 2 6 KWh 260 g 27 kg X X RM 7361 L 821x486x541 88 lit 9 5 lit 135 W 130 W ca 2 6 KWh 260 g 28 kg X RM 7365 L 821x486x541 88 lit 9 5 lit 135 W 130 W ca 2 6 KWh 260 g 28 kg X RM 7371 L 821x486x606 89 lit 11 0 lit 125 W 130 W ca 2 5 KWh 270g 27 kg X X RM 7401 L 821x525x541 97 lit 10 5 lit ...

Page 18: ... gas installation must comply with national regulations Technical regulations EN 1949 Technical regulations EN 732 Local and building control department requirements The appliance shall be installed in such a way that it is shielded from excessive heat radiation Excessive heat impairs performance and raises the energy consumption of the refrigerator Side installation If the appliance is installed ...

Page 19: ...a baffle plate and a net to prevent dirt from entering the gas bur ner Compared to side ventilation this ventilation method can allow more dirt to enter the rear area of the refrigerator which makes regular maintenance of the gas burner at least once a year necessa ry Rear installation often causes an unfavou rable installation arrangement as ideal ventilation cannot always be assured e g the lowe...

Page 20: ...d to the caravan wall not to the refrigerator Insert sealing strips at the bottom and sides of the cover Finally push the refrigerator into the cover from the front Both of these installation options facilitate the removal and installation of the appliance for servi cing Comment Other methods of sealing may be approved However the chosen method must prevent draughts entering the living space of th...

Page 21: ...ble above condenser A The lower ventilation grille should be flush with the floor of the vehicle allowing any gas leakages heavier than air to escape directly into the open air Should this arrangement prove impossible a ventilation aperture must be introduced by the manufacturer of the vehicle into the recess floor intended for the unit s installa tion in order to avoid the accumulation on this fl...

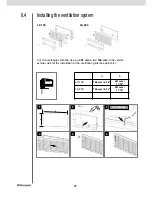
Page 22: ...156 mm in the vehicle exterior wall for the installation of the ventilation grille see point 6 3 LS 100 LS 200 b a 1 3 2 4 6 5 14 x 1 2 3 PROPOSAL 4 5 6 Installing the ventilation system a b LS 100 156 mm 6 14 451 mm 17 76 LS 200 156 mm 6 14 451 mm 17 76 ...

Page 23: ...ewalls or rails attached for securing the refrigerator must be designed in such a way that the screws will remain firmly in place even when under increased load while the vehicle is moving Always insert screws through the sleeves provided otherwise structural parts embedded in the foam such as cables etc may be damaged Once the refrigerator is in its final position secure the screws into the wall ...

Page 24: ... the cooling capacity and will jeopardize the manufactur er s guarantee 1 Connect T piece E to adaptor F or tail pipe K as required and affix with screw G Ensure that heat baffle H is lodged in the correct position 2 Insert flue pipe with cover plate C through the appropriate aperture in frame I and connect to T piece E If necessary shorten flue pipe C to the required length 3 Insert ventilation g...

Page 25: ... exclusively to use liquid gas propane butane under no circumstances should town gas or natural gas be used EN 27418 A fixed pre set pressure regulator complying with EN 12864 must be connected to the liquid gas cylinder The pressure regulator must concur with the operating pressure specified on the data plate of the appliance The operating pressure corresponds to the standard pressure of the coun...

Page 26: ...credited experts who are able by virtue of their training and knowled ge to vouch for the correct implementation of the leakage test The refrigerator must be equipped with a gas cock C in the supply line to allow the supply to be disconnected Such a cut out device must be readily accessible to the user C SW 14 SW 17 CAUTION 20 Nm max 10 Nm max WARNING The gas connection may only be carried out by ...

Page 27: ...he connection cables must be laid in such a way that they do not come in contact with hot components of the unit burner or with sharp edges Changes at the internal electrical installation or the connection of other elec trical components e g external fan to the internal wiring of the appliance will expire the e1 CE admittance as well as any claims from guarantee and product liability The power mus...

Page 28: ...s There are no particularly high current flows via the D and S connection therefore no particularly large cross section is required for these connections approx 1mm Terminal strip RM 7xx1 L and RM 7xx5 L models Retrofitting Connections A Ground heating element DC B Plus heating element DC C Ground electronics D Plus electronics D alternator signal S AES input control signal solar charge regulator ...

Page 29: ...er heating element DC ignition unit valve permanently connection DC lighting DC heating element AC mains connection temp sensor ignition plug ionisation plug Connections A Ground heating element DC B Plus heating element DC C Ground electronics D Plus electronics Colours schwarz black violett violet braun brown weiss white grün green gelb yellow rot red For operation it is compulsory to provide th...

Page 30: ...Dometic GmbH In der Steinwiese 16 D 57074 Siegen www dometic com ...

Reviews: