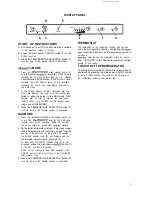
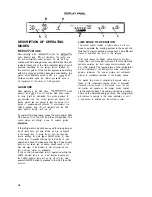
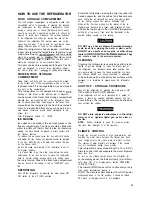
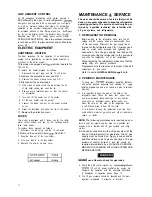
background image

CERTIFIED INSTALLATION

Certified installations require one roof vent and one lower
side vent.
For 

“Certified Vent System 

 page 14.

For further information contact your dealer or distribu-
tor.

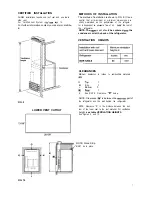
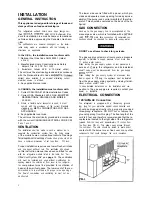
FIG. 9

LOWER VENT CUTOUT

METHODS OF INSTALLATION

The method of installation is shown in FIG. 9. It is es-

s e n t i a l   t h a t   a l l   m a x i m u m   o r   m i n i m u m   d i m e n s i o n s   a r e
strictly maintained as the performance of the refrigera-

tor is dependent on adequate flow of air 

 the rear of

the refrigerator.

NOTE: The 

 vent should 

be centered 

 the

condenser coil at the back of the refrigerator.

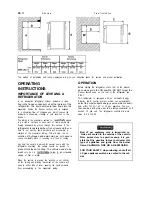
VENTILATION HEIGHTS

CLEARANCES

Minimum clearances in inches to combustible materials

G:

0

K:

Side

0

L:

Bottom 0

0

N :

S e e   N O T E :   C l e a r a n c e  

  b e l o w .

NOTE: Clearance 

 is between the 

 part of

the refrigerator and the wall behind the refrigerator.

NOTE: Clearance “N” is the distance between the bot-
tom of the lower vent to the roof material. For ventilation
height, 

see table VENTILATION HEIGHTS

See Figures 9, and 10.

NOTE: Wood Strip
MUST be in place

L

FIG. 10

7

Summary of Contents for NDR1292-S

Page 1: ...o this manual For assistance or additional information consult a qualified installer service agency or the gas supplier NEWDIMENSIONS Contents Page Installation 4 Operating Instructions 0 Maintenance...

Page 2: ......

Page 3: ...Selector Button 3 Temperature Selector Button 4 Climate Control Button 5 Low Ambient Control Button A AC Mode Indicator Lamp B AEYAUTO Mode Indicator Lamp C GAS Mode Indicator Lamp D CHECK Indicator L...

Page 4: ...t be installed and used without modification An opening toward the outside at floor level in the refrigera tor compartment must be provided for ventilation of heavier than air fuel gases The lower ven...

Page 5: ...with the latest vacuum insulated panel technology These insulating panels are located on the Top Back Bottom Sides and Doors of the refrig erator If the surface is punctured loss of insulation will o...

Page 6: ...h flooring see FIG 8 The hole must be drilled in the cut out opening of the base plate at the rear of the refrigerator The installer MUST make sure that the hose does not kink when run through the flo...

Page 7: ...n adequate flow of air over the rear of the refrigerator NOTE The upper vent should be centered over the condenser coil at the back of the refrigerator VENTILATION HEIGHTS CLEARANCES Minimum clearance...

Page 8: ...icle should be leveled to prevent this loss of cooling The vehicle needs to be leveled only so it is omfortable to live JI no noticeable sloping of floor or walls When the vehicle is moving the leveli...

Page 9: ...the GAS mode GAS operation may be reset by pressing the main power ON OFF button 1 to the OFF then ON position See step 2 under GAS MODE TO SHUT OFF THE REFRIGERATOR The refrigerator may be shut off...

Page 10: ...main power ON OFF button 1 three or four times If repeated attempts fail to start the LP gas operation check to make sure that the LP gas supply tanks are not empty and all manual shutoff valves in t...

Page 11: ...ing when the ice is formed Food in the fresh food compartment may be frozen if the setting is left on COLDEST posi tion DEFROSTING Shut off the refrigerator by pressing the main power ON OFF button to...

Page 12: ...ician who is familiar with LP gas systems and refrigerators 1 REFRIGERATOR REMOVAL Before working on the refrigerator make sure the AC voltage and DC voltage leads are disconnected Shut off the gas su...

Page 13: ...d scale out of the flue tube Replace the flue baffle Clean burner tube with a brush Blow out burner with compressed air Before removing burner jet clean burner area of soot and scale that fell out of...

Page 14: ...o be followed closely The refrigerator is qualiv guaranteed However we are not responsible for any failures caused by improper adjust ments and unfavorable installation conditions Contact Service poin...

Page 15: ...ft The right hand side of the shelf will come loose Lower the right hand side of the wire shelf and let the left hand side slide out of the holes in the Wall Insert the ends of the wire shelf on the l...

Page 16: ...11 MO F0 0214 16...
Reviews: