


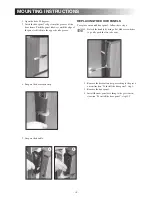

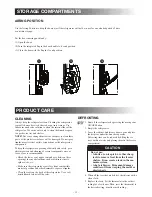


reMoving anD replacing the
shelves
Remove the shelf locks by inserting the tip of a flat
1.
bladed screwdriver into the slot of the locks. Turn the
screwdriver counterclockwise and then remove the
shelf locks from the wire shelf.
Tilt the shelf to one side at an angle while pulling
2.
forward.
Reposition the shelf in the desired location. Insert
3.
the ends of the wire shelf on the left-hand side and
slide the shelf into the holes on the right-hand side.
Slide the plastic plugs into the holes of the wall.
4.
Snap the shelf locks onto the wire shelf.
5.
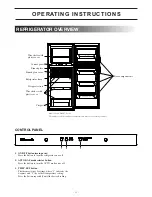
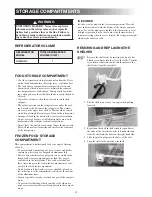
frozen fooD storage
coMpartMent
This compartment is not designed for deep or quick freezing
of food.
To prevent food from drying out, keep it in covered dishes,
•
containers, plastic bags or wrapped in aluminum foil.
Meat or fish, whether raw or prepared, can be stored in the
•
frozen food storage compartment provided they are pre-
cooled first in the refrigerator. They can be stored about
three times longer in the frozen food compartment as com-
pared to the fresh food compartment.
quick frozen soft fruits and ice cream should be placed in
•
the coldest part of the compartment, which is at the bottom
of the aluminum liner.
Frozen vegetables, may be stored in any part of the compart-
•
ment.
To prevent frost buildup, which can reduce the efficiency,
•
wipe excess moisture off items being placed in the compart-
ment.
- 14 -
storage coMpartMents
wARNINg
eXPlOSION HAZARD. Never store explosive
substances in the refrigerator, such as cigarette
lighter fuel, gasoline, ether or the like. Failure to
heed this warning could cause an explosion result-
ing in death or severe personal injury.
6
!
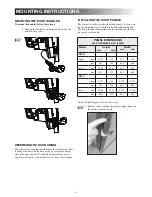
refrigerator voluMe
refrigerator
MoDel
total refrigerateD
voluMe (cu.ft)
DMR/DMC
7
fooD storage coMpartMent
Cool the refrigerator before placing any food inside. Never
•
put hot food or drinks into the refrigerator - cool them first.
The food storage compartment is completely closed and
•
unventilated, which is necessary to maintain the required
low temperature for food storage. Consequently, foods hav-
ing a strong odor or those that absorb odors easily should be
covered.
Vegetables, salads etc. should be covered to retain their
•
crispness.
The coldest positions in the refrigerator are under the cool-
•
ing fins and at the bottom of the refrigerator. The warmer
areas are on the upper door shelves. This should be consid-
ered when placing different types of food in the refrigerator.
Arrange all food in the unit to allow for free air circulation.
•
Do not overpack because a stuffed refrigerator must work
harder and will have higher cabinet temperatures.
Do not leave the unit’s door open any longer than necessary.
•
This will reduce frost formation and increase the efficiency
of the refrigerator.
ice cubes
Ice cubes can be made in the freezer compartment. Place the
trays in direct contact with the bottom of the freezer compart-
ment. Ice will be made more rapidly if the thermostat is set at
its highest position, but be sure to move the thermostat back
to normal setting when the ice is formed; the refrigerator might
otherwise become too cold.