


37
User Controls
Check if the projected image is clear. If not, adjust the focus to
>
sharpen the image
If an error message pops up after auto setting, check surround-
>
ings and redo
If the error message continues to pop up, switch to Manual
>
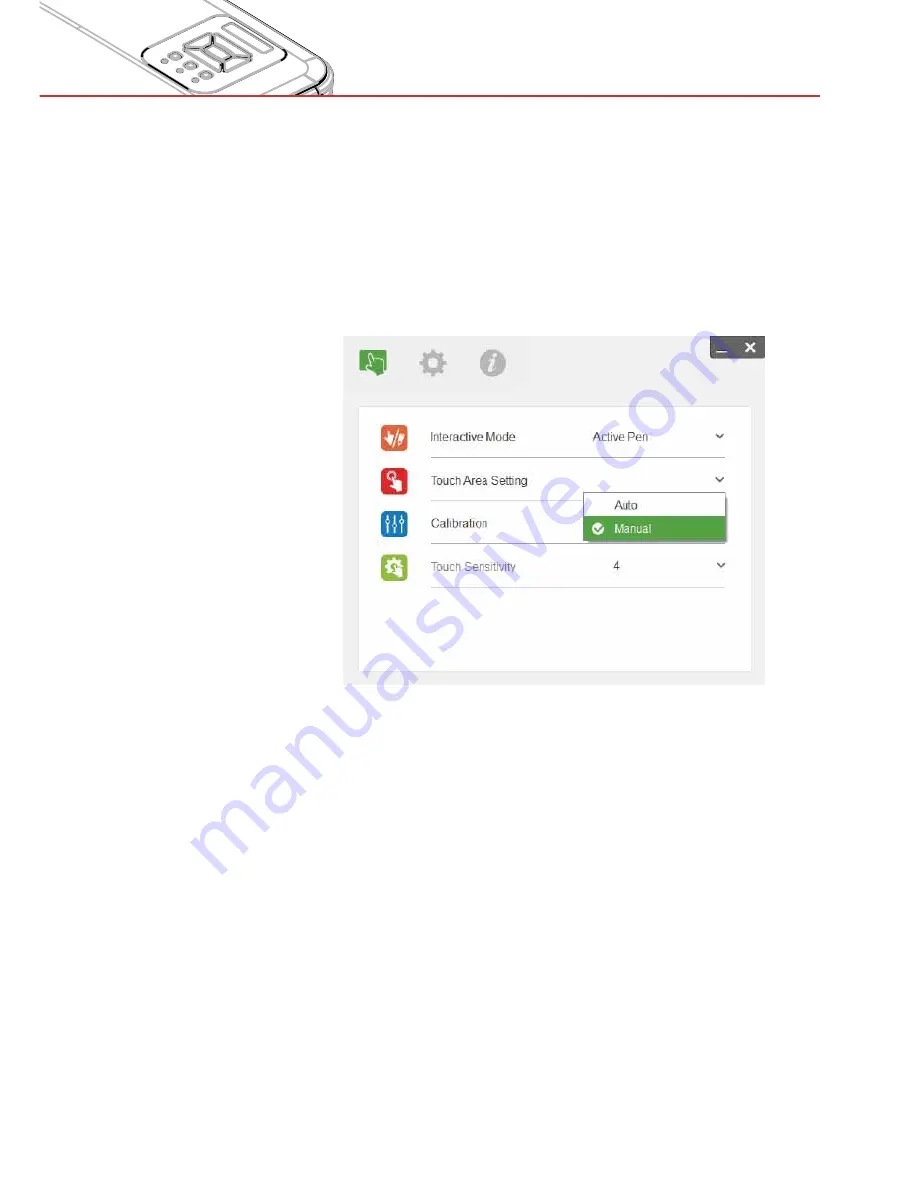
Touch Area Setting
B. Select Manual Touch Area Setting:
B-1. After the camera captures the projected image, a Touch Area
window will pop up. The working touch area is de
fi
ned by a
green frame. If the captured image is not clear enough, re-
select “Ambient light mode selection” from “Auto” to “Bright” or
“Dim” according to the actual ambient light conditions.
NOTE! The captured image shows the actual camera view,
which may be reversed from the projected image (depending
on projector positioning). P1 could be lower right corner, P2
lower left corner etc.


