


Digital Monitoring Products
XTLN/XTLN-WiFi Installation Guide
4
InstallatIon
Secondary Power Supply
6.1 Standby Battery
The XTLN/XTLN-WiFi rechargeable battery is used to provide backup battery power when DC power is not
available. The battery is intended for backup power only and not to operate the panel on a daily basis. If
the battery is low, or not plugged into the BAT battery connector, a low battery condition is indicated by the
panel.
Note: If removing the panel from service, disconnect the backup battery from the BAT connector.
6.2 Replacement
Use the following steps to replace the XTLN/XTLN-WiFi standby battery. DMP recommends replacing the
battery every 3 years under normal use.
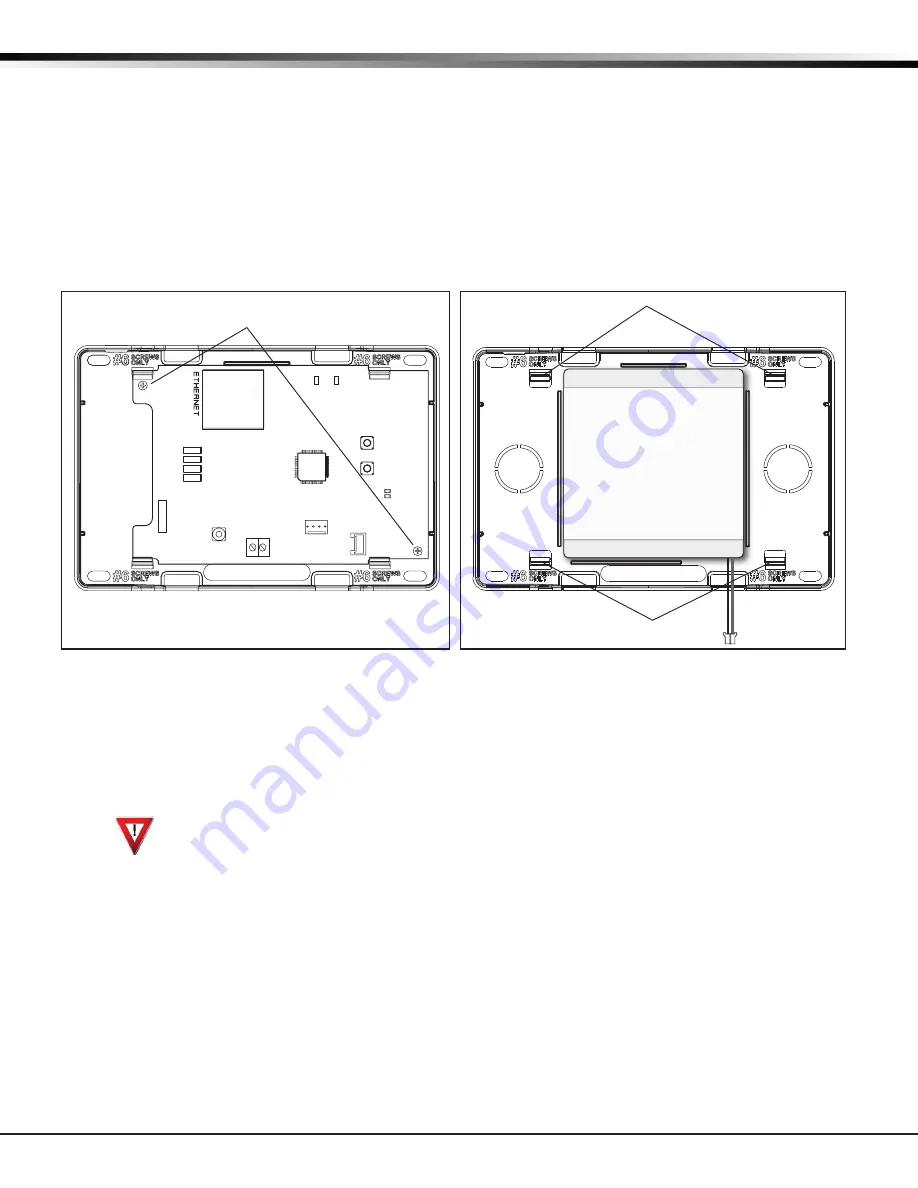
1. Unplug the battery connector (BAT) from the XTLN/XTLN-WiFi panel.
2. If installed, remove the screw from the PCB.
3. Loosen the top PCB snaps.
4. Lean the panel PCB forward and lift out from the bottom PCB snaps.
5. Remove and properly dispose of the used battery.
Caution: Risk of fire, explosion, and burns. Do not disassemble, heat above 212°F (100°C),
or incinerate. Properly dispose of used batteries.
6. Place the new battery into the XTLN/XTLN-WiFi housing base with the battery wires directed toward
the bottom right corner. See Figure 4.
7. Set the XTLN/XTLN-WiFi PCB into the bottom snaps and press into the top snaps to secure in place.
8. Plug the battery into the panel connector (BAT).
6.3 Battery Supervision
The panel tests the battery once every hour when DC power is present. This test occurs 15 minutes past
each hour and lasts for five seconds. A load is placed on the battery and if the battery voltage is low, a low
battery is detected. If DC power has failed, a low battery is detected any time the battery voltage falls
below 3.7V.
RESET
S1
LOAD
S2
BAT
J7
PROG
RED
PWR
MODEL XTLN
TX RF RX
SN
J1
PCB Screw Locations
Top PCB Snaps
Bottom PCB Snaps
Battery
connector
3.7V
Rechargeable
Battery
Figure 4: Standby Battery Replacement
Figure 3: PCB Screw Locations


