background image

8


©

 2014 DJI. All Rights Reserved. 

ZENMUSE H3-3D


User Manual

Final Checks

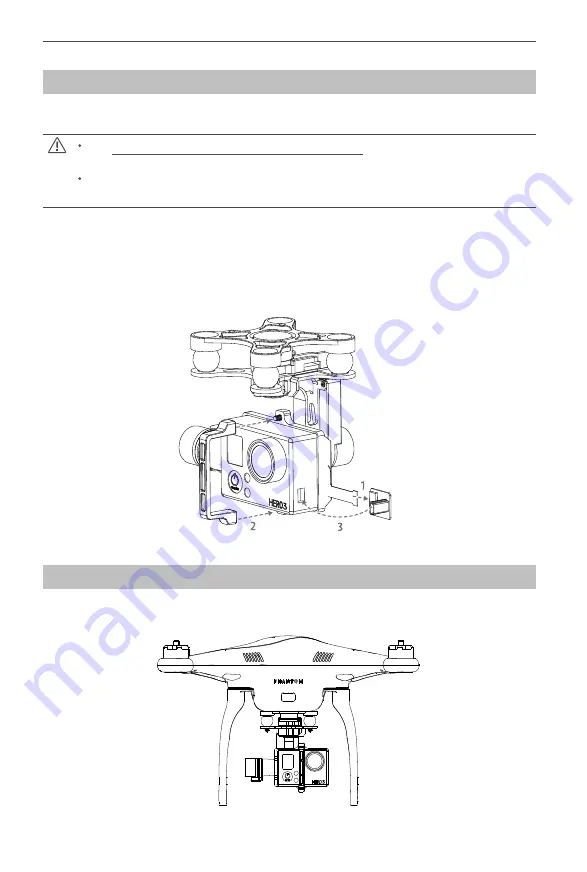
Ensure the installed damping unit is parallel with the aircraft. 

Camera Installation

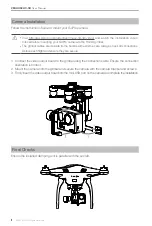
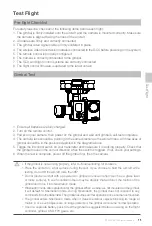
Follow the instructions below to mount your GoPro camera.

 Visit http://www.dji.com/product/zenmuse-h3-3d/video/ and watch the installation video 

tutorial before mounting your GoPro camera to the H3-3D gimbal.

 The gimbal cables are delicate items, handle with extreme care. Always check all connections 

before each flight and ensure they are secure.

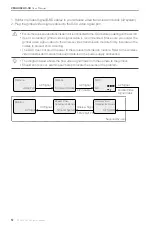
1.  Connect the video output board to the gimbal using the connection cable. Ensure the connection 

orientation is correct.

2.  Mount the camera onto the gimbal and secure the camera with the camera bracket and screws. 

3.  Firmly insert the video output board into the mini-USB port on the camera to complete the installation. 

Summary of Contents for Zenmuse H3-3D

Page 1: ...ZENMUSE H3 3D User Manual 2014 12 V1 04 ...

Page 2: ... or flight pack battery and keep children away when calibrating and configuring the gimbal Observe the procedures contained in this manual to mount and connect gimbal to your aircraft Users of this product should respect the AMA s National Model Aircraft Safety Code DJI has no control over use setup final assembly modification including use of non specified DJI parts i e motors ESCs propellers etc...

Page 3: ...Connection 9 Connecting the GCU and Flight Control System 9 GCU and Flight Control System Connection 10 Video Connection 11 Configuration 13 Driver and PC Assistant Installation 13 PC Assistant Interface 13 Channel Setting 13 Firmware Software Upgrade 14 Test Flight 15 Pre flight Checklist 15 Gimbal Test 15 Appendix 16 Troubleshooting 16 Settings When Using the A2 Flight Control System 16 Specific...

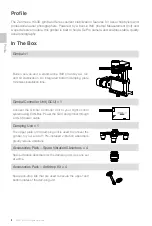
Page 4: ... An integrated bottom damping plate minimizes installation time Gimbal Controller Unit GCU 1 Connect the Gimbal Controller Unit to your flight control system using CAN Bus Power the GCU and gimbal through a 3S 6S power cable Damping Unit 1 The upper plate of the damping unit is used to connect the gimbal to your aircraft Pre installed vibration absorbers greatly reduce vibrations Accessories Pack ...

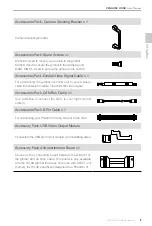
Page 5: ...s video transmission module Transmits the video signal Accessories Pack CAN Bus Cable 1 Use CAN Bus to connect the GCU to your flight control system Accessories Pack 8 Pin Cable 1 For connecting your Phantom 2 to the G8 port of the GCU Accessory Pack USB Video Output Module Connects to the USB port of your camera for transmitting video Accessory Pack Anti interference Board x 1 Serves as the conne...

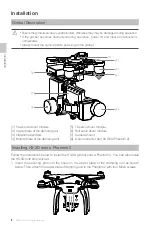
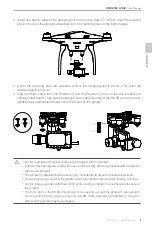
Page 6: ... Upper plate of the damping unit 3 Vibration absorbers 4 Bottom plate of the damping unit 5 Tilt servo driver module 6 Roll servo driver module 7 Camera mount 8 8 pin connector port to GCU Phantom 2 Installing H3 3D onto a Phantom 2 Follow the instructions below to install the H3 3D gimbal onto a Phantom 2 You can also install the H3 3D onto other aircraft 1 Insert the securing pins into the holes...

Page 7: ...of the vibration absorbers into the mounting holes on the bottom plate Aircraft camera and accessories are not included with the gimbal Camera must be aligned to face the nose of the aircraft and the gimbal should be parallel with the aircraft itself The gimbal is calibrated before delivery Do not attempt to adjust or calibrate it yourself Do not remove any screws in the gimbal which may result in...

Page 8: ...before mounting your GoPro camera to the H3 3D gimbal The gimbal cables are delicate items handle with extreme care Always check all connections before each flight and ensure they are secure 1 Connect the video output board to the gimbal using the connection cable Ensure the connection orientation is correct 2 Mount the camera onto the gimbal and secure the camera with the camera bracket and screw...

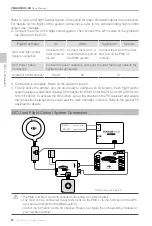
Page 9: ...mplete the connection between the GCU and the flight control system 1 Upgrade the flight controller s firmware and PC Assistant to the latest version as shown in the table below Flight Controller A2 WKM NAZA M V2 NAZA M PC Assistant V1 20 or higher V2 00 or higher V2 12 or higher V2 12 or higher Firmware Version V2 10 or higher V5 22 or higher V3 12 or higher V3 12 or higher 2 Complete the connect...

Page 10: ...ol Channel H3 3D X3 X1 4 Connection is complete Power on the aircraft to launch 5 To fully utilize the gimbal you will also need to configure its tilt function Each flight control system assigns a specified channel X3 channel for WKM X1 for NAZA M and H3 3D for A2 to for tilt control To activate the tilt function set up the channel in the PC Assistant and ensure the connection between the receiver...

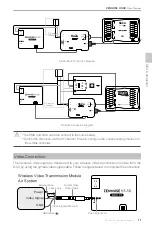
Page 11: ...low the figure below to complete the connection 3S AV 6S A E T R U X1 X2 X3 M1 M2 M3 M4 M5 M6 F1 F2 NAZA MUTI POTOR V2 LED EXP 2S V SEN X3 EXP GPS 3V 5V 6S NAZA PMU V2 DIY power connector The PMU and GCU can both connect to the same battery Control the tilt motion via the X1 channel Properly configure the corresponding channel on the remote controller Power Video Signal GND 3S AV 6S Wireless Video...

Page 12: ... firmly Insulate all the cables to prevent short circuiting The GCU does not provide power to the wireless transmission module Refer to the wireless video transmission module manual for details on the power supply connection The diagram below shows the how video signal flows from the camera to the gimbal Should errors occur examine each step to locate the source of the problem Supplied by user Vid...

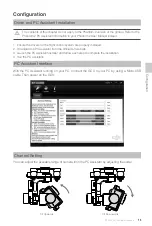
Page 13: ...rol system are properly installed 2 Download the PC Assistant from the official DJI website 3 Launch the PC Assistant installer and follow each step to complete the installation 4 Run the PC Assistant PC Assistant Interface With the PC Assistant running on your PC connect the GCU to your PC by using a Micro USB cable Then power on the GCU Channel Setting You can adjust the available range of camer...

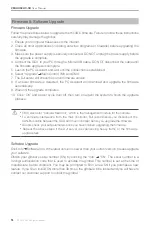
Page 14: ...until the upgrade completes 10 Click OK and power cycle turn off then turn on again the system to finish the upgrade process CMU stands for Camera Multi Unit which is the management module for the camera To eliminate interference from the main controller DJI recommends you disconnect the CAN Bus cable between the GCU and main controller before you upgrade the firmware Double check your set paramet...

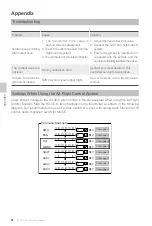
Page 15: ... switch on your transmitter and make sure it is working properly Check that the gimbal moves in the correct direction when the switch is toggled If not check your settings 6 When the test is complete power off the gimbal first then the camera If the gimbal is not working properly refer toTroubleshooting for solutions Place the aircraft on a flat surface during the test If you choose to hold the ai...

Page 16: ...ntact your local dealer or DJI customer service for assistance Unable to determine gimbal orientation BVR beyond visual range flight Use a wireless video transmission module Settings When Using the A2 Flight Control System Users should configure the H3 3D s pitch control in the A2 assistant when using the A2 Flight Control System Map the H3 3D to two channels on the transmitter as shown in the fol...

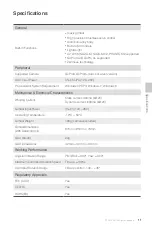
Page 17: ...m Requirement Windows XP SP3 Windows 7 Windows 8 Mechanical Electrical Characteristics Working Current Static current 400mA 12V Dynamic current 600mA 12V Gimbal Input Power 3S 6S 12V 26V Operating Temperature 10 C 50 C Gimbal Weight 168g camera excluded Gimbal Dimensions With Damping Unit 97mm 95mm 73mm GCU Weight 22g GCU Dimensions 42 mm 32 mm 9 3 mm Working Performance Angular Vibration Range Pi...

Page 18: ...The content is subject to change http www dji com product zenmuse h3 3d download Download the latest version from 2014 DJI All Rights Reserved ...

Reviews: