background image

33

CUTTER BLADE MAINTENANCE:

CAUTION Stop engine and remove ignition key

for safety.  Wear heavy, thick gloves

when holding onto cutter blade, avoid

the sharp edge of the blade.

Blades should be discarded when worn excessively.

DANGEROUS!
DO NOT USE
BLADE IN THIS
CONDITION!

When notch starts,
    discard blade

New Blade

CARE & MAINTENANCE

Check sharpness of mower blades after every 10

hours of operation.  Observe proper blade position

prior to removal.

1. Safely raise front of mower.

2. Hold or block blade from

turning.

3. Loosen blade bolt and remove

blade.

4. When replacing blade, tighten

blade bolt securely.  Refer to

diagram.  Be sure blade is

centered on pilot before

tightening nut to 60 ft. lbs.

Summary of Contents for 2004 RAM Series

Page 1: ...RAM Series ZTR Model Year 2004...

Page 2: ...ot a toy or a recreational vehicle Before you start to use the mower read the operator s manual carefully and become completely familiar with the controls The information contained in this manual appl...

Page 3: ...2 Warranty Policy 13 Specifications 14 Seat Adjustment Instructions 15 Controls 16 19 Operation Instructions 20 30 Care Maintenance 31 42 Standard Service Parts List 43 44 Troubleshooting 45 46 RAM Se...

Page 4: ...Over Run Over Back Over SAFETY RIDING LAWN MOWERS IF IMPROPERLY OPERATED CAN CAUSE SERIOUS INJURY OR DEATH The most common causes of injury to the operator or bystander read and understand this manual...

Page 5: ...rdous situation which if not avoided will result in death or serious injury WARNING highlighted in orange indicates a potentially hazardous situation which if not avoided could result in death or seri...

Page 6: ...y the blade Be sure the area is clear of other people before mow ing Stop mower if anyone enters the area Never carry passengers Do not mow in reverse unless absolutely necessary Always look down and...

Page 7: ...es or safety glasses with side shields when operating mower Data indicates that operators age 60 years and above are involved in a large percentage of riding mower related injuries These operators sho...

Page 8: ...r Dixon ZTR never up or down Remove obstacles such as rocks tree limbs etc Watch for holes ruts or bumps Uneven terrain could overturn the mower Tall grass can hide obstacles Use slow speed Tires may...

Page 9: ...DO NOT Do not turn on slopes unless necessary and then turn slowly and gradually downhill if possible Do not mow near drop offs ditches or embank ments The mower could suddenly turn over if a wheel i...

Page 10: ...plosion caused by static electricity Never fill containers inside a vehicle or on a truck or trailer bed with a plastic liner Always place containers on the ground away from your vehicle before fillin...

Page 11: ...estarting Never make adjustments or repairs with the engine running unless otherwise specified Grass catcher components are subject to wear damage and deterioration which could expose moving parts or...

Page 12: ...en out of the mowing area and under the watchful care of another responsible adult Be alert and turn mower off if a child enters the area Before and during backing look BEHIND and DOWN for small child...

Page 13: ...claims must be approved by Dixon Industries Inc 5 Battery Warranty limited to 90 days from date of purchase 6 Accessories Warranty grass catchers snow blades covers etc Limited to 90 days fromdateofpu...

Page 14: ...er overhead valve air cooled gasoline full pressure lube with oil filter vertical shaft aluminum head block with cast iron cylinder liners Starting Electric key switch operation w safety interlock bla...

Page 15: ...15 SEAT ADJUSTMENT INSTRUCTIONS Models ZTR RAM 44 and RAM 50 1 Grasp seat slide adjuster and move it into adjustment position 2 Slide seat forward or backward 3 Release seat slide adjuster...

Page 16: ...TURNING Turning is controlled by moving one control lever slightly forward or rearward of the other To turn left move left lever rearward of the right lever To turn right move right lever rearward of...

Page 17: ...ARKING BRAKE The hand operated parking brake is located on the left hand side between the operators seat and the fuel tank To engage brake pull lever up to the rear To release brake move lever forward...

Page 18: ...uit breaker If circuit breaker trips push button to reset If this condition repeats consult dealer for inspection and repair THROTTLE CONTROL LEVER Located on control panel to operator s right Throttl...

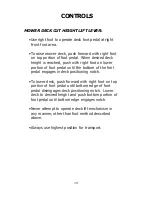
Page 19: ...pedal until the bottom of the foot pedal engages in deck positioning notch To lower deck push forward with right foot on top portion of foot pedal until bottom edge of foot pedal disengages deck posi...

Page 20: ...nctions During initial operation learning to drive set throttle at slow speed Sound judgement by the operator will prevent accidents BEFORE OPERATING MOWER 1 Read engine manufacturer s operating and m...

Page 21: ...Always turn off engine before engaging or disengaging the hydro release free wheel lever Never attempt to move the lever with the engine running Lift seat to access release levers Pull release lever...

Page 22: ...ignition switch to START Engine should not turn over or attempt to start CONTROL LEVER SWITCH TEST a Disengage blade drive switch b Put parking brake in ON position c Swing control levers in d Turn ig...

Page 23: ...t to start SEAT SWITCH TEST a In a SAFE AREA away from bystanders start the engine b Leave levers swung out and parking brake ON c Engage blade drive d Raise slightly off seat ENGINE SHOULD STOP NOTE...

Page 24: ...position 4 Move choke to desired speed position 5 Release parking brake 6 Swing levers in 7 Operate the mower per the CONTROL instructions on Page 16 CAUTION Do not operate the engine in an enclosed...

Page 25: ...en or full setting 2 Do Not Attempt To Cut Grass When It Is Wet Wet grass will clog the underside of the deck and discharge area 3 If the grass is tall place the mower deck cut height lever in the top...

Page 26: ...mower deck cut height selector in either the top or second notch Never cut more than 3 4 to 1 off the grass at any one time Attempting to cut more grass will result in the deck plugging and cause the...

Page 27: ...ss clippings over the lawn for even fertilization If the mulching quality of the mower does not seem to be satisfactory try one or more of the following tips a Raise the height of cut setting on your...

Page 28: ...he grass is tall place the mower deck cut height selector in the top or second notch Initially overlap cutting swaths instead of a full swath with each pass 4 Keep The Underside Of The Mower Deck Clea...

Page 29: ...ttachment bolts tight Do Not operate the mower with the grass catching attachment partially removed Important Do Not leave clippings in the bags while the mower is stored Damp grass clippings are a fi...

Page 30: ...cutting season As a rule of thumb never cut off more than 1 3 of the total grass blade length Correct mowing height can reduce weeds and disease by 50 to 80 The following grass cut heights are based o...

Page 31: ...ak in Check crankcase oil level before each use Clean grass debris from muffler manifold area before each use Check air intake screen after each use Clean grass under deck after each use Check tire pr...

Page 32: ...y and terminals with baking soda and water Identify each cable so they can be reconnected to the correct terminal Disconnect cables from terminals ALWAYS disconnect ground cable first and reconnect la...

Page 33: ...SE BLADE IN THIS CONDITION When notch starts discard blade New Blade CARE MAINTENANCE Check sharpness of mower blades after every 10 hours of operation Observe proper blade position prior to removal 1...

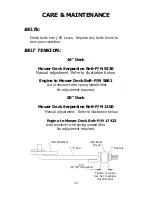
Page 34: ...ck Belt P N 5861 Auto tensioner with spring loaded idler No adjustment required 50 Deck Mower Deck Serpentine Belt P N 1300 Manual adjustment Refer to illustration below Engine to Mower Deck Belt P N...

Page 35: ...arking brake 3 Raise the seat to access hydro control linkage If right wheel creeps adjust right side linkage and vice versa Use procedure below a Loosen jam nuts on ends of the coupler P N 7736 b If...

Page 36: ...36 Illustration A Illustration B CARE MAINTENANCE...

Page 37: ...same If adjustment is required turn nut on one or both of the front L rods until both measurements are equal 4 Turn each outer blade tip to align with the deck in a front to rear manner 5 Measure fro...

Page 38: ...hest cut position and latch in place As a safety precaution insert clevis pin in nearest hole at rear of foot pedal Belt can now be removed from mower deck pulley 2 Remove front hanger pin 3 Remove fr...

Page 39: ...ATIONS 1 each front wheel caster 1 each mower deck hub 2 each deck lift shaft SERVICE INTERVALS Every 50 hours of operation or once per season RECOMMENDED GREASE Name brand wheel bearing or multi purp...

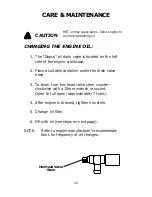
Page 40: ...lve stem counter clockwise with a 10mm wrench or socket Open to full open approximately 7 turns 4 After engine is drained tighten hex stem 5 Change oil filter 6 Fill with oil see steps on next page NO...

Page 41: ...s 2 Refill engine with type and quantity of oil recommended by the engine manufacturer in engine literature NOTE Engine oil changes on the RAM Series Models will require replacement of the oil filter...

Page 42: ...our mower start the engine and engage the mower deck for a few minutes to disperse any water that may have accumulated in bearings pulleys or fans Note Allow mower to cool before washing If bearings a...

Page 43: ...Standard Lo Lift P N 17280 Belts Engine to Mower Deck P N 5861 Serpentine P N 9236 Engine to Transmission P N 16108 50 Deck Blades Hi Lift P N 9444 Standard Lo Lift P N 9443 Belts Engine to Mower Deck...

Page 44: ...Stratton Engine Operator s Manual for correct service intervals for engine oil changes and air filter maintenance Protect your engine investment use only original equipment filters Refer to the Briggs...

Page 45: ...clean or replace fuel filters 3 HARD TO START ENGINE Fuel line clogged clean fuel line and check fuel filter Faulty fuel pump consult dealer 4 ENGINE STARTS BUT CUTS OUT Water in fuel drain old fuel r...

Page 46: ...ator not on seat sit on seat Faulty interlock system consult dealer Fauty blade spindle bearing consult dealer Deck drive belt not properly routed reroute Blades blocked by foreign material clean unde...

Page 47: ...DATE ENGINE TUNED DIXON INDUSTRIES INC a BLOUNT International Inc Co P O Box 1569 Coffeyville Ks 67337 0945 620 251 2000 FAX 620 251 4117 OWNER S INFORMATION Date of Purchase Mower Model Number Mower...

Page 48: ...XON INDUSTRIES INC a BLOUNT International Inc Co P O Box 1569 Coffeyville Ks 67337 0945 620 251 2000 RAM Series Part No 17411 1103 W W W W WARNING ARNING ARNING ARNING ARNING The engine exhaust from t...

Reviews: