
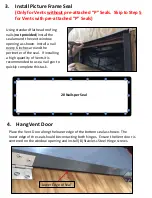
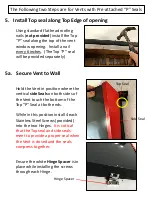


5. Install Top seal along Top Edge of opening
Using standard flat head roofing
nails (
not provided
) install the Top
”P” seal along the top of the vent
window opening. Install a nail
every 6 inches. (The Top “P” seal
will be provided separately)
The Following two Steps are for Vents with Pre-attached “P” Seals
Hold the Vent in position where the
vertical
side Seals
on both sides of
the Vent touch the bottom of the
Top “P” Seal at both ends.
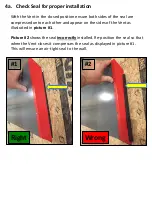
While in this position install 4 each
Stainless Steel Screws (provided)
into the two Hinges.
It is critical
that the Top seal and side seals
meet to provide a proper seal when
the Vent is closed and the seals
compress together.
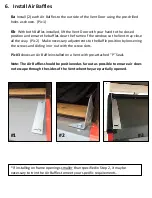
5a. Secure Vent to Wall
Top Seal
Side Seal
Ensure the white
Hinge Spacer
is in
place while installing the screws
through each Hinge.
Hinge Spacer


