background image

2

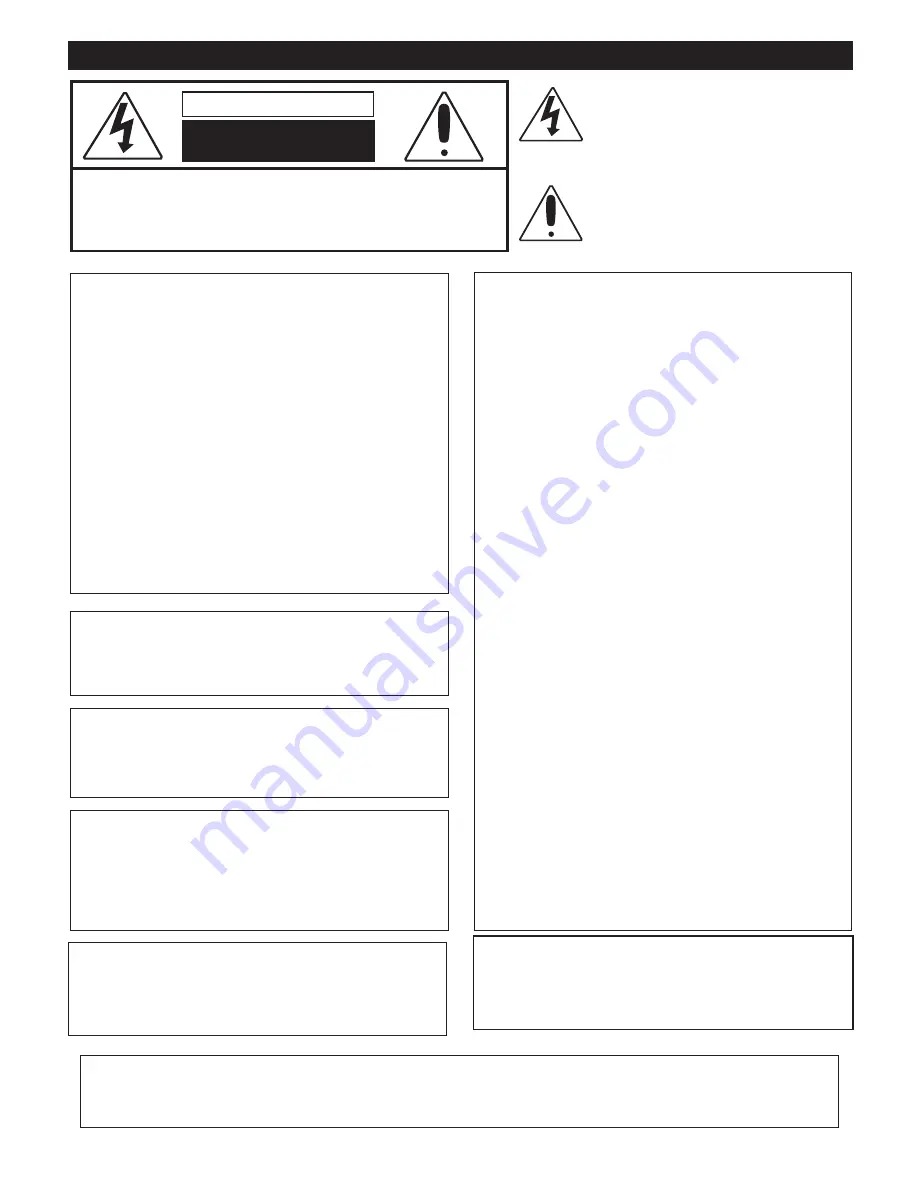
IMPORTANT SAFETY INSTRUCTIONS

CAUTION: TO REDUCE THE RISK OF ELECTRIC SHOCK, DO NOT

REMOVE COVER (OR BACK). NO USER-SERVICEABLE PARTS INSIDE.

REFER SERVICING TO QUALIFIED SERVICE PERSONNEL.

CAUTION

RISK OF ELECTRIC SHOCK

DO NOT OPEN

The lightning flash with arrowhead symbol

within an equilateral triangle is intended to alert

the user to the presence of uninsulated

dangerous voltage within the product’s

enclosure that may be of sufficient magnitude to

constitute a risk of electric shock to persons.

The exclamation point within an equilateral

triangle is intended to alert the user to the

presence of important operating and

maintenance (servicing) instructions in the

literature accompanying the appliance.

CAUTION:

THIS DIGITAL VIDEO DISC PLAYER EMPLOYS A

LASER SYSTEM.
TO ENSURE PROPER USE OF THIS PRODUCT,

PLEASE READ THIS OWNER’S MANUAL CAREFULLY

AND RETAIN FOR FUTURE REFERENCE. SHOULD

THE UNIT REQUIRE MAINTENANCE, CONTACT AN

AUTHORIZED SERVICE LOCATION-SEE SERVICE

PROCEDURE.
USE OF CONTROLS, ADJUSTMENTS OR THE

PERFORMANCE OF PROCEDURES OTHER THAN

THOSE SPECIFIED HEREIN MAY RESULT IN

HAZARDOUS RADIATION EXPOSURE. 
TO PREVENT DIRECT EXPOSURE TO LASER BEAM,

DO NOT TRY TO OPEN THE ENCLOSURE. VISIBLE

LASER RADIATION MAY BE PRESENT WHEN THE

ENCLOSURE IS OPENED. DO NOT STARE INTO BEAM.

FCC NOTICE: 

This equipment has been tested and found to comply

with the limits for a Class B digital device, pursuant to

part 15 of the FCC Rules. These limits are designed to

provide reasonable protection against harmful

interference in a residential installation. This equipment

generates, uses and can radiate radio frequency energy

and, if not installed and used in accordance with the

instructions, may cause harmful interference to radio

communications. 

However, there is no guarantee that interference will not

occur in a particular installation. If this equipment does

cause harmful interference to radio or television

reception, which can be determined by turning the

equipment off and on, the user is encouraged to try to

correct the interference by one or more of the following

measures: 

Reorient or relocate the receiving antenna. 

Increase the separation between the equipment and

receiver. 

Connect the equipment into an outlet on a circuit

different from that to which the receiver is connected. 

Consult the dealer or an experienced radio/TV

technician for help. 

Modification not authorized by the manufacture may void

user authority  to operated this device.

FCC CAUTION: 

To assure continued compliance, follow the attached

installation instructions and use only shielded cables

when connecting to other devices. Also, any changes or

modifications not expressly approved by the party

responsible for compliance could void the user’s authority

to operate the equipment. 

WARNING:

TO REDUCE THE RISK OF FIRE OR ELECTRIC

SHOCK, DO NOT EXPOSE THIS PRODUCT TO RAIN

OR MOISTURE. 

WARNING:

TO REDUCE THE RISK OF FIRE OR ELECTRIC

SHOCK, AND ANNOYING INTERFERENCE, USE THE

RECOMMENDED ACCESSORIES ONLY.

SURGE PROTECTORS:

It is recommended to use a surge protector for AC

connection. Lightning and power surges ARE NOT

covered under warranty for this product.

LASER WARNING:

This unit employs a Laser only qualified service personal

should attempt to service this device due to possible eye

injury 

ATTENTION:

POUR ÉVITER LES CHOC ÉLECTRIQUES, INTRODUIRE LA

LAME LA PLUS LARGE DE LA FICHE DANS LA BORNE

CORRESPONDANTE DE LA PRISES ET POUSSER

JUSQU’AU FOND.

IMPORTANT:

PLEASE KEEP ALL PACKAGING MATERIAL FOR AT LEAST 90 DAYS IN CASE YOU NEED TO RETURN THIS

PRODUCT  TO YOUR PLACE OF PURCHASE.

Summary of Contents for DP7000

Page 1: ......

Page 2: ...al 12 Basic Operation 13 Volume 13 Menu Button 13 Power Switch 13 Headphone Jacks 13 Top Cabinet Open Button 13 Standby 13 DVD Basic Operation 14 Playback of a DVD 14 Skip 15 Search 15 Pause 15 Slow M...

Page 3: ...tructions may cause harmful interference to radio communications However there is no guarantee that interference will not occur in a particular installation If this equipment does cause harmful interf...

Page 4: ...Taking a minute to do this now will help to prevent hearing damage or loss in the future After all we want you listening for a lifetime We Want You Listening For A Lifetime Used wisely your new sound...

Page 5: ...xample when you pour a cold drink into a glass on a warm day Drops of water form on the outside of the glass In the same way moisture may condense on the optical pick up lens inside this unit one of t...

Page 6: ...the Standby mode the display will turn off and the screen saver will disappear Press any button to resume and to turn on again BATTERY LOW INDICATOR When the rechargeable battery packs becomes weak th...

Page 7: ...y 9 Right Speaker 10 Top Cabinet OPEN Button 11 DVD CD Door OPEN CLOSE Area 12 STOP Navigation Down Button 13 Skip n Navigation Right Button 14 PAUSE p Navigation Up Button 15 Headphone 1 Jack 16 SEAR...

Page 8: ...important that you read the manual that accompanies the DVD disc as there are features that are on the DVD player that cannot be used with certain DVDs There are also extra features on the DVD disc th...

Page 9: ...that is recorded on a DVD disc If the Region number described on the DVD disc does not correspond to the Region number of this DVD player this DVD player cannot play that disc You may not be able to...

Page 10: ...the ENTER button 4 See steps below to change the selected setting Select the language the PLAYER MENU will be in ENGLISH FRENCH SPANISH using the Navigation Up 1 or Down 2 button When the desired lang...

Page 11: ...R button 3 The DVD must be recorded in the selected language otherwise the default language of the DVD will be played 1 2 3 1 Select the language the subtitle OSD will be in Off English French Spanish...

Page 12: ...Select the brightness setting 3 to 3 using the Navigation Up 1 or Down 2 button When the desired setting is selected press the ENTER button 3 1 2 3 1 SCREEN DISPLAY ASPECT BRIGHTNESS Select the contra...

Page 13: ...R button 3 Enter the first digit of the password using the SEARCH 4 or 5 button then press the ENTER button 3 Repeat to enter all four digits Then write the password down and press the ENTER button 3...

Page 14: ...op Cabinet OPEN button then lift the top cabinet up 2 3 1 TOP CABINET OPEN BUTTON For private listening plug one or two headphones into these jacks The speakers will be disconnected when a plug is ins...

Page 15: ...lease make sure to refer to the disc s jacket or case for additional information Resuming playback may not work on all discs IMPORTANT NOTES Mickey s hand will appear at the top right of the display s...

Page 16: ...e buttons and the speed will increase to x4 x8 x16 the sound will be muted and resume normal playback The DVD will move forward or backward at high speed until the Play button 3 is pressed normal play...

Page 17: ...ither the Search 1 or 2 button to move the CD forward or backward at double x2 speed to locate a specific section Repeatedly press these buttons and the speed will increase to x4 x8 x16 and resume nor...

Page 18: ...y 3 Press the Top Cabinet OPEN button 1 and lift up the top cabinet Slide the Power ON OFF switch 2 to the ON position 2 1 1 Press the DVD CD Door OPEN CLOSE area to open the disc tray Insert a disc w...

Page 19: ...e Navigation Left button 1 or Navigation Right button 2 to select the folder then press the ENTER button 3 to enter the sub folder To return to the previous folder s menu use the Navigation Left butto...

Page 20: ...rmal try another function Clean the disc This is normal on some discs Enter your password and or change the rating level Insert DVD correctly Make sure to insert a DVD Clean the disc This is normal tr...

Page 21: ...the disc to the outer edge of the disc Never wipe in circular motions Discs should be stored in their cases after each use to avoid damage Do not expose discs to direct sunlight high humidity high tem...

Page 22: ...VIDEO Disc 12cm single sided single layer 12cm single sided dual layer 12cm double sided single layer 8cm single sided single layer 8cm single sided dual layer 8cm double sided single layer COMPACT DI...

Page 23: ...13 Volumen 13 Bot n de Men 13 Interruptor de Encendido 13 Enchufes de aud fonos 13 Bot n para abrir gabinete superior 13 En espera 13 Operaci n b sica del DVD 14 Reproducci n de un DVD 14 Brincar 15...

Page 24: ...usa de acuerdo a las instrucciones puede ocasionar interferencia da ina con las comunicaciones de radio Sin embargo no hay garant a de que no habr interferencia en una instalaci n particular Si este...

Page 25: ...el Esto s lo le tomar un minuto y le ayudar a prevenir la p rdida del o do en el futuro Nosotros deseamos que usted pueda oir durante toda su vida Si sabe usar su equipo ste le proveer mucho tiempo de...

Page 26: ...s de reproducci n mec nica deben ser realizados por un t cnico de servicio calificado NOTAS SOBRE CONDENSACI N DE HUMEDAD La condensaci n de humedad da a el reproductor de DVD Le rogamos que lea deten...

Page 27: ...os la unidad entrar en modo de Espera el visor se apagar y el protector de pantalla desaparecer Oprima cualquier bot n para reanudar y encender de nuevo la unidad INDICADOR DE PILA BAJA Cuando se baja...

Page 28: ...uperior 11 rea para ABRIR CERRAR la puerta del DVD CD 12 Bot n de PARO Navegaci n Abajo 13 Bot n de Brincar n Navegaci n Derecha 14 Bot n de PAUSA p Navegaci n Arriba 15 Enchufe para Aud fonos 1 16 Bo...

Page 29: ...an algunas de las funciones seleccionadas como desea consulte el manual que acompa a al disco DVD Chapter 1 Title 1 Title 2 Chapter 2 Chapter 1 Chapter 2 Chapter 3 Chapter 4 CD DE AUDIO Los datos en u...

Page 30: ...est grabada en un disco DVD Si el n mero de Regi n descrito en un disco DVD no corresponde al n mero de Regi n de este reproductor de DVD este reproductor de DVD no puede reproducir dicho disco Es po...

Page 31: ...ENTRAR 4 Vea los pasos a continuaci n para cambiar la configuraci n seleccionada Seleccione el idioma en el que estar el MEN DEL REPRODUCTOR INGL S FRANC S o ESPA OL usando el bot n de Navegaci n Arri...

Page 32: ...Abajo 2 Cuando aparezca el idioma deseado oprima el bot n de ENTRAR 3 El DVD debe estar grabado en el idioma seleccionado de lo contrario se escuchar el idioma predeterminado del DVD 1 2 3 1 Seleccio...

Page 33: ...6 9 1 2 3 1 Seleccione la configuraci n del brillo 3 3 usando el bot n de Navegaci n Arriba 1 o Abajo 2 Cuando aparezca la configuraci n deseada oprima el bot n de ENTRAR 3 1 2 3 1 ASPECTO DE PANTALLA...

Page 34: ...luego oprima el bot n de ENTRAR 3 Ingrese el primer d gito de la contrase a usando el bot n de BUSCAR 4 o 5 y luego oprima el bot n de ENTRAR 3 Repita lo anterior para ingresar los cuatro d gitos Lueg...

Page 35: ...se desconectar n al conectar los aud fonos en uno de los enchufes 2 3 1 ENCHUFES DE AUD FONOS EN ESPERA Cuando la unidad se haya detenido por unos tres minutos el protector de pantalla aparecer en la...

Page 36: ...rima el bot n de ENTRAR Le rogamos que consulte la cubierta o caja del disco para informaci n adicional Es posible que continuar con la reproducci n no funcione en todos los discos NOTAS IMPORTANTES L...

Page 37: ...la velocidad aumentar a x4 x8 x16 el sonido estar silenciado y reanudar la reproducci n normal El DVD se mover hacia adelante o atr s a alta velocidad hasta que oprima el bot n de Tocar 3 la reproducc...

Page 38: ...producci n 3 Durante la reproducci n oprima el bot n de Buscar 1 o el bot n de Buscar 2 para mover el CD hacia adelante o atr s al doble x2 de velocidad para encontrar una secci n espec fica Oprima re...

Page 39: ...encender de nuevo la pantalla Para detener la reproducci n oprima el bot n de Paro 1 Como la unidad recuerda donde se detuvo simplemente oprima el bot n de Tocar 2 para reanudar la reproducci n donde...

Page 40: ...uierda 1 o el bot n de Navegaci n derecha 2 para seleccionar la carpeta y luego oprima el bot n de ACEPTAR 3 para entrar a la subcarpeta Para regresar al men de la carpeta anterior utilice el bot n de...

Page 41: ...ba Esto es normal pruebe otra funci n Limpie el disco Esto es normal en algunos discos Ingrese su contrase a y o cambie el nivel de clasificaci n Introduzca DVD correctamente Aseg rese de introducir u...

Page 42: ...movimientos circulares Los discos deben guardarse en sus cajas despu s de usarlos para evitar que se da en No exponga los discos a los rayos directos del sol mucha humedad altas temperaturas ni al po...

Page 43: ...deo DVD 12cm lado sencillo capa sencilla 12cm lado sencillo capas duales 12cm lado doble capa sencilla 8cm lado sencillo capa sencilla 8cm lado sencillo capas duales 8cm lado doble capa sencilla DISCO...

Page 44: ...ent de base 13 Volume 13 Bouton MENU 13 Interrupteur d alimentation 13 Prises d couteurs 13 Bouton d ouverture de la partie sup rieure 13 Mode d attente 13 Fonctionnement de base d un DVD 14 Lecture d...

Page 45: ...interf rences nuisibles dans une installation r sidentielle Cet quipement g n re utilise et peut rayonner une nergie de fr quence radio et s il n est pas install et utilis conform ment aux instructio...

Page 46: ...fectuer ce r glage peut vous viter des dommages ou une perte de l audition ventuelle Apr s tout nous voulons que vous entendiez toute votre vie Nous voulons que vous entendiez toute votre vie Utilis a...

Page 47: ...illes et ou d autres composants du m canisme de lecture devraient tre ex cut s par un technicien d entretien qualifi REMARQUES SUR LA CONDENSATION DE L HUMIDIT La condensation d humidit endommage le l...

Page 48: ...e sauve cran s arr tera Appuyez sur n importe quel bouton pour red marrer l appareil INDICATEUR DE PILE FAIBLE Lorsque la pile rechargeable s affaiblira l indicateur de pile faible LOW BATTERY s allum...

Page 49: ...e la partie sup rieure 11 Zone d ouverture fermeture du DVD CD 12 Bouton STOP navigation vers le bas 13 Bouton sauter n navigation vers la droite 14 Bouton PAUSE n navigation vers le haut 15 Prise des...

Page 50: ...r pr programmation Si une fonction s lectionn e ne produit pas l effet d sir consultez le manuel accompagnant le DVD Plage 1 Plage 2 Plage 5 Plage 6 Plage 3 Plage 4 AUDIO CD Les donn es d un CD audio...

Page 51: ...sur le disque DVD Si le num ro r gional inscrit sur le DVD ne correspond pas au num ro r gional de ce lecteur DVD le lecteur ne pourra pas lire le disque La lecture de certains disques DVD sur ce lec...

Page 52: ...pour changer le r glage s lectionn S lectionnez la langue dans laquelle le menu lecteur PLAYER MENU appara tra ENGLISH FRENCH SPANISH ANGLAIS FRAN AIS ESPAGNOL l aide des boutons de navigation vers le...

Page 53: ...e navigation vers le haut 1 ou vers le bas 2 Lorsque la langue d sir e est s lectionn e appuyez sur le bouton ENTER 3 Le DVD doit avoir t enregistr dans la langue s lectionn e autrement la langue par...

Page 54: ...r glage de contraste 3 to 3 d sir l aide des boutons de navigation vers le haut 1 ou vers les bas 2 Lorsque l option d sir e est s lectionn e appuyez sur le bouton ENTER 3 1 2 3 1 ASPECT DU MENU CRAN...

Page 55: ...ation vers le haut 1 ou vers le bas 2 et appuyez ensuite sur le bouton ENTER 3 Entrez le premier caract re du mot de passe l aide du bouton SEARCH 4 ou 5 et appuyez sur le bouton ENTER 3 R p tez pour...

Page 56: ...oment ou une fiche sera ins r e dans l une de ces prises 2 3 1 PRISES D COUTEURS ATTENTE Lorsque l appareil n est pas utilis pendant p riode d approximativement trois minutes l conomiseur d cran appar...

Page 57: ...uton ENTER Consultez la pochette ou le bo tier du disque pour de plus amples renseignements Le red marrage de la lecture pourrait ne pas fonctionner pour tous les types de disques REMARQUES IMPORTANTE...

Page 58: ...ra x4 x8 x16 le son sera coup et reviendra la lecture normale La lecture du DVD se fera vers l avant ou vers l arri re haute vitesse jusqu ce que le bouton PLAY 3 soit enfonc le lecteur reprendra alor...

Page 59: ...faire avancer ou reculer la lecture du CD vitesse double x2 afin de rep rer une section en particulier Appuyez sur ces boutons de fa on r p t e et la vitesse augmentera x4 x8 x16 puis reviendra la le...

Page 60: ...on d ouverture OPEN 1 et soulevez la partie sup rieure Glissez l interrupteur ON OFF marche arr t 2 en position ON marche 2 1 1 Appuyez sur la zone OPEN CLOSE ouverture fermeture de la porte du DVD CD...

Page 61: ...ation vers la gauche 1 ou vers la droite 2 pour s lectionner le dossier et appuyez ensuite sur le bouton ENTER 3 pour acc der au sous dossier Pour revenir au menu du dossier pr c dent utilisez les bou...

Page 62: ...normal essayez une autre fonction Nettoyez le disque Ceci est normal sur certains disques Entrez votre mot de passe et ou changez le niveau de classification Ins rez correctement le DVD Assurez vous...

Page 63: ...essuyer suivant un mouvement circulaire Ranger les disques compacts dans leur bo tier apr s chaque utilisation afin d viter les dommages Ne pas exposer les disques compacts la lumi re directe du sole...

Page 64: ...s vid o DVD 12cm monoface simple couche 12cm monoface double couche 12cm double face simple couche 8cm monoface simple couche 8cm monoface double couche 8cm double face simple couche DISQUE COMPACT Di...

Page 65: ...front cover...

Page 66: ...e servicio al cliente al numero 954 660 7026 Por favor mantenga todo el material de empaque por lo menos por 90 dias en caso que usted necesite devolver el producto donde lo compro a directamente a Me...

Reviews: