Dish TV Smartvu-mini A2020 User Manual Download Page 5


2. Start-Up Your Device 


2.1 Connect the Power 


  Connect the Dish TV SmartVU to the HDMI connector of your TV or monitor 

  Connect the power adapter into the wall socket 

  Connect  one  end  of  USB  cable  to  the  adapter,  and  the  other  end  into  the  Micro  USB 

device.   

Note:


The USB power supply must be at least 1000mA, we recommend that you use the 

power adapter that comes in the box. 

  Then the device will start and the LED will flash once 

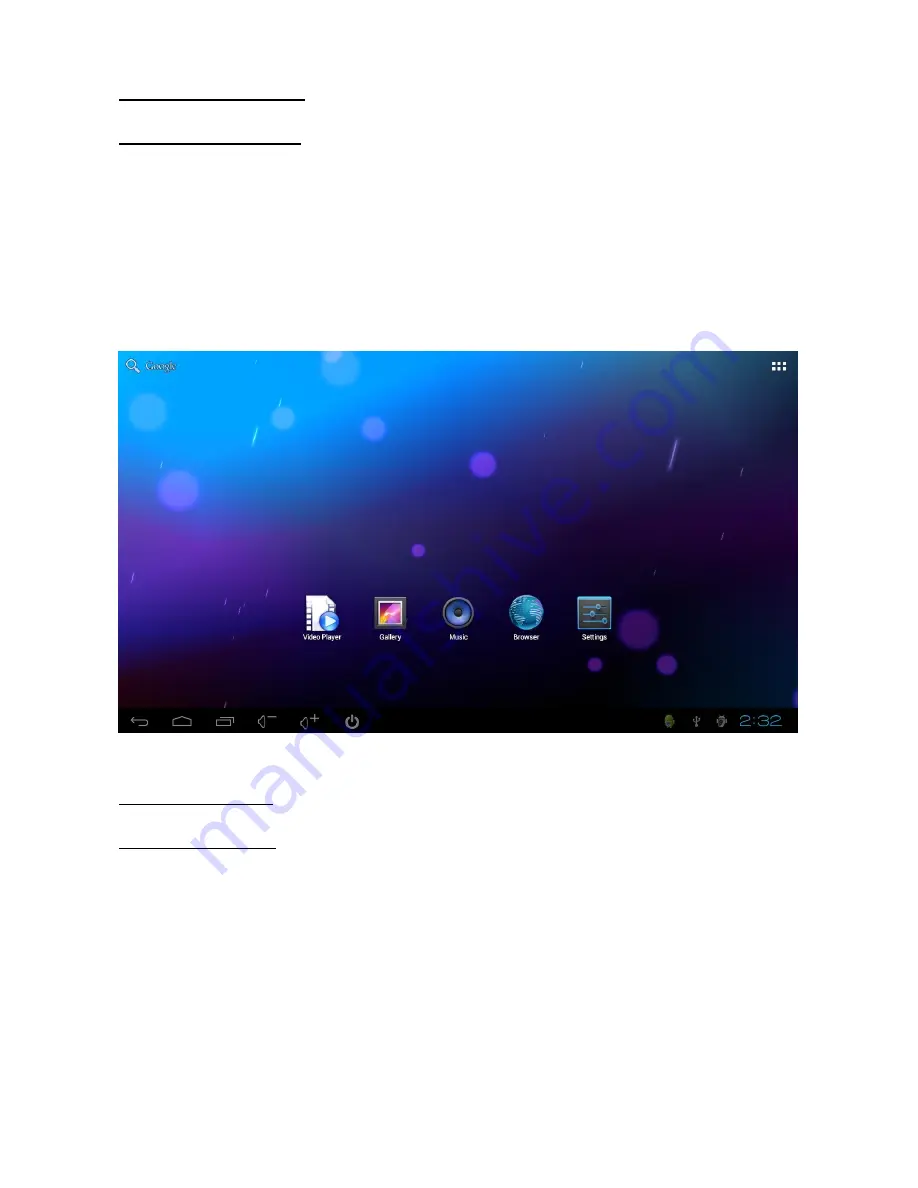
  When it starts up, the TV screen shows the main interface 


If the SmartVU does not boot, please refer to the "Troubleshooting" section 

 
3. External Devices 
 
3.1 Connect to a TV 


  Plug the HDMI port of SmartVU to the HDMI port on the TV, or use an HDMI extension 

cable to connect to your TV 

  Turn on the TV and  change  the  TV  video  input  to  the  correct  HDMI input (For details, 

please see the TV manual). 


Summary of Contents for Smartvu-mini A2020

Page 1: ...1 Model A2020 User Manual...

Page 2: ...ork 4 2 Adjust the Display Resolution 4 3 Adjust the Volume 4 4 Adjust Remote Sensitivity 4 5 Copy Files from Computer 4 6 Install Applications 4 7 Uninstall Applications 4 8 Move Applications 4 9 Qui...

Page 3: ...3 1 What s Inside the Box You can use a USB hub to connect multiple devices at once...

Page 4: ...4 1 1 Remote Control...

Page 5: ...recommend that you use the power adapter that comes in the box Then the device will start and the LED will flash once When it starts up the TV screen shows the main interface If the SmartVU does not...

Page 6: ...4G Note Use a single click on the left mouse button not double click to start using the SmartVU 4 Use 4 1 Connect to the Network The SmartVU has built in Wi Fi follow the steps to set up the Wi Fi ne...

Page 7: ...not look right click SETTINGS DISPLAY then click Output Settings and then set the output resolution we recommend using the Auto detection You can also use the RESIZE option to set the DISPLAY screen s...

Page 8: ...computer by using the USB cable supplied Wait about 30 seconds approximate Android boot time Then you will see two new disks appear in your computer one for built in flash and another for external TF...

Page 9: ...our WiFi network If you are unsure about data usage and data caps on your Internet connection please talk to your Internet service provider ISP Quickflix does have metering partnerships with certain I...

Page 10: ...f you do not see the LED lights check the power is connected well If the LED light is bright and the TV is turned on but TV screen doesn t show TV stick interface please check whether the HDMI is conn...

Page 11: ...your supplier and have your receipt of purchase on hand This warranty is subject to the following provisions This is only valid within New Zealand The product must be correctly connected and operated...

Reviews: