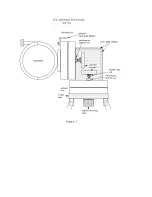
Azimuth axis friction adjustment
The Azimuth axis should be adjusted with a little more tension then the
Altitude axis! There should be enough tension to insure the disc are pulled
together and not held in place just by the weight of the mount. To little friction will
result in vibration caused by the axis jumping, rather then sliding on the friction
disc.
You will find that as you become familiar with the mount, adjustments will
only be made if you change your heaviest eyepiece or telescope configuration.
While the DiscMount is new you may also see minor changes, until the friction
system settles in.
Install the rear cover plate and top cover plate. The azimuth axes can be
adjusted from the front by sliding the wrench under the Altitude axis disc. The
Altitude axis can be adjusted by sliding back the top cover plate about a
¼
”.
Make sure the ring knobs or screws are tight. Don’t forget to put the
wrench back on the magnet located under the top cover!
Some hints
1- Once the balance and friction are close, only very slight adjustments are
required. The patent pending variable friction adjustment system will stay
wherever you set it.
2-Keep the weight spread down. If the diagonal is always being used. Do the
adjustments with the diagonal installed. As long as there is friction between the
disc the telescope will not take off and crash. If a slight imbalance occurs the
telescope will slowly rotate.
3-Focus on a star in the worse case heavy configuration and measure the
position of the focuser tube. Use this position for worse case heavy adjustments.
4-I use my telescope for astronomical, nature viewing/photography, with and
without bino’s! So I have marked several positions on the dovetail with a pencil
or tape depending on the configuration to be used, then it’s easy to slide the
telescope in the saddle for each configuration. Friction seldom needs to be
adjusted!
5-Art and drafting supply stores sell a masking type tape that will not leave glue
on your tube when making initial adjustments and it’s easy to write on. It’s made
to tape paper down and be removed without damage.
6-If you’re using one eyepiece such as a zoom eyepiece, or the camera is
staying in, a rough balance is all that's needed.
7-The capability of the mount is limited to the smoothness required at the highest
power (low power is more forgiving) and the maximum friction that is comfortable
to use!
8-The DM-6 has extremely high rigidity. Vibration originates from the tripod and
the mounting system used to couple the telescope to the disc. The closer the
telescope tube is mounted to the altitude disc the less tripod vibration will be felt.


