


Part 1 – Introduction
10
Installation
Installation of this product does not require the use of
special tools.
For more information on other devices comprising the
overall system, refer to their respective
installation
manuals
.
Product color and design may vary depending on the
model.
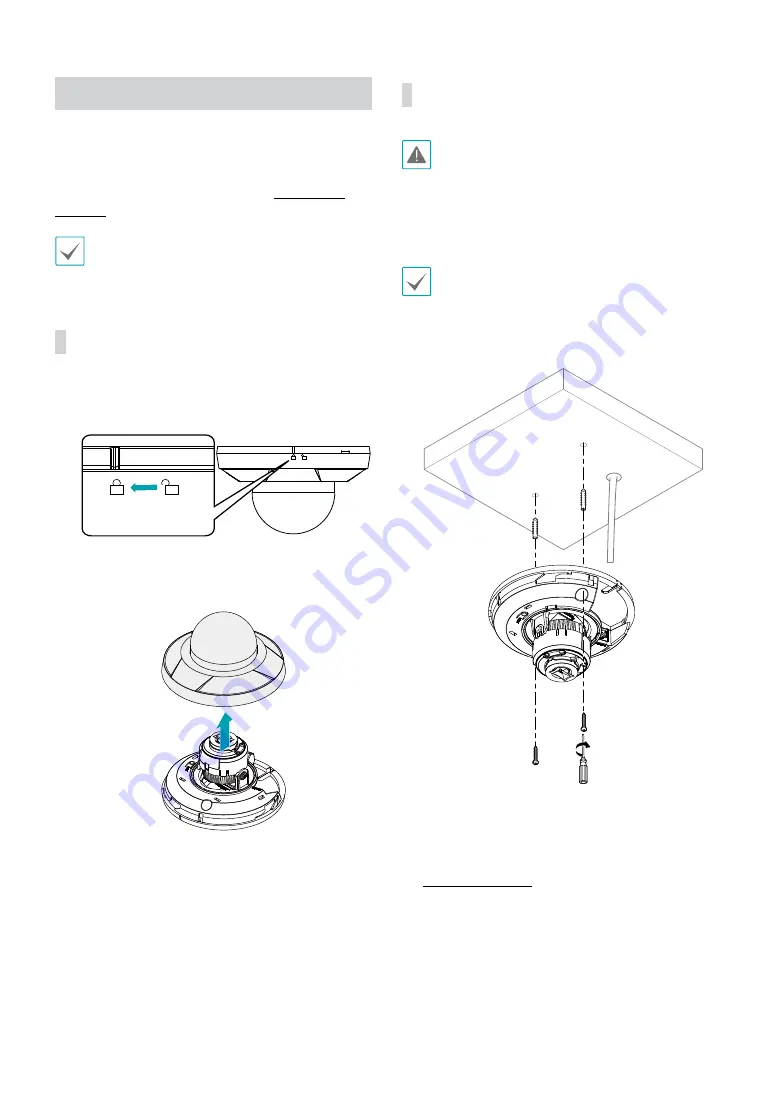
Removing the Dome Cover
1
Turn the dome cover counterclockwise.
2
Remove the dome cover.
Installation
• Check the wall or ceiling to see if it needs to be
reinforced. The camera may fall off if the wall or
ceiling is not strong enough to support its weight.
• Install the camera in a shaded area. If the camera
is installed in direct sunlight, it may be affected
adversely.
Use the provided guide pattern to check the distance
between the screw holes if necessary.
1
Use the screws, anchors provided with the camera to
secure the body on a wall or a ceiling.
2
Connect external devices and the network cable.
3
Adjust the angle. For more information, refer to the
.


