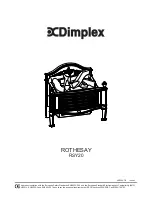
Dimplex OPTIMYST Basket
Introduction
Thank you for choosing this Dimplex electric fi re. Please read this information guide carefully to be able to safely
install, use and maintain your product.
Important Safety Advice
When using electrical appliances, basic precautions should always be followed to reduce the risk of fi re, electrical
shock and injury to persons, including the following:
1. OVERHEATING
WARNING: In order to avoid overheating, do not cover the heater. Do not place material or garments on the heater, or
obstruct the air circulation around the heater. The heater carries a DO NOT COVER warning.
2. DAMAGE.
If the appliance is damaged, check with the supplier before installation and operation.
If the supply cord is damaged it must be replaced by the manufacturer or service agent or a similarly qualifi ed person
in order to avoid a hazard.
3. LOCATION
Do not use outdoors.
Do not use in the immediate surroundings of a bath, shower or swimming pool.
Do not locate the heater immediately below a fi xed socket outlet or connection box.
Ensure that furniture, curtains or other combustible material are positioned no closer than 1 metre from the heater.
Although this heater conforms with safety standards, we do not recommend its use on deep pile carpets or on long
hair type of rugs.
4. PLUG
POSITIONING
The appliance must be positioned so that the plug is accessible.
Keep the supply cord away from the front of the heater.
5.
USE OF OTHER CONTROLS
Do not use this heater in series with a thermal control, a program controller, a timer or any other device that switches
on the heat automatically, since a fi re risk exists when the heater is accidentally covered or displaced.
6. UNPLUGGING
In the event of a fault unplug the device.
Unplug the device when not required for long periods.
7. OWNER/USER
This appliance can be used by children aged form 8 years and above and persons with reduced physical, sensory or
mental capabilities or lack of experience and knowledge if they have been given supervision or instruction concerning
use of the appliance in a safe way and understand the hazards involved. Children shall not play with the appliance.
Cleaning and user maintenance shall not be made by Children without supervision.
Children of less than 3 years should be kept away unless continuously supervised. Children aged from 3 years and
less than 8 years shall only switch on/off the appliance provided that it has been placed or installed in its intended
normal operating position and they have been given supervision or instruction concerning use of the appliance in a
safe way and understanding the hazards involved. Children aged from 3 years and less than 8 years shall not plug in,
regulate and clean the appliance or perform user maintenance.
CAUTION - Some parts of this product can become very hot and cause burns. Particular attention has to be
given where children and vulnerable people are present.
8. ELECTRCITY
WARNING – THIS APPLIANCE MUST BE EARTHED.
This heater must be used on an AC ~ supply only and the voltage marked on the heater must correspond to the
supply voltage.
Before switching on, please read the safety advice and operating instructions.
General Information
Only use fi ltered water in this appliance.
This model is designed to be free standing and is normally positioned near a wall.
Always ensure that the appliance is sitting on a level surface.
To reduce heat loss and to prevent any chimney up draft affecting the operation of your inset fi re we recommend they
the chimney fl ue is sealed off.
Please note: Used in an environment where background noise is very low, it may be possible to hear a sound which is
related to the operation of the fl ame effect. This is normal and should not be a cause for concern.
If this product experiences a power surge for whatever reason the product may cut-out. This is a normal safety feature
and the product will resume operation after 30 seconds.
Once installed, never move this appliance or lay on its back, without draining the water from sump and water tank.
If you intend not using the appliance for longer than 2 weeks, drain the water from sump and water tank and dry the
sump.

