Digitus DA-70516 User Manual Download Page 9

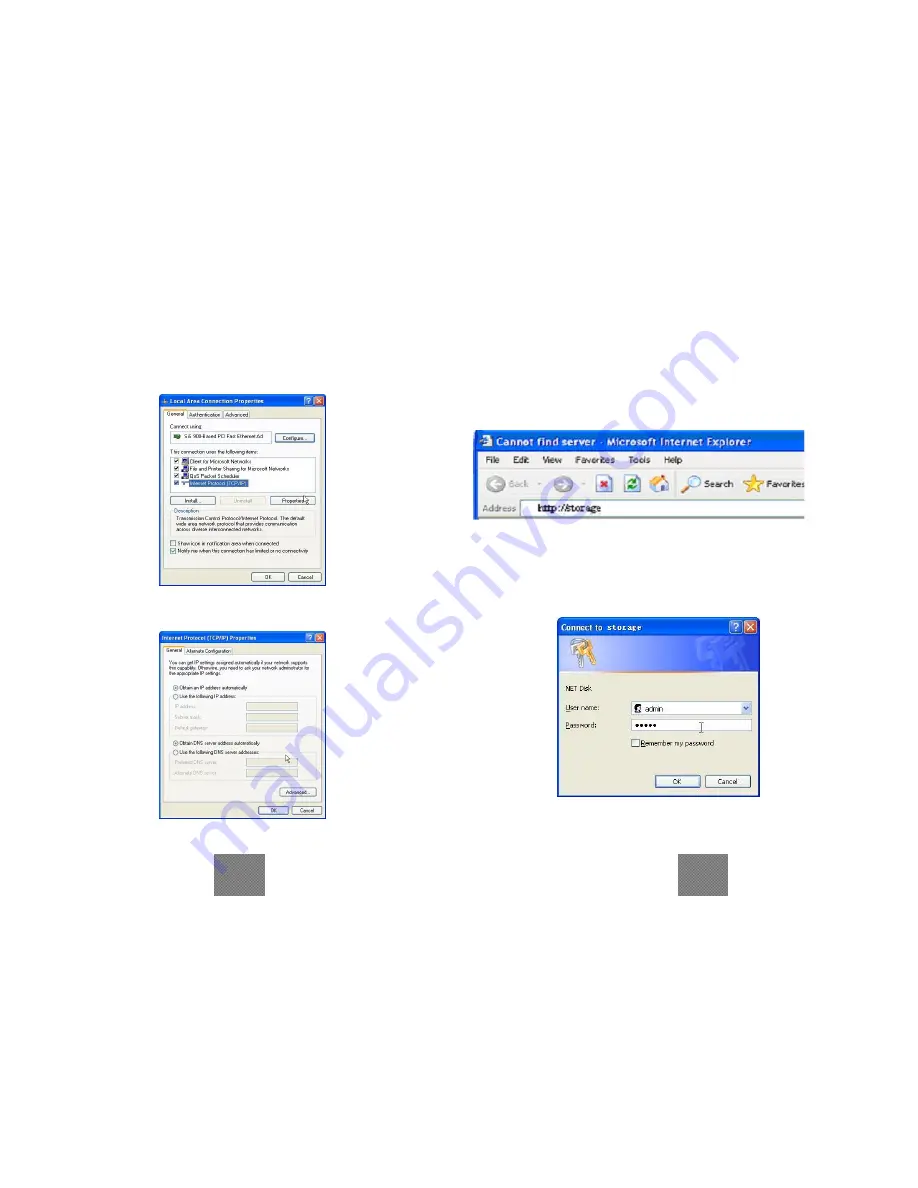
4) The following screen will appear, select “

Internet Protocol 

(TCP/IP)”

 then click on the <Properties> button 


5) Follow the step as below to configuring your TCP/IP settings. 


• Using Web Control Utility 

1)  Open  your  Web  browser  and  type  “

http://storage”

  into  the 

URL address box and then press <Enter>.


2)  The  login  pop-up  dialog  box  will  appear,  please  type  the 

following default username and password: 

Username: admin      Password:    admin   


15 

16 

Summary of Contents for DA-70516

Page 1: ...A 70516 CONTENT 1 Product Information 1 2 Product Specifications 2 3 System requirements 3 4 Take a look to the Product 4 5 Product Assemble Step 5 6 Product Connecting 8 7 Driver Installation USB2 0 9 8 Verification 13 9 Configuring LANDISK 14 10 Note 23 ...

Page 2: ...ard PIO mode interface USB2 0 high speed interfaces RJ45 for barrier free data transfer Supports power down mode and USB suspend indicator Product Specifications Network Connection Method Available network environment 100BASE TX 10BASE T Connection type RJ 45 Supported Protocols TCP IP NBNS Net BIOS Name Server Microsoft Networks CIFS SMB HTTP 1 0 and HTML 2 0 DHCP Server Client Auto detection SNT...

Page 3: ...98SE only RJ45 network port for NDAS mode Mac OS X G4 processor or higher running OS X 10 2 or higher 128 MB RAM 256 MB recommended USB 1 1 Port USB 2 0 recommended RJ45 network port for NDAS mode 4 Take a look on the Product 1 System LED 2 Link LED 3 Power LED 4 Working LED 5 Reset to FactoryDefault Power on press 15sec 6 Receptor of Power Adapte 7 USB Port USB1 1 USB2 0 8 LAN Port 10 100 Base TX...

Page 4: ...f the front panel pull out the product module from the housing 2 Set your IDE hard drive as Master Single mode 3 Connect IDE cable and 4 pin power adapter cable on your hard drive 4 Use the screws to fix it firmly 5 4 ...

Page 5: ...le from the housing 6 Use the bundled screws to screw it firmly Top and bottom side also screw it firmly 7 Product assemble step complete 6 Product Connecting 1 Connecting USB2 0 IDE external enclosure to your computer 6 7 Screws ...

Page 6: ...xternal enclosure in a USB port of your computer the system will detect it and start Add New Hardware Wizard 2 When you see the following picture please press Next 3 When you see the following picture please check Search for the best driver for your device Recommended and press Next 8 9 ...

Page 7: ... AT2 Driver included on the driver CD ROM shipped with this IDE external enclosure 5 When you see the following picture please press Next 6 When you see the following picture please press Finish WINDOWS ME 2000 XP AND Mac OS X Need no driver installation 10 11 12 ...

Page 8: ...ntrollers you should see the following screen 9 Configuring LANDISK Checking TCP IP Setting on PC Bring up the properties of the My Network Places Windows XP 1 Double click the My Computer icon on your desktop 2 Right click My Network Places and select Properties 3 Right click Local Area Connection and select Properties 13 14 ...

Page 9: ...low the step as below to configuring your TCP IP settings Using Web Control Utility 1 Open your Web browser and type http storage into the URL address box and then press Enter 2 The login pop up dialog box will appear please type the following default username and password Username admin Password admin 15 16 ...

Page 10: ...p Your Time zone Language Setting Up Your Language DHCP Server Enable Disable Your DHCP Server NOTE Make sure to press Change for the settings to take affect 4 You can select a function from the left side menu 5 Formatting Your Hard Disk If you have installed a new hard drive in the LANDISK you must go to Disk Utility for creating a new Partition and doing format for the hard disk Disk Utility 17 ...

Page 11: ...P or Static IP as below IP Config 7 Sharing Your Folders to LAN You will see all available folders for Network Share listed in the Share List box just select your target folder and click on the à button for sharing the folder to Network SMB Server 19 20 ...

Page 12: ...er FTP Account List Presses Add Modify to set the accounts that you allow accessing LANDISK and defining the authority 9 Maintenance Firmware Upload Here you can update the new firmware for your LANDISK System Reboot Click Reboot to have the device perform a software restart Factory Defaults You can Press Reset here then refresh this page by pressing Refresh button on IE browser or reboot the LAND...

Page 13: ...herwise you may need to re format your old hard drive by LANDISK s utility 2 The LAN Port on the LANDISK is Auto MDI MDIX you can also connect the network cable directly to the Lan port on your computer It is not necessary to use a crossover network cable for direct link 3 If you prefer to use a Fixed IP for your computer please also setup a fixed IP for LANDISK 4 The HDD must be jumperd to MASTER...

Reviews: