

To add cameras to the NVR, the system will scan your network for all supported devices.
The cameras connected directly to the NVR will appear at the top of the list, with the IP
Address credentials set in the Switch Settings in the previous step.
To add a camera:
1. The system will automatically scan the netowork for supported devices. you can also
press the search button next to Auto Discovery.
2. Supported devices will appear in the results table.
3. Check the box next to the cameras you wish to assign to the NVR.
4. Select from the 'Channel' drop-down menu which camera to assign to which channel.
5. Press 'Save' to save all changes or 'Cancel' to exit the registration screen.
6. You can always access the registration setup screen to change cameras by right-clicking
anywhere on the screen and selecting Setup Menu > Camera > Register.
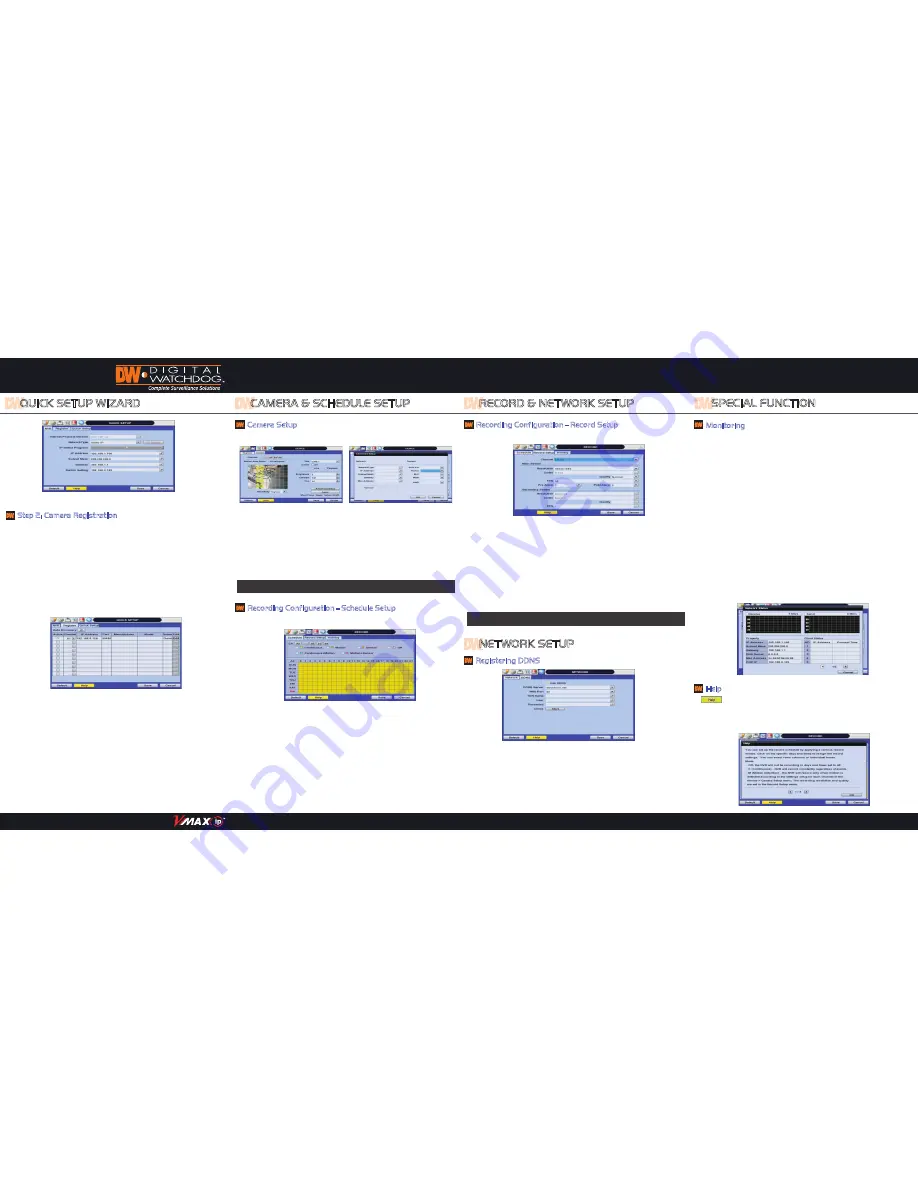
Step 2: Camera Registration
Network Video Recorder
Camera Setup
Once all cameras have been properly registered with the NVR, you can adjust the
camera's image, title, and network information under the camera's setup menu.
Recording Configuration - Schedule Setup
Users can use “Schedule” settings to define the time range of the scheduled
recording for each channel.
Users can use “Schedule” settings to define the time range of the scheduled
1. Go to the Setup Menu and select Record.
2. In the record window, select the Record Setup submenu.
3. Chose the desired resolution, frame-rate, and quality from the drop-down list
for each of the recording modes (Continuous/ Event).
4. Individually configure the settings for each channel, or use the [COPY SETTINGS]
button to apply changes to multiple cameras.
5. To setup a specific recording schedule, go to the SCHEDULE submenu. You can
setup the record schedule by applying different recording modes at different
days and times.
a. Select a record mode from the options on the top of the screen.
b. Using your mouse, click, hold, and drag to select multiple days & hours.
c. You can setup a unique recording schedule for each channel or apply the same
recording settings to all channels.
d. You can setup special days as "holidays" either by their date (December 24th)
or by their time of the month (Thursday of every 3rd week of November).
1. Go to Setup Menu > DEVICE > Camera
2. Select the channel for the camera you want to modify.
3. Press the pencil icon next to the camera's title to edit the camera's name.
4. Set the camera's motion detection and sensitivity. By default, motion is enabled on
the entire camera view. Block marked in yellow indicates motion is ON for that area.
To disable, click on the yellow box.
5. If applicable, enable the camera as a covert channel. If enabled, the camera's image will
not be available for users that have been setup with covert channel restrictions.
6. Adjust the camera's image using the brightness, contrast and hue settings.
7. Press 'Advanced Settings' to access the camera's network settings, adjust the Auto Iris,
Flicker, BLC, WDR, and AWB settings, or view the camera's firmware version.
Note: Advanced Settings are available only on cameras sold with the NVR.
SPECIAL FUNCTION
Recording Configuration - Record Setup
The Record Setup Menu offers streaming configuration per channel for both the first
and second streams.
1. Right-click anywhere on the screen and go to Setup Menu> Record > Record Setup.
2. Select the channel to setup from the drop-down menu.
3. Setup the channels main and secondary stream settings, including resolution,
quality, FPS, and pre and post alarm recording.
a. Resolution: select from 1920x1080, 1280x720, or 640x360. Secondary stream is set by
default to 640x360.
b. Codec: the codec is set by default to H.264 on the main stream, and MJPEG on the
secondary stream.
c. Quality: set the image quality to Low, Normal, High, Highest
d. FPS: set the stream's frames per second speed from 0 to 30. Main stream's FPS is set by
default to 25fps, secondary stream's FPS is set by default to 5fps.
e. Pre Alarm: if applicable, select from 3-5 seconds.
f. Post Alarm: if applicable, select from 5-15 seconds.
The “HELP” button will help you understand how to setup several important
settings such as DDNS, NOTIFICATION, BACKUP, SCHEDULE, NETWORK, and CAMERA.
For example, if you need help about how to set “BACKUP”, Click “HELP” button at the
right bottom of the BACKUP menu.
Note: Due to system performance, BitRate per channel must be limited to 4,000kbps/CH
for Main Stream and 512kbps for Secondary Stream.
Registering DDNS
The DDNS address provides your NVR a URL address, easier to remember than an IP address.
This is a free feature supported by Digital Watchdog for its customers.
1. Go to the Network setup menu, and select the 'DDNS' tab.
2. Check USE DDNS to enable.
(Make sure the NVR's web port has been properly setup in your router).
3. Select DWDDN2.net (default).
4. Enter a name for your NVR and click the CHECK button.
If the name is available, the system will display the following message:
"THIS NVR NAME CAN BE USED". Click SAVE to save all changes.
5. To use your DDNS, open an Internet Explorer page and enter the DDNS in the address bar:
NVRname.dwddns2.net:port-number.(example: http://vmaxip.dwddns2.net:1234)
Monitoring
The monitoring menu allows you to view the cameras and network status as well as
connection log and events.
1. Right-click anywhere on the screen and go to Setup Menu > System > Monitoring.
2. The table will display the cameras assigned to each channel (see Camera Registration for
more information), their IP address, vendor and model, event notification and status.
a. IP Address: The camera's address. If the camera's are connected directly to the VMAXIP
NVR, the IP address will be set according to the switch settings in the network setup page.
b. Vendor and Model: the camera's make and model will be displayed in the table.
c. Events: if the cameras are set to record events, notifications will appear every time an
event occurs such as motion, sensor activation, etc. Please note that all external devices
must be set accordingly to event recording and notifications for the event notification to
work.
d. Status: displays the camera's connect/ disconnect status.
3. You can refresh the table to view any changes in the network.
4. Network Status: View send and receive traffic charts for the VMAXIP in Mb/s.
a. VMAXIP's Receive chart: displays the data received at the NVR from the cameras in MB/s.
b. VMAXIP Network Properies: VMAXIP's network settings, including IP and MAC addresses,
gateway, subnet mask, DNS server, and PoE IP.
c. Remote Client's Send chart: displays data transmission from the NVR to a remote client in
Mb/s.
d. Client's Status: The system can monitor up to ten remote connections to the VMAXIP,
displaying their IP addresses and connection time.
5. Connection Log: displays the IP cameras' connection to the VMAXIP NVR in log format.
Press the 'Connection Log' button, then press the 'Search' button to display all log results.
Help
QUICK SETUP WIZARD
CAMERA & SCHEDULE SETUP
RECORD & NETWORK SETUP
NETWORK SETUP
DHCP
35.35.1.101
35.35.1.100
3C:04:BF:0F:00:58
255.255.0.0
off
off
off
Nomal
off
DW-VIP2TIR
Digital watchdog


