

Rev Date: 11/19
Copyright © Digital Watchdog. All rights reserved.
Specifications and pricing are subject to change without notice.
Quick Start Guide
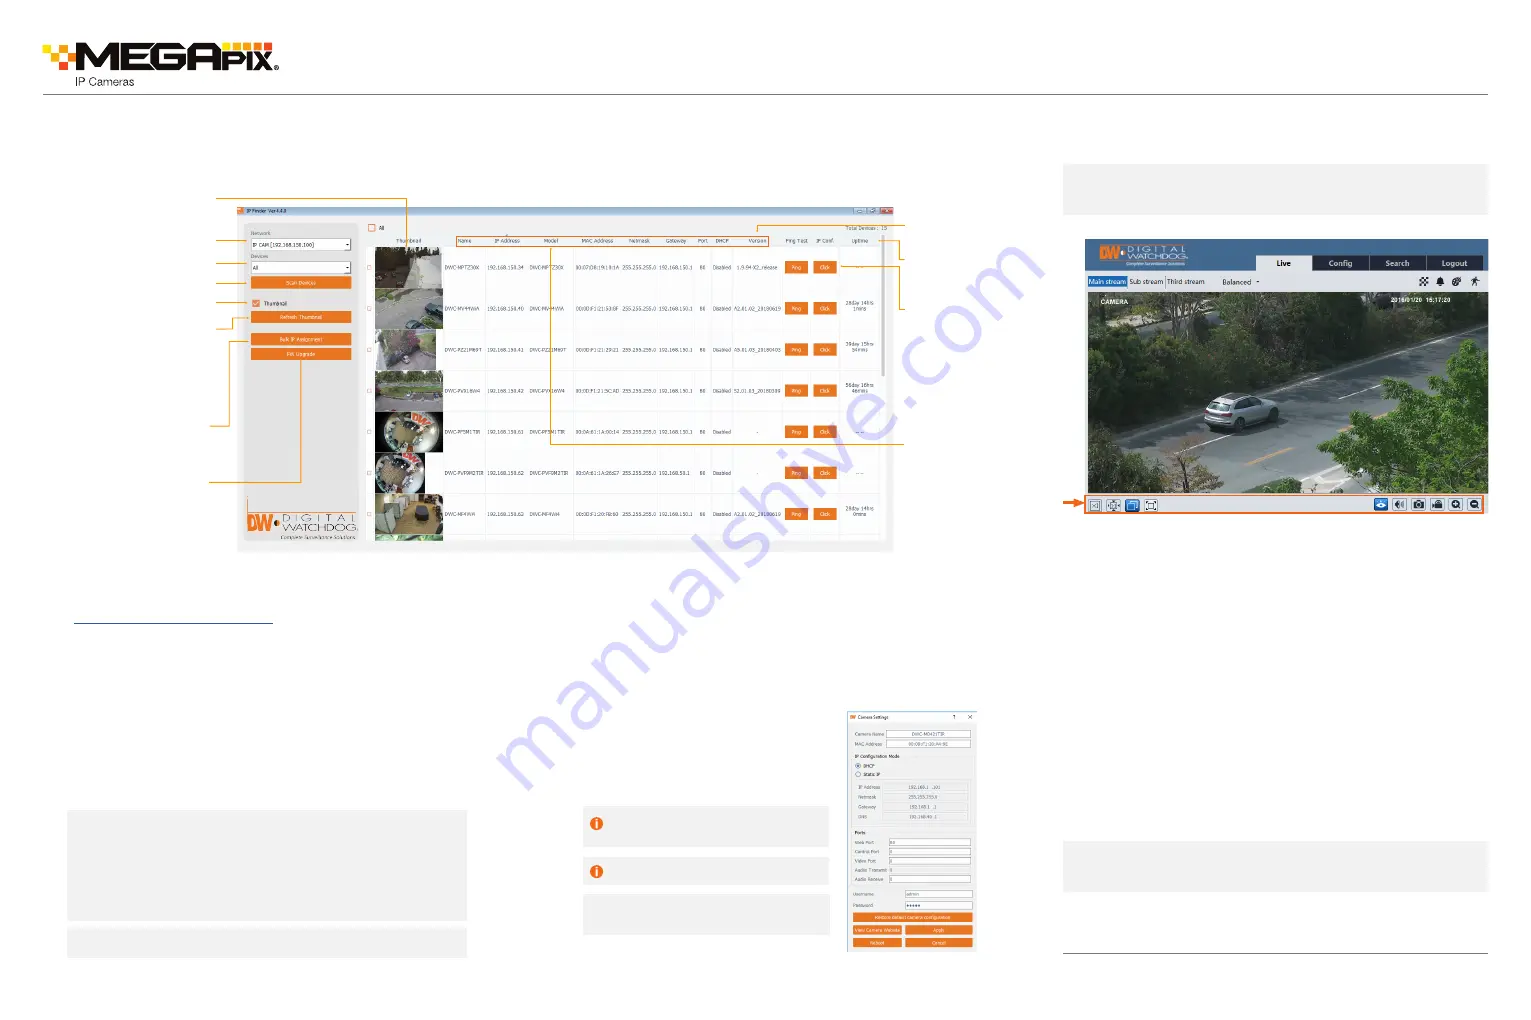
STEP 5 – WEB VIEWER
NOTE:
Some Menu options may not be available based on the
camera model. See the full manual for more information.
*
NOTE:
This camera’s web client must be accessed via Internet
Explorer web browser only.
The GUI display may differ by camera models.
Once the camera’s network settings have been setup properly, you can
access the camera’s web viewer using the DW® IP Finder
™
.
To open the camera’s web viewer:
1. Find the camera using the DW® IP Finder
™
.
2. Double-click on the camera’s view in the results table.
3. Press the ‘View Camera Website’. The camera’s web viewer will
open up in your default web browser.
4. Enter the camera’s username and password (default are admin /
admin).
5. If you are accessing the camera for the first time, install the
ActiveX player for web files in order to view video from the
camera.
*
STEP 4 – DW® IP FINDER
™
Thumbnail view
Firmware version
Camera’s uptime
Open Device
configuration
settings
Filter device type to scan
Scan devices
Select a network to scan
Show/hide thumbnail view
Refresh thumbnail view
Bulk IP assignment
Firmware upgrade
Device’s
information
Use the DW® IP Finder™ software to scan the network and detect all MEGApix® cameras, set the camera’s network settings or access the camera’s web client.
Network Setup
1. To install the DW® IP Finder™, go to:
http://www.digital-watchdog.com
2. Enter “DW® IP Finder” on the search box at the top of the page and
press Enter.
3. Click on the DW® IP Finder from the search result and go to the
Software tab. Click on download icon to download the DW® IP
Finder installation file.
4. Run the installation file and follow the wizard to install the DW® IP
Finder™. Open the DW® IP Finder™ and click ‘Scan Devices’. It will
scan the selected network for all supported devices and list the
results in the table. During the scan, the DW® logo will
turn
gray.
Default ID / PW : admin / admin
‘Port forwarding’ has to be set in your
network’s router for external access to
the camera.
*NOTE:
For security purposes, it is highly
recommended to change your
password after initial setup.
Default TCP/IP information: DHCP
Select DHCP if the internet service is dynamic IP. This will allow the
camera to receive its IP address from the DHCP server.
Select “Static” to manually enter the camera’s IP address, (Sub)
Netmask, Gateway and DNS information.
* The camera’s IP must be set to Static if connecting to
DW Spectrum
Contact your network administrator for more information.
5. Select a camera from the list by double-clicking on the
camera’s image or clicking on the ‘Click’ button under the IP
Conf. column. The pop-up window will show the camera’s current
network settings, allowing admin users to adjust the settings as
needed.
6. To access the camera’s web page, click on ‘View
Camera Website’.
7. To save the changes made to the camera’s
setting, input the username and password
of the camera and click Apply. Click “Scan
Devices” from the main screen again to
display the updated information.


