


6
6. Click OK to close then click Close to go back to Network Connections.
Local Network
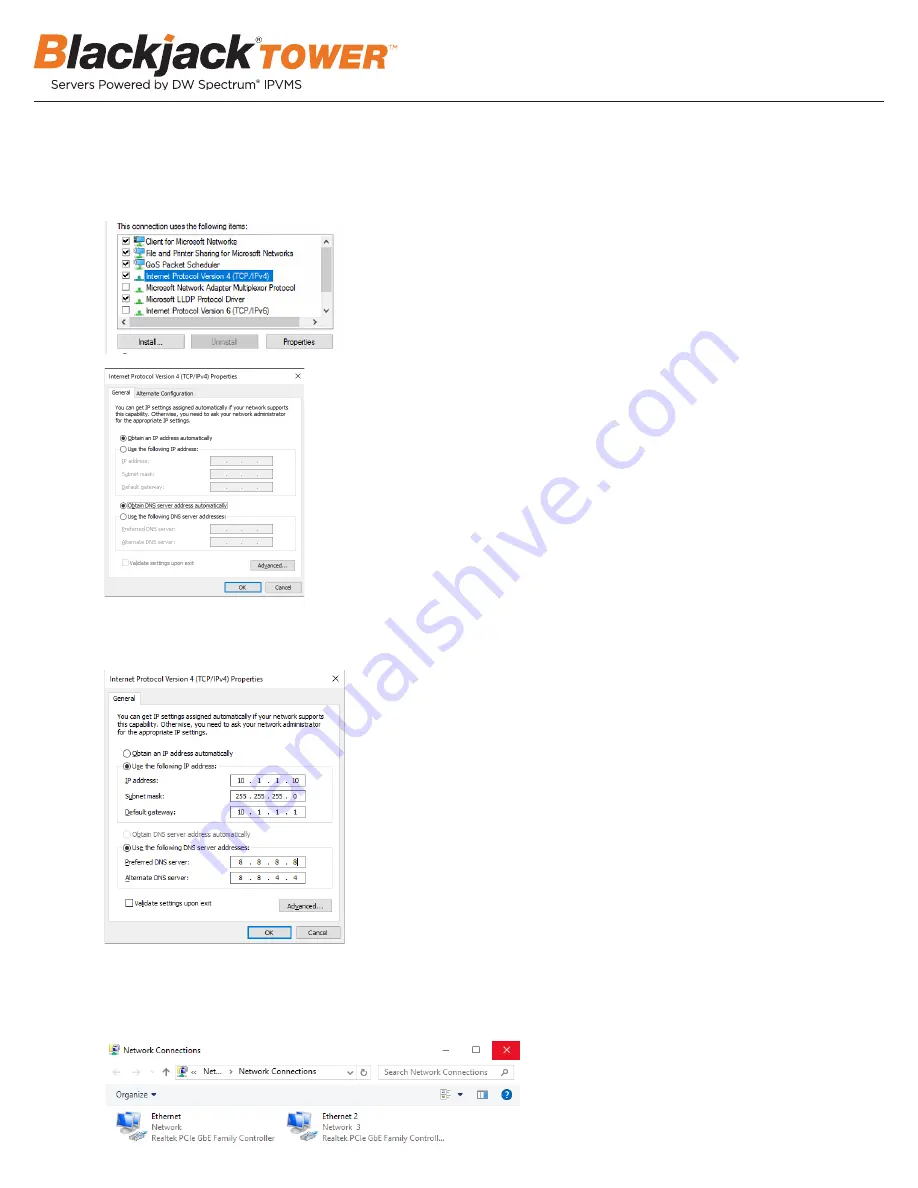
7. Right click on the other Ethernet, the one with network cable unplugged, and click Properties.
8. Click Internet Protocol Version 4 (TCP/IPv4) and click Properties
9. Select Use the following IP address (Use the following DNS server addresses will be selected automatically)
10. Enter IP address and Subnet mask of the camera network.
6. Click OK to close then click Close to go back to Network Connections.
Local Network
7. Right click on the other Ethernet, the one with network cable unplugged, and click Properties.
8. Click Internet Protocol Version 4 (TCP/IPv4) and click Properties
9. Select Use the following IP address (Use the following DNS server addresses will be selected automatically)
10. Enter IP address and Subnet mask of the camera network.
6. Click OK to close then click close to go back to network connections.
Local Network
7. Right-click on the other Ethernet, the one with network cable unplugged, and click “Properties”.
8. Select “Internet Protocol Version 4 (TCP/IPv4)” and click “Properties”.
9. Select “Use the following IP address” (Use the following DNS server addresses will be selected automatically).
10. Enter IP address and subnet mask of the camera network.
* Consult with your IT department if you do not know what IP address to use.
11. Click OK to close then click Close to go back to Network Connections.
12.
Connect a network cable to the Ethernet port B8 on the diagram (page 2) to the switch on the local network.
13. Close the Network Connections by clicking X on the upper right corner of Network Connections.
Linux
1. D
ouble-click the Network icon
on the Desktop
2. Select ‘Wired’ that has arrows pointing up and down from the list (If neither of the “wired” are showing arrows up and downs, then make
sure the network cable is connected to the PoE switch on the camera network from
STEP 1
)
3. Click ‘Options’ at the bottom of the window.
4. Click on the ‘IPv4 Settings’ tab.
5. From the drop-down menu, select connection type (“Method”) as Manual.
6. Click ‘Add’ next to Addresses.
NOTE
The Blackjack Cube’s network settings are set to DHCP as default.
11. Click OK to close then click close to go back to network connections.
12. Connect a network cable to the Ethernet port B10 on the diagram (page 2) to the switch on the local network.
13. Close the network connections dialog.


