background image

6

6-31

Installing Windows software

3.

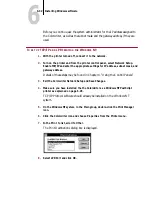
Attach a Centronics cable from the parallel port of your computer to the parallel 
port of the Colorwriter.

4.

Turn on the Colorwriter. Press the Menu button, select Network Setup and confirm 
that the parallel port setting is ENABLE PARALLEL.

5.

You can leave the default settings for parallel port timeout, and ignoring EOF 
character.

For information on these and other setup options, see the User Guide.

6.

Exit the Colorwriter Network Setup and save changes.

The printer reboots.

7.

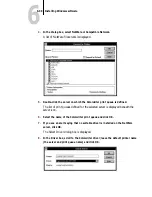
Turn on your computer. Choose Print Manager from the Main group.

8.

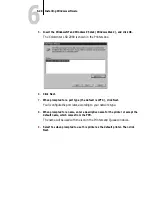
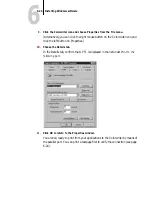
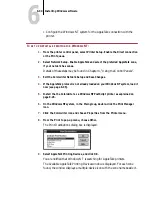
Double-click the Colorwriter icon and choose Properties from the Printer menu.

In the Printer Properties dialog box, confirm that LPT1 appears in the 

Print to


box.

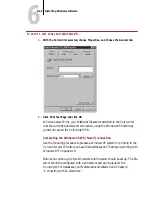
9.

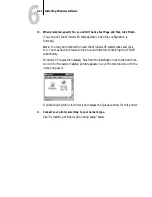
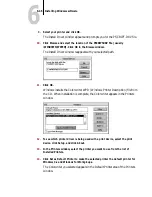
Click Details to check and configure the defaults. Select Print Directly to Port and 
click OK.

Since parallel port jobs are spooled on the Colorwriter, this bypasses 
Windows NT Print Manager spooling.

10.

Click OK to exit the Printer Properties dialog box.

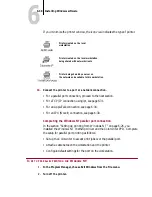
The Colorwriter is ready to accept parallel print jobs from your computer, using 
the Windows NT PostScript printer driver and the Colorwriter PPD. When you 
select Print, your PostScript files are transmitted over the parallel port connection 
to the Colorwriter. The network administrator should verify the parallel port 
connection by printing a simple document to LPT1, the designated port.

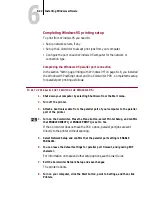
Completing the Windows NT TCP/IP connection

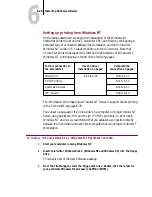
In the section “Setting up printing from Windows NT” on pages 6-26 to 6-30, 
you installed the Windows NT PostScript driver and the Colorwriter PPD. 
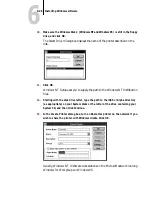
Complete the setup for the TCP/IP and lpr connection as follows:

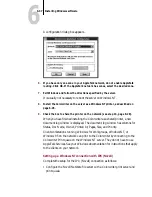
Set up the Colorwriter to accept print jobs using TCP/IP and lpr protocols.

Configure the Windows NT system for the TCP/IP connection.

Summary of Contents for Colorwriter LSR 2000+

Page 1: ...Systems InfoCenter http www printers digital com Colorwriter LSR 2000 Printer Getting Started EK LCPLE GS A01 Digital Equipment Corporation Maynard Massachusetts This document was created with FrameMa...

Page 2: ...ng negligence product liability or otherwise will be limited to 50 Restricted Rights Legends For defense agencies Restricted Rights Legend Use reproduction or disclosure is subject to restrictions set...

Page 3: ...for Imaging and its suppliers Except as stated above this Agreement does not grant you any right to patents copyrights trade secrets trademarks whether registered or unregistered or any other rights f...

Page 4: ...interference will not occur in a particular installation If this equipment does cause harmful interference to radio or television reception which can be determined by turning the equipment off and on...

Page 5: ...that the printer does not emit hazardous laser radiation The label shown below is attached to this printer WARNING When servicing the machine or laser module follow the procedures specified in the ma...

Page 6: ...xvii Energy Star compliance xvii Chapter 1 Overview System requirements 1 1 Using the Colorwriter with a Macintosh 1 1 Using the Colorwriter with a Windows computer 1 2 Using the Colorwriter with UNIX...

Page 7: ...an AC outlet 3 1 If you have an optional paper feeder unit 3 2 If you do not have an optional paper feeder unit 3 3 Tips on handling the power cord 3 4 Turning the printer on or off 3 5 Status messag...

Page 8: ...rallel cable connection 5 1 Verifying the parallel port connection 5 2 Ethernet cable connection 5 3 Verifying the network connection 5 4 Setting up TCP IP printing 5 4 Setting up the Colorwriter prin...

Page 9: ...es 6 14 Installing the Colorwriter screen fonts 6 15 Installing Windows software 6 17 Setting up printing with Windows 95 6 18 Completing Windows 95 printing setup 6 22 Setting up printing from Window...

Page 10: ...ak Precision and ICC color profiles and flexibility in page layout the Colorwriter fits extremely well into graphic arts prepress and desktop publishing environments The complex images necessitated by...

Page 11: ...and install the printer at your site If you are a user and the printer has already been installed read Chapter 1 Overview and then Chapter 3 Printing the First Page NOTE In this manual software or fea...

Page 12: ...is included in the documentation pack If you adhere it to the side of the printer you can use it to keep the Quick Reference Card with the printer Printed Release Notes describe last minute additions...

Page 13: ...people When installing the printer carefully observe the location requirement described in this manual When the printer is in use the fixing assembly and delivery areas become extremely hot Be carefu...

Page 14: ...he allowed rating current of the extension cord Make sure that the total ampere rating of the products plugged into the extension cord does not exceed the extension cord ampere rating Use a short exte...

Page 15: ...of this printer should always be supervised by a responsible adult To avoid injury do not allow children access to the interior of any electrical product and do not let them touch any electrical cont...

Page 16: ...t for long periods of time To avoid this make sure that the following measures are taken Install the printer in a large well ventilated room Avoid facing the exhaust port directly toward users Be sure...

Page 17: ...required to use the Colorwriter and utilities Using the Colorwriter with a Macintosh To use the Colorwriter with a Macintosh computer you need Any Macintosh computer in the Macintosh II Quadra Centris...

Page 18: ...bles for your network or printer connection To print to the Colorwriter your PC must be connected to a network file server running Windows NT or Novell NetWare software Alternatively you can print fro...

Page 19: ...tware installs this PPD automatically You can use the Windows PostScript Printer Driver that came with your Windows 3 x System software together with the Microsoft Windows Printer Description WPD file...

Page 20: ...Star compliant Printer drivers and files for remote users Color reference files NOTE In this manual software or features that are part of the Professional Color Kit PCK are indicated with a small PCK...

Page 21: ...ase the memory in your Colorwriter The following table explains what features available on your Colorwriter are supported with different memory configurations Memory Utilities Queues of servers Qualit...

Page 22: ...Documentation user software and registration and warranty cards Power cord Drum cartridge Two waste toner bottles Four toner cartridges one each of cyan yellow magenta and black Silicone oil bottle O...

Page 23: ...OT NO SAFETY INFORMATION Laser Safety Caution Printer paper cassette installed Power cord for 120V model Drum cartridge Toner cartridges cyan yellow magenta black Waste toner bottles with sealing cap...

Page 24: ...e printer NOTE Before moving your printer pay careful attention to Steps 7 through 9 7 Determine the location for your printer See page 2 5 for information on choosing your printer location 8 If you h...

Page 25: ...cking screw by pushing the orange knob up and out toward you 15 Open the fixing unit cover which is identified in Appendix C of the User Guide 16 Remove the orange left and right pressure release spac...

Page 26: ...er Be sure to follow these guidelines when choosing a location for the Colorwriter Room temperature should be between 59 and 86 degrees Fahrenheit 15 to 30 degrees Centigrade Relative humidity should...

Page 27: ...e properly A dusty or wet area Handling abrupt temperature changes When the room is quickly heated or the printer is moved from a cool dry place to a warm humid one let the printer remain idle for mor...

Page 28: ...two fingerholds at the bottom of the two sides of the printer 2 Lift up both sides at the same time and carry the printer to the location selected Note that the right side of the printer is heavier th...

Page 29: ...ction and go to the instructions for Installing consumables on page 2 15 After choosing a location for the printer attach the optional paper feeder unit Checking the package contents The optional pape...

Page 30: ...items are illustrated below and on page 2 2 TO SET UP THE OPTIONAL PAPER FEEDER UNIT 1 Remove all packing tape and set aside the two locking pins for later use Optional paper feeder unit Universal pap...

Page 31: ...Choosing the printer location 2 Push up the handle on the underside of the universal cassette and pull out the cassette 3 Turn over the universal cassette and remove the packing tape and the spacer S...

Page 32: ...location 4 Turn the cassette upright and remove the two spacers inside the cassette 5 Move the paper feeder unit to the selected location NOTE The paper feeder unit weighs about 20 lb 9 2 kg and can b...

Page 33: ...the two positioning poles on the feeder unit for alignment Follow the instructions on page 2 7 to lift the printer The printer weights about 110 lb 50 kg and therefore requires two or more persons to...

Page 34: ...sing the printer location 8 Insert the two locking pins into the printer body as shown below to secure the feeder unit to the printer body 9 Make sure the printer body and the feeder unit are correctl...

Page 35: ...le upward slide the universal cassette removed in Step 2 all the way into the optional feeder unit until it snaps into place 11 While pressing the handle upward slide the universal cassette removed in...

Page 36: ...unit installed your printer will not look exactly like the illustrations Installing the toner cartridges The Colorwriter requires four toner cartridges cyan magenta yellow and black Each toner cartrid...

Page 37: ...ing consumables 2 Remove one of the toner cartridges from its protective bag NOTE Avoid touching the windows on the top and bottom of the cartridge 3 Remove the two pieces of protective tape on the to...

Page 38: ...er evenly NOTE Do not try to redistribute the toner in a used or unsealed cartridge the toner may leak 5 Place the toner cartridge on a flat surface and then pull the sealing tape completely out in th...

Page 39: ...of the arrow until the color markers that match the toner cartridge appear in the opening Make sure the two color markers are fully visible before installing the toner cartridge The rotary knob pops o...

Page 40: ...e marks indicated below When the cartridge is properly inserted there is a small gap between the cartridge and the marks 9 Repeat the steps above to install the remaining three toner cartridges NOTE E...

Page 41: ...idge is extremely sensitive to light and may deteriorate if exposed to light Therefore do not open the protective bag or the drum cartridge cover until you are ready to install the drum cartridge as f...

Page 42: ...cartridge door in the direction of the arrow to open the door 4 Remove the drum cartridge from its protective bag NOTE Do not open the protective bag or drum cartridge cover until you are ready to ins...

Page 43: ...ng as shown below NOTE Be sure your transfer drum release handle is in the down position to avoid scratching the photosensitive drum 6 While holding the cover with one hand and the cartridge horizonta...

Page 44: ...over Avoid touching the surface of the photosensitive drum with your fingers when removing the drum cartridge cover NOTE Keep the cover to protect the used drum later 8 Push the drum all the way in an...

Page 45: ...e with the printer and each drum cartridge kit After you have installed the drum cartridge immediately take out the new waste toner bottle from the drum cartridge package and install the bottle Read t...

Page 46: ...consumables 2 Close the drum cartridge door to hold the waste toner bottle in place 3 Push up the transfer drum release handle to lock the transfer drum in position This completes the waste toner bot...

Page 47: ...il Use only the recommended silicone oil see Appendix F of the User Guide for information on ordering consumables Do not operate the printer unless a silicone oil bottle is installed otherwise the pri...

Page 48: ...l traces of the oil Use an all purpose alkaline cleaner or have the surface including carpeting cleaned commercially Petroleum distillates may be used except on plastic or vinyl surfaces Dispose of ab...

Page 49: ...ose the front door unless the silicone oil bottle stopper the drum cover and the transfer drum release handle are in their original positions This completes the installation of the printer consumables...

Page 50: ...h a new one if the original was damaged Use tape similar to the one originally shipped with the unit to seal the plastic bag 4 Place the bottom sheet of cardboard on the shipping pallet and place the...

Page 51: ...Packing the printer for shipping 10 Apply the shipping labels to the overpack box 11 Tie the entire assembly to the pallet with bands Tighten the bands until the corners of the box begin to crush sli...

Page 52: ...Before plugging the printer into an AC outlet make sure the rating indicated on the printer matches the voltage of the AC outlet If the voltage label is missing or you are not sure of the type of pow...

Page 53: ...AN AC OUTLET 1 Plug the short AC power cord attached to the paper feeder unit into the power receptacle on the printer body 2 Plug the supplied power cord into the power receptacle on the paper feeder...

Page 54: ...l paper feeder unit is not installed you can connect the printer to an AC outlet as follows TO CONNECT THE PRINTER WITHOUT AN OPTIONAL PAPER FEEDER UNIT TO AN AC OUTLET 1 Plug the supplied AC power co...

Page 55: ...gether as this is dangerous Disconnect the printer by pulling on the plug not the cord Turn off the printer and disconnect the power plug in the following situations The printer produces smoke odor or...

Page 56: ...wing order TESTING DIAGS Diagnostics PASSED SCANNING BOOT DEVICE PRESS MENU FOR SETUP Press the Menu key to access setup menus LOADING SYSTEM software INITIALIZING the system After startup is complete...

Page 57: ...plug it from the AC outlet TO RESET THE PRINTER 1 Turn off the printer 2 Wait 30 seconds or more before turning the printer on again Otherwise proper initialization may not be obtained NOTE Never turn...

Page 58: ...ize other than what is in the printer an error message appears on the printer control panel and the job will not print For information on loading paper into the optional paper feeder unit see Chapter...

Page 59: ...pushing up the handle on the underside of the cassette pull out the paper cassette NOTE To increase the paper supply you can also add the optional paper feeder unit which comes with a universal paper...

Page 60: ...ton to lock 3 While lifting the paper length guide slightly slide it until the desired paper length is selected as marked on the tray then release the guide to lock it 4 Set the size guide on the fron...

Page 61: ...o the paper cassette with the print side facing up and the bottom edge going into the cassette first 2 Check to see that the paper stack does not exceed the paper limit mark otherwise a paper jam may...

Page 62: ...le upward slide the cassette all the way into the paper feeder unit until it clicks into place The cassette is now ready to supply paper TO READ THE PAPER AMOUNT INDICATOR The blue bar goes out of vie...

Page 63: ...ting a test page Printing a test page enables you to confirm that the Colorwriter is properly installed and to view color and grayscale samples to troubleshoot any problems It takes approximately 5 mi...

Page 64: ...information about the printer and all of its current setup options Before you change the setup print a configuration page in case you need to restore some settings later The help map contains a brief...

Page 65: ...the factory When the dial value is increased by 1 the left margin increases by approximately 0 4mm 10 dots When the dial value is decreased by 1 the left margin is decreased by approximately 0 4mm TO...

Page 66: ...han 2mm calculate the difference Use this measurement to adjust the margin with the side margin adjustment dial For example if the left margin is 2 8mm 2 8mm 2 0mm 0 8mm Decrease the margin by 0 8mm 0...

Page 67: ...llowing meanings Lit when the printer is online and ready to print new jobs Flashes when the printer is receiving data processing printing or when the Downloader or Spooler is connected Lit when the p...

Page 68: ...rs Menu button At startup or at the PRINTER OFFLINE screen accesses the setup menus In the setup menus takes you back to the SELECT FUNCTION screen When the Colorwriter is online switches between the...

Page 69: ...d RUN SETUP Selecting the language You can select the language the Colorwriter uses in the printer control panel and the language in which info is printed on the test pages From the SELECT menu choose...

Page 70: ...the system date Enter the date in the form MM DD YY Month Day Year SYSTEM TIME Use this option to change the system time Enter the time in the form HH MM Hours Minutes Choose To do this SYSTEM SETUP S...

Page 71: ...select YES each print job is followed by a page containing the name of the user who sent the job the document name the Colorwriter name the time the job was printed the number of pages printed and th...

Page 72: ...nguage you selected from the SELECT LANGUAGE option Select NO ENGLISH if you want messages displayed in your selected language on the LCD but you want status and printer error messages displayed on yo...

Page 73: ...in the Colorwriter LSR Spooler JOBS TO SAVE 1 99 10 This option appears only if ENABLE PRINTED is set to YES Use this option to specify the number of jobs to be stored in the Printed queue Note that...

Page 74: ...r you wish to use in any cassette The size specified is the current DEFAULT SIZE in Printer Setup unless specifically indicated within the PostScript file Paper Source setting in Printer Setup on the...

Page 75: ...ne Users who have access to PostScript Level 2 printer drivers and the Colorwriter PPD can override this setting for particular jobs CRDs are not used when printing CMYK data Select PHOTOGRAPHIC to op...

Page 76: ...settings are updated the configuration page will list the selected AppleTalk zone NOTE Before you complete the following selections you must first set up the Novell file server ENABLE IPX YES NO NO Se...

Page 77: ...to handle Colorwriter print jobs You can use the scroll arrows to select the server from a list of NetWare File Servers on the IPX network NOTE If you have a guest account that does not require a pas...

Page 78: ...e you to log in with a password Enter your print server password IPX POLL INT 0 99 15 Use this option to specify the interval in seconds at which the Colorwriter communicates with the Novell server If...

Page 79: ...s only if ENABLE TCP IP is set to YES Use this option to specify the IP address for printing with TCP IP The Colorwriter is shipped with an invalid IP address If you plan to print with TCP IP you must...

Page 80: ...60 15 This option appears only if ENABLE PARALLEL is set to YES Use this option to specify how long the Colorwriter waits without receiving data from the parallel port before deciding that the current...

Page 81: ...uld eventually cause PostScript errors You may want to clear the job log periodically to avoid this problem If you have a printer with the 32MB or 48MB memory configuration you can delete the job log...

Page 82: ...ob logs and printer queues The CLEAR LOG QUEUES option enables you to delete the job log and all queued jobs on the Colorwriter When you select this option you are prompted to CONFIRM CLEAR Press for...

Page 83: ...hts when cyan is selected Y Lights when yellow is selected Bk Lights when black is selected Density gauge Indicates the currently selected color density or test print pattern COLOR SELECT Press this b...

Page 84: ...results when you use CRDs requires that you use a calibrated printer We recommend setting the density control panel to the neutral center position before you calibrate the Colorwriter with the Fiery P...

Page 85: ...e printer on page 4 3 Parallel cable connection In addition to receiving print jobs over Ethernet the Colorwriter can accept print jobs from a Windows computer or server through its high speed Centron...

Page 86: ...TO VERIFY THE PARALLEL PORT CONNECTION FROM A PC OR A PC BASED SERVER 1 Insert your disk containing a sample PostScript file in the floppy disk drive of the PC connected to the Colorwriter parallel po...

Page 87: ...hat plug into the RJ 45 socket on the Colorwriter NOTE Shut off the Colorwriter before connecting it to any network device Do not attach cable to more than one Ethernet connector on the Colorwriter at...

Page 88: ...inicomputers and mainframes running diverse operating systems The Colorwriter supports the lpd protocol for printing over TCP IP networks Network users simply submit print jobs to a named printer Wind...

Page 89: ...ork Information Services this step must be performed on the master NIS server machine After adding the Colorwriter entry the updated database must be released to network users For the Colorwriter name...

Page 90: ...TER TO ALL UNIX SYSTEMS 1 Log in to your UNIX host as the root user 2 Edit your etc hosts file to include the Colorwriter as a network device The following is a sample entry for the Colorwriter 192 9...

Page 91: ...is entered colorwriterq lp rm colorwriter rp xjprint lf var spool lpd colorwriterq log sd var spool lpd colorwriterq mx 0 sf sb The spool directory colorwriterq is specified here and the directory it...

Page 92: ...e name xjprint after the exclamation point is for configuring the Colorwriter it is an internal name that the Colorwriter requests It must be xjprint it is not a user selectable name This is the only...

Page 93: ...d 3 color For more information on the specific printer types Enter printer Enter the FULL name of one of the following printer types la50 la70 la75 la324 la424 lg02 lg06 lg12 lg31 lj250 ln03 ln03s ln0...

Page 94: ...op os pl pp ps pw px py rf rm rp rs rw sb sc sd sf sh st tf tr ts uv vf xc xf xs fo ic nc ps uv Da Dl It Lf Lu Ml Nu Or Ot Ps Sd Si Ss Ul Xf Enter symbol name mx Enter a new value for symbol mx 1000...

Page 95: ...cap entry for Digital Colorwriter LSR 2000 Color Laser Printer Setup activity is complete for this printer Verify that the printer works properly by using the lpr 1 command to send files to the printe...

Page 96: ...ool directory SPOOLER DIRECTORY sd SYS SPECIFIC UCX_LPD MAGENTA Set LPD PrintServer extensions flag ps Set remote system name rm DGDP03 Set remote system printer name rp xjprint Set printer error log...

Page 97: ...Remote Host rm STR DGDP03 Remote Printer rp STR xjprint Spool Directory sd STR SYS SPECIFIC UCX_LPD MAGENTA Parameter fields p1 STR Are these the final values for printer MAGENTA y y Adding comments...

Page 98: ...customer s network without printing a test page Before you begin this procedure verify that the Colorwriter can print a test page from the control panel TO VERIFY A COLORWRITER INSTALLED ON A TCP IP N...

Page 99: ...your networking software see the documentation for your networking application Printing to the Colorwriter Once the Colorwriter has been properly installed on the TCP IP network users should be able t...

Page 100: ...ve jobs from the queue Type cancel job ID For example to remove a job whose ID is printer 123 from the print queue of your Colorwriter type cancel printer 123 To find out the job ID use the lpstat com...

Page 101: ...storage areas for print jobs When a user on a network workstation prints a job the job is sent to a print queue on the NetWare server The job is spooled to the NetWare file server disk freeing up the...

Page 102: ...gn to the Colorwriter Print queue You need to set up one print queue on the NetWare server for jobs that will be printed by the Colorwriter Users will see and print to the name you assign to the Color...

Page 103: ...a bindery context to work with NetWare 4 x Edit the network startup file to set the bindery context Activate the new bindery context This section describes the second and third steps Given the variety...

Page 104: ...X Novell printing 4 Use the down arrow key to select Maintenance Selective Install The Installation Options menu is displayed 5 Select NCF Files Options 6 In the menu of available NCF files select EDI...

Page 105: ...ery Context is TS 8 Press Esc to close the window and save changes 9 Proceed to the next section TO ACTIVATE THE BINDERY CONTEXT 1 If you cannot reboot the NetWare server at this point type the set co...

Page 106: ...procedure using three different NetWare file servers TO SET UP THE NETWARE SERVER FOR PRINTING TO THE COLORWRITER 1 Log in to the NetWare server as the Supervisor 2 At the NetWare MS DOS prompt type...

Page 107: ...Server in Colorwriter Network Setup 7 Choose Print Queue Information from the Available Options menu 8 Press the Insert key and type a name for a new Colorwriter print queue Press Enter The print queu...

Page 108: ...k Queue Servers list is displayed 11 Press the Insert key The Queue Server Candidates list is displayed 12 Use the arrow keys to select the name of the print server you created in Step 6 and press Ent...

Page 109: ...x workstations Setting up printing to the Colorwriter with IPX is summarized below Specify Novell NetWare as your network type see the next section Install the Colorwriter as a Windows printer Select...

Page 110: ...In the Main group of the Windows Program Manager double click the Windows Setup icon 2 Choose Change System Settings from the Options menu 3 From the Network menu choose Novell NetWare shell version...

Page 111: ...over a Novell network you must select a network port and connect to it TO CONNECT TO A NOVELL NETWORK 1 In the Main group double click the Control Panel icon 2 Double click Printers from the Control...

Page 112: ...area of the Printers dialog box 5 Click the Connect button The Connect dialog box is displayed 6 Click the Network button The Network Printer Connections dialog box is displayed 7 In the Printer conn...

Page 113: ...a print server and print queue for the printer For details see page 5 17 or refer to your NetWare documentation You can also print directly to the Colorwriter from Windows 95 with IPX TO SET UP IPX P...

Page 114: ...X SPX Protocol 5 Click Advanced 6 In the Property list click Frame Type and select the Frame Type that corresponds to the one set during Colorwriter control panel setup If necessary print the Configur...

Page 115: ...ll be transmitted to the specified print queue on the Novell file server The printer will poll the file server and if jobs are present they will be transmitted to the Colorwriter 16 Click OK in the Pr...

Page 116: ...have been changed to avoid name collision if there is more than one Colorwriter on the AppleTalk network The name of the zone in which the Colorwriter is located This information is required if your A...

Page 117: ...LSR_Direct P2 Interconnect type and address dcps_lib P3 Logical name for library ies P4 Default queue parameters separate noflag noburst notrail P5 Default queue qualifiers P6 Communication speed ser...

Page 118: ...55 34 Printing from DCPS to the Colorwriter P6 Communication speed serial devices only P7 Device characteristics P8 Verify on off...

Page 119: ...dicated with a small PCK icon Installation instructions for this software are marked with an icon in the margin The top level of the CD has language folders containing localized software and a Read Me...

Page 120: ...Fonts Installer installs Macintosh screen fonts for PostScript printer fonts that are resident on the Colorwriter Digital Colorwriter LSR installs Color Reference including CMYK Reference and PANTONE...

Page 121: ...rinter driver for Alpha based Windows NT Intel folder for installing the Colorwriter with the PostScript printer driver for Intel based Windows NT The setup information file and Colorwriter PPD file f...

Page 122: ...ript Level 2 and provide access to CRDs We recommend that you use the Adobe PostScript Printer Driver that we provide because it allows you to access all of the Colorwriter s features Installing the A...

Page 123: ...intosh Disk 1 to install the driver on other Macintosh computers Setting up the Colorwriter in the Chooser After you install the printer driver and printer description file you need to set up the Colo...

Page 124: ...ection you enabled in Printer Setup For example Colorwriter LSR_Direct Colorwriter LSR_Print and Colorwriter LSR_Hold 5 Click Setup The Adobe PSPrinter Driver automatically selects the correct PostScr...

Page 125: ...r AppleTalk connection is operational VERIFYING THE APPLETALK CONNECTION ON A MIXED NETWORK For Macintosh computers on a mixed network with computers using Windows NT Server or Windows NT Workstation...

Page 126: ...u save are properly formatted for downloading or printing to the Colorwriter To print with This file Should be in this location Applications that support PostScript Level 2 such as Adobe Photoshop or...

Page 127: ...Installers folder To install the screen fonts see page 6 15 4 Double click the Digital Colorwriter LSR icon 5 Click to select the items you want to install then click Install You can install Utilities...

Page 128: ...rinter Using the Macintosh PANTONE Color Reference You can download CMYK representations of PANTONE numbered color swatches both coated and uncoated and use the pages as a reference to see how these c...

Page 129: ...he user software see the User Guide page 3 3 Install the Color Profiles as described on page 6 9 The Installer places them inside folders as follows Colorwriter LSR or the folder you designate Color P...

Page 130: ...ication that supports the KCMS you must install the KCMS from the application disks To use a Colorwriter precision transform drag one set of precision transforms to the KPCMS folder If you do not use...

Page 131: ...in the Read Me file To use the Fiery Print Calibrator you will need a Status T densitometer such as an X Rite DTP 32 Documentation for the Fiery Print Calibrator is provided online as a PDF Adobe Acro...

Page 132: ...ch as the Colorwriter that uses CMYK toner colors They are also used when you use Photoshop to save separations EFICOLOR color conversions that involve RGB data should start with a standardized RGB co...

Page 133: ...fferent monitor setup and separation table even if you quit Photoshop and reopen it Installing the Colorwriter screen fonts The Colorwriter screen fonts correspond to the printer fonts resident on the...

Page 134: ...lation is finished open the Screen Fonts folder and drag the font suitcases you want to use to the System Folder of your startup disk Normally the system will place them in the Fonts folder If you use...

Page 135: ...may be different from the protocols supported by the Colorwriter For Windows NT Server setup information see page 6 35 Windows 3 1 or Windows for Workgroups using the parallel connection or running o...

Page 136: ...Windows 95 installation CD or diskettes available for completing the Colorwriter installation If you don t have the installation CD ask your administrator to let you access a Windows 95 CD over the n...

Page 137: ...66 19 Installing Windows software 4 From the dialog box displaying the list of printers click Have Disk The Install From Disk dialog box prompts you to insert the disk...

Page 138: ...d for a port type the default is LPT1 click Next You ll configure the port later according to your network type 8 When prompted for a name enter a descriptive name for the printer or accept the defaul...

Page 139: ...d click OK You may have to browse to the drive and directory containing the WIN95 subdirectory Windows 95 copies the necessary files from the installation disk to the hard disk An icon for the newly i...

Page 140: ...ut Down from the Start menu 2 Turn off the printer 3 Attach a Centronics cable from the parallel port of your computer to the parallel port of the printer 4 Turn on the Colorwriter Press the Menu butt...

Page 141: ...and click the left button on Properties 10 Choose the Details tab In the Details tab confirm that LPT1 is displayed in the list under Print to the following port 11 Click OK to return to the Propertie...

Page 142: ...tScript printer driver and the Colorwriter PPD Completing the Windows 95 IPX Novell connection Use the following procedure to prepare a Windows 95 system for printing to the Colorwriter over IPX after...

Page 143: ...with Windows 95 on page 6 18 click the Start button point to Settings and then click Printers 4 Click the icon for the printer and choose Properties from the File menu 5 Choose the Details tab in the...

Page 144: ...computer running Windows NT Server using AppleTalk IPX and the lpr TCP IP protocols To print using Windows NT and lpr we recommend that you establish a connection directly between the Colorwriter and...

Page 145: ...n CD ROM in an attached or built in CD ROM drive or have the set of installation disks ready 6 In the Main group double click the Print Manager icon 7 In the Print Manager window choose Create Printer...

Page 146: ...Windows NT distribution files 12 Starting with the disk drive letter type the path to the i386 or Alpha directory as appropriate on your System disks or the letter of the drive containing your System...

Page 147: ...station is connected to the printer over the network or by means of the parallel port 14 When the PostScript Printer Setup dialog box appears click OK Even though the Colorwriter does not use halftoni...

Page 148: ...ows NT on page 6 26 you installed the Windows NT PostScript driver and the Colorwriter PPD Complete the setup for parallel port printing as follows Set up the Colorwriter to accept print jobs over the...

Page 149: ...faults Select Print Directly to Port and click OK Since parallel port jobs are spooled on the Colorwriter this bypasses Windows NT Print Manager spooling 10 Click OK to exit the Printer Properties dia...

Page 150: ...IP address subnet mask and gateway address Details of these steps may be found in Chapter 4 Using the Control Panels 3 Exit the Colorwriter Network Setup and Save Changes 4 Make sure you have install...

Page 151: ...Enter a name for the Colorwriter in the Printer Name box in the Create Printer dialogue Then click OK 12 Click OK You have configured your system to use TCP IP to communicate with the printer When you...

Page 152: ...AppleTalk protocol is not already loaded on your Windows NT system load it now see page 6 35 5 Install the the Colorwriter as a Windows NT PostScript printer as explained on page 6 26 6 On the Windows...

Page 153: ...the network which forces all users to print to the server rather than directly to the printer The Colorwriter does not support the capture feature 13 Click OK You have configured your system to commun...

Page 154: ...twork Settings dialog box appears 2 Click Add Software 3 Select Services for Macintosh and click OK 4 Insert Windows NT disks as prompted When the installation is complete Services for Macintosh is li...

Page 155: ...u have finished installing the Colorwriter as a shared printer a new document log window is displayed The document log window has columns for Status Doc Name Owner Printed At Pages Size and Priority C...

Page 156: ...ll network should be set up The NetWare file server should be configured with a print server and print queue for the Colorwriter For details see your NetWare documentation and the section beginning on...

Page 157: ...t of print queues defined for the selected server is displayed beneath the server icon 6 Select the name of the Colorwriter print queue and click OK 7 If you see an alert saying that no suitable drive...

Page 158: ...ion file and a printer The setup process creates this association The Adobe PostScript Printer Driver included in the Win31 directory on the User Software CD supports Windows 3 x and Windows for Workg...

Page 159: ...lect the setup exe file An example of the file location is d English Prntdrv Us_eng Win31 5 Click OK in the Browse window and then click OK in the Run window 6 Select Read to view the Read Me file bef...

Page 160: ...box alerts you to use Control Panel Printers to connect and set up the printers you installed 12 Click OK The Windows Control Panel window now contains a new Adobe icon 13 In the Main group double cli...

Page 161: ...patibility This PostScript driver can be installed on the same system as the Adobe driver You only use one at a time when you print Installing the Colorwriter from the Windows Control Panel associates...

Page 162: ...ter User Software CD into the CD ROM drive 6 Click Browse The Browse window appears prompting you to select a path to the print driver 7 Under Drives select the drive that contains the User Software C...

Page 163: ...writer WPD Windows Printer Description file from the CD When installation is complete the Colorwriter appears in the Printers window 12 To see which printer driver is being used with a print device se...

Page 164: ...2 If you are printing to the parallel port select LPT1 LPT2 or LPT3 3 Shut down your computer by selecting Shut Down from the Start menu 4 Turn off the printer 5 Attach a Centronics cable from the pa...

Page 165: ...The network administrator should verify the parallel port connection by printing a simple document to LPT1 or the port designated for the Colorwriter TO SET UP IPX NOVELL PRINTING FOR WINDOWS 3 X 1 I...

Page 166: ...e printer to the appropriate port 6 Select Network If you select Network the next window depends on the NetWare client driver version 7 If the Network Printer Connections dialog box is displayed selec...

Page 167: ...l connection Copying the printer description files if you use QuarkXPress or PageMaker The User Software CD contains two Windows printer description files for compatibility with certain Windows 3 1 3...

Page 168: ...keep them anywhere on your disk TO INSTALL COLORWRITER LSR COLOR REFERENCE FILES AND COLOR PROFILES 1 Turn on the CD ROM drive and insert the User Software CD into your CD ROM drive 2 Use either the W...

Page 169: ...box 5 If you are using the User Software CD for the 16MB system select Color Reference and Standard Profiles and then click Next If you are installing software for the Colorwriter LSR with PCK instal...

Page 170: ...stalled in the folder containing your other KCMS profiles Using the Windows CMYK Color Reference Download the CMYK Color Reference PostScript file to print CMYK color patches to use as a reference for...

Page 171: ...er Each swatch is identified by PANTONE number and its equivalent CMYK value for example PANTONE 108 CHC C 0 M 10 Y 98 K 0 The file PANTONE C ps prints swatches for the PANTONE coated library The file...

Page 172: ...or matching Depending on the profiles you select the installer copies the following files to your disk Color Profiles can be used together with a color management system to manage printer color output...

Page 173: ...Windows the computer must be running Windows 95 Windows NT Server or Windows NT Workstation and must be connected to a TCP IP network or to an IPX SPX network with a Novell server Colorwriter LSR Down...

Page 174: ...CD ROM drive and insert the User Software CD into your CD ROM drive 2 Use either the Windows Explorer Windows 95 or the File Manager Windows NT to open the following folders English Installr Disk1 3...

Page 175: ...ndard Color Profiles when you first install your Colorwriter printer Use the Calibrated Color Profiles only if you have used the Fiery Print Calibrator to calibrate your printer Using the wrong profil...

Page 176: ...xt If you are not sure which type of network you have check with your network administrator before proceeding If you choose the wrong protocol you will have to run the Installer again or rename a disk...

Page 177: ...imple task to edit the default configuration file In most cases you should install the default file and then run the Colorwriter LSR Manager to edit it 9 Click Next If you do not have a NET_WSCK INI f...

Page 178: ...ilities with IPX SPX networks make sure that IPX protocols are loaded and bound to the network driver on your workstation There is a NetWare server on the network configured with a print server and a...

Page 179: ...R Manager icon in the Digital Colorwriter LSR folder or program group This folder or group is already open if you just installed the Colorwriter LSR utilities The introductory window for the Colorwrit...

Page 180: ...d to select a network type Choose the same network type as you selected when you ran the Installer see page 6 58 NOTE The Colorwriter LSR Manager enables you to configure the utilities to use the IPX...

Page 181: ...ars on the Configuration page and then click Next This entry is case sensitive The next window requests the printer s IPX address 7 Enter the IPX address exactly as it appears on the Configuration pag...

Page 182: ...configure the utilities for TCP IP networks the Colorwriter LSR Manager requires one additional item of network information the DNS Domain Name Services or host name that your network administrator ha...

Page 183: ...rwriter IP address together with a host name you assign to the Colorwriter To create a local hosts file follow the guidelines in the sample hosts file that came with your Windows operating system Add...

Page 184: ...sly configured for a network the Printers section of this window is blank You may add the Colorwriter to the network modify its current network configuration or configure multiple 4 Click Add to enter...

Page 185: ...have already run the Installer twice once with each protocol you can switch protocols using the Colorwriter LSR Manager alone 5 Select TCP IP and then click Next A dialog box requests the TCP IP name...

Page 186: ...R utilities can function from your workstation Information about your network is written to a configuration file NET_WSCK INI and stored in the active System folder on your hard disk When you run the...

Page 187: ...the entries After the Colorwriter LSR Manager edits a NET_WSCK INI the entries for a single Colorwriter are similar to one of the following examples For utilities on IPX networks ConfigServers Server1...

Page 188: ...writer LSR Manager you choose the active network protocol for the utilities If both DLL files are present the Colorwriter LSR Manager substitutes a tilde for the last character in the DLL filename for...

Page 189: ...k OK to apply the settings 7 Choose Preferences from the File menu and choose Separation Tables from the submenu 8 Click Load and in the dialog box that appears select the separation table you want to...

Page 190: ...ter description file for 6 8 printing with 6 8 Windows version printer description files for 6 50 Apple LaserWriter driver 1 1 Apple System software version supported 1 1 AppleTalk enabling 4 9 verify...

Page 191: ...rs in rotary unit 2 18 Color Mode setup option 4 7 color printing introduction xiii Color Reference files installing 6 9 6 50 using 6 10 6 52 color rendering dictionaries xi 4 9 Color Select button on...

Page 192: ...us 4 2 disposing of consumables packaging xvi distributing toner 2 17 DNS Domain Name Services name 6 64 6 67 documentation xiii 2 1 door closing 2 28 opening 2 15 dots per inch dpi of printer 1 4 dow...

Page 193: ...14 gauging amount of paper in universal cassette 3 11 grayscale specifying as default printing mode 4 7 grounding type plug xvi H handling printer xiv silicone oil bottle 2 27 toner cartridges 2 16 h...

Page 194: ...y context 5 18 to 5 21 Windows 95 IPX SPX 5 29 IPX Novell networks 1 3 4 10 5 1 IPX Novell printing specifying a file server login 4 11 specifying poll interval 4 12 specifying print server for 4 12 w...

Page 195: ...r fonts 6 13 6 55 manuals xiii 2 1 Manual Tray paper source option 4 7 margin side adjusting 3 14 to 3 15 media attachment unit MAU 5 3 media pack 2 1 memory upgrade kit 2 1 Menu button 4 2 4 3 menu e...

Page 196: ...oil bottle See silicone oil bottle oil pump 2 1 2 2 oil recycle bottle illustrated 2 2 Online activity light 4 1 Online button 4 2 on off switch 3 6 opening drum cartridge door 2 21 printer covers xvi...

Page 197: ...e drum cartridge Photoshop See Adobe Photoshop plug xvi plugging in printer 3 1 to 3 4 Poll Interval setup option 4 12 positioning poles 2 12 PostScript errors printing up to 4 5 PostScript interprete...

Page 198: ...name setup option 4 4 printer port selecting 6 46 to 6 47 printer settings customizing 6 13 6 55 specifying on printer control panel 4 4 Printer Setup menu 4 6 to 4 7 Color Mode option 4 7 Default Siz...

Page 199: ...message 4 2 productivity xi protocols network 5 1 lpd TCP IP 5 4 5 5 RFC1179 1 3 PSCRIPT DRV file 6 45 Q Quadra See Macintosh computers QuarkXPress printing with 6 8 Windows version printer descriptio...

Page 200: ...m a Macintosh 6 5 to 6 6 Select Queue IPX setup option 4 12 separation tables installing 6 14 to 6 15 6 70 to 6 71 server names 5 18 servers polled by printer 4 12 specifying login 4 11 servicing prin...

Page 201: ...to 2 6 Subnet mask setup option 4 13 sunlight avoiding exposing printer to 2 6 superuser privileges 5 15 supplies ordering xiii suspend resume printing button 4 2 swatches 6 2 6 3 system administrator...

Page 202: ...to 3 11 paper length guide 3 9 paper sizes and amounts 3 7 paper width guide 3 9 removing 3 8 setting paper size 3 9 UNIX workstations printing from 5 15 setting up 5 6 system requirements 1 3 unpacki...

Page 203: ...25 system requirements 1 2 user software files for 6 17 Windows computers printer use with 1 2 to 1 3 Windows files on User Software CD 6 3 Windows NT adding Services for Macintosh to server 6 36 sett...

Reviews: