background image

10

Whenever you wish to discard the images you have already taken, you can erase
them from the camera. Take note that this erase feature functions only as “All-
Frame Erase.” No partial erasure is allowed.

1

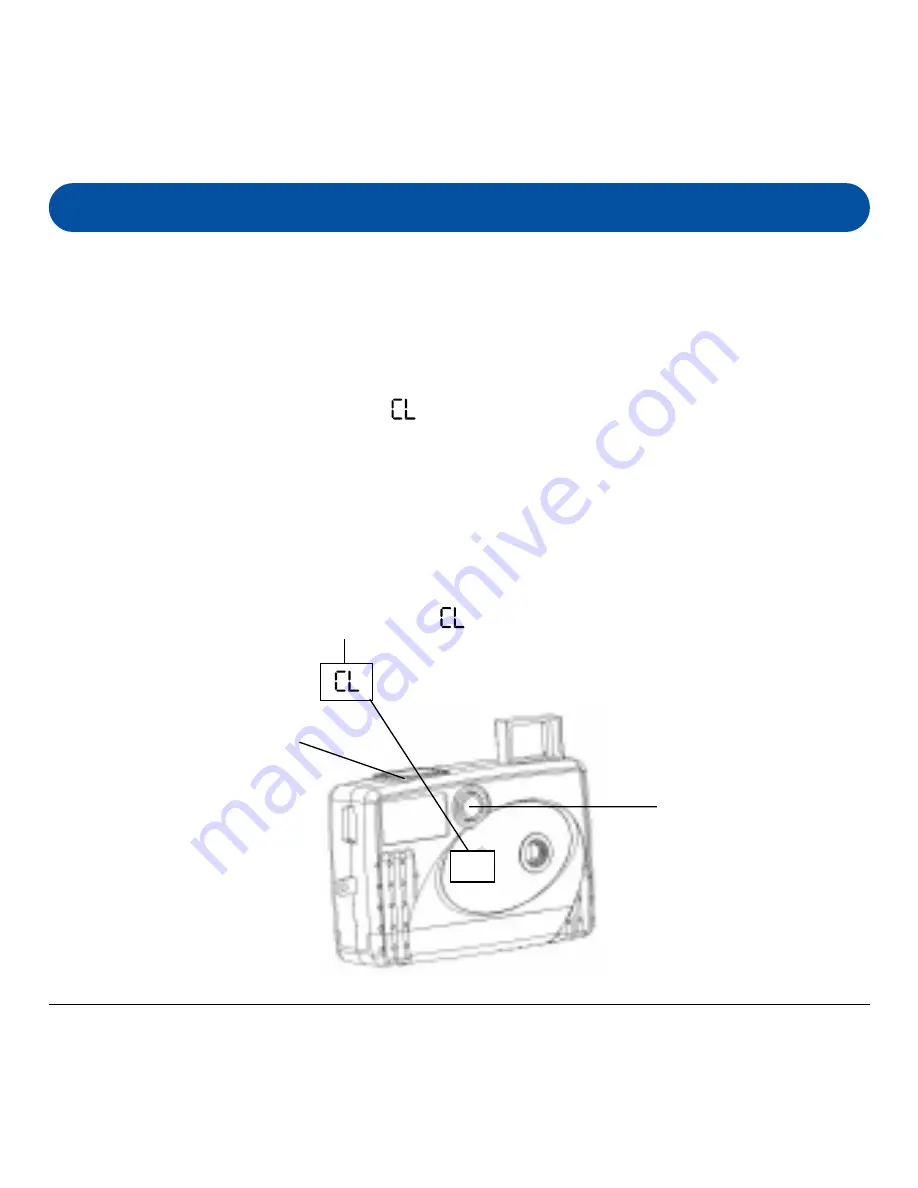
Enable the “All-Frame-Erase” feature by repeatedly pressing the Function
Mode select button until the “ ” icon is displayed on the LCD Display
Panel.

2

Press the Shutter button twice to start erasing all images in the camera.

NOTE

: If you do not press the Shutter a second time within 5 seconds, the

erase function is aborted.

Erasing All Images from Camera

“All-Frame-Erase” is ON when this LCD

Panel displays the “

” icon

Repeatedly press this
Function Mode button
until the
“All-Frame-Erase” icon
is displayed

Press the Shutter button

twice to erase all images

Summary of Contents for L'espion

Page 1: ...User sManual...

Page 2: ...of Adobe Systems Incorporated Ulead PhotoExpress are registered trademarks of Ulead Systems Inc All other products or name brands are trademarks of their respective holders Important Pictures you may...

Page 3: ...ingMode 8 D Self Timer Mode 9 Erasing All Images from Camera 10 Connecting the Camera to your PC 11 Utility Software Installation 12 13 A Installing Camera Driver 12 B Installing Other Bundled Softwar...

Page 4: ...Using Ulead PhotoExpress 15 Using the l espion as a PC Web Cam 17 A SelectCameraSource 16 B Send a Video Mail 17 Frequentlyasked questions and technicalsupport 18...

Page 5: ...1 l espion digitalcamera Special USB cable l espion Quick Reference and other inserts CD ROM Containsdigitalcamerasoftwareanduser smanuals Key chain Package Contents AAA Battery Alkaline recommended...

Page 6: ...y transfer Still images into Motion pictures using the AVI Audio Video Interlead format application Instant image frames erasure All images can be cleared instantly to start a new picture taking sessi...

Page 7: ...3 Camera Components LENS VIEWFINDER LCD DISPLAY PANEL POWER AND FUNCTION MODE SELECTION BUTTON SHUTTER BUTTON BATTERY COMPARTMENT USB PORT GRIP...

Page 8: ...ative ends are properly oriented with the polarity indicated on chamber 3 Close and slide the battery compartment cover back to its original position WARNING When the LCD Panel display starts to blink...

Page 9: ...betweencameraandsubjectbutnot nearerthanonemeter 2 Press the Shutter button to take a picture of your subject A short beep sound emits at each click of the shutter to confirm that a shot has been tak...

Page 10: ...on is displayed on the LCD Display Panel 2 Press the Shutter button and the icon becomes which would indicate that the 80 Shot mode is ready NOTE Switching from 80 pictures mode to 20 pictures modes w...

Page 11: ...ress the Shutter button and the icon becomes which would indicate that the 20 Shot mode is ready WARNING Switching from 20 pictures mode to 80 pictures mode will not erase any images in the camera If...

Page 12: ...on whichshootingmodeyouarein Continuous shooting under 20 Shots mode takes about 2 seconds to fully consume the 20 frames while it takes about 8 seconds under 80 Shots mode If you release the Shutter...

Page 13: ...er release delay after pressing the Shutter button 1 Set camera into Self Timer mode by repeatedly pressing the Function Mode select button until the icon is displayed on the LCD Display Panel 2 Then...

Page 14: ...ode select button until the icon is displayed on the LCD Display Panel 2 Press the Shutter button twice to start erasing all images in the camera NOTE If you do not press the Shutter a second time wit...

Page 15: ...om the camera to your PC connect the camera to your PC with the supplied USB cable 1 Insert the smaller terminal of the USB cableintothecamera sUSBport 2 Plug the other end of the USB cable into the U...

Page 16: ...and execute the file cdsetup exe from the CD 2 Whenthel espionSoftwareInstaller screenappears selectthelanguage you wish to use then select and click Camera Driver on the screen Follow the on line ins...

Page 17: ...wareintheorder that it appears on the screen follow the on line instructions to complete the installationofallsoftwarecomponents Ulead Photo Express This is your Image editing software for creating di...

Page 18: ...image editing software Acquire All Click the Acquire All button to send and process all the thumbnail images on the panel to a selected application Download Click the Download button to transfer and o...

Page 19: ...lect Data Source dialog box will appear choose l espion digital camera from the list and then click the Acquire button 4 The l espion Digital Camera interface appears Please refer to the previous page...

Page 20: ...OTE The EyeStar Mail is required only when the camera is used as a PC camera The EyeStar Mail is a complete consumer video package for recording audio and video clips that you can send to your family...

Page 21: ...the desired view that you want to capture 2 Click Record to start capturing video and audio data 3 Click Stop to end recording 4 Click Send Mail to run the Send Mail program with the captured data in...

Page 22: ...123456 Q Iamusingthecameraasawebcamandthedisplayhas A Thedisplaywillchangewhileusingthecameraasa gone strange and I have lost my images Webcam this is quite normal The camera s memory is used as a buf...

Reviews: